

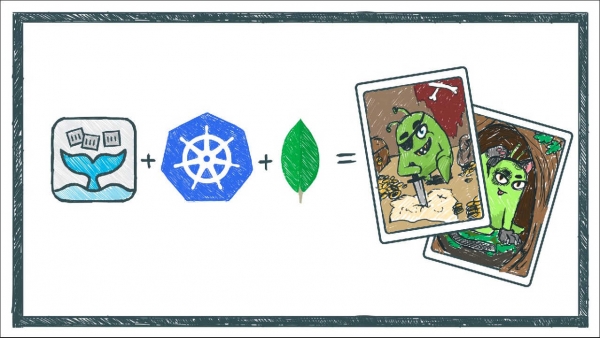
In this article, I will set up a development environment for the game "Byliny" and break the game down into parts suitable for use in OpenFaaS. All manipulations will be done on Linux, deploying Kubernetes in minikube using VirtualBox. My workstation has 2 CPU cores and 12GB of RAM, and I use an SSD for the system disk. For development, I will use Debian 8, with installed packages emacs, sudo, git, and virtualbox; everything else will be downloaded from GitHub and other sources. These applications will be installed in /usr/local/bin unless otherwise specified. Let's get started!
Preparing the development environment
Installing Go
Follow the instructions from the official website:
$ curl -L0 https://dl.google.com/go/go1.13.5.linux-amd64.tar.gz -o go.tar.gz
$ sudo tar -C /usr/local -xzf go.tar.gz
$ echo 'export PATH=$PATH:/usr/local/go/bin' >> ~/.profile
Checking functionality:
$ mkdir -p ~/go/src/hello && cd ~/go/src/hello
$ echo 'package main

import "fmt"

func main() {
fmt.Printf("hello, world\n")
}' > hello.go
$ go build
$ ./hello
hello, world
Installing faas-cli
Follow the instructions from the official website:
$ curl -sSL https://cli.openfaas.com | sudo -E sh
x86_64
Downloading package https://github.com/openfaas/faas-cli/releases/download/0.11.3/faas-cli as /tmp/faas-cli
Download complete.

Running with sufficient permissions to attempt to move faas-cli to /usr/local/bin
New version of faas-cli installed to /usr/local/bin
Creating alias 'faas' for 'faas-cli'.
  ___                   _____           ____
 / _  _ __   ___ _ __ |  ___|_ _  __ _/ ___|
| | | | '_  / _  '_ | |_ / _` |/ _` ___
| |_| | |_) |  __/ | | |  _| (_| | (_| |___) |
 ___/| .__/
      |_|

CLI:
 commit:  73004c23e5a4d3fdb7352f953247473477477a64
 version: 0.11.3
Additionally, you can enable bash-completion:
faas-cli completion --shell bash | sudo tee /etc/bash_completion.d/faas-cliInstalling and configuring Kubernetes
For development, minikube is sufficient, so we'll install it and kubelet in /usr/local/bin, and also install helm for application deployment:
$ curl https://storage.googleapis.com/minikube/releases/latest/minikube-linux-amd64 -o minikube && chmod +x minikube && sudo mv minikube /usr/local/bin/
$ curl https://storage.googleapis.com/kubernetes-release/release/$(curl -s https://storage.googleapis.com/kubernetes-release/release/stable.txt)/bin/linux/amd64/kubectl -o kubectl && chmod +x kubectl && sudo mv kubectl /usr/local/bin/
$ curl https://get.helm.sh/helm-v3.0.2-linux-amd64.tar.gz | tar -xzvf - linux-amd64/helm --strip-components=1; sudo mv helm /usr/local/bin
Starting minikube:
$ minikube start
  minikube v1.6.2 on Debian 8.11
  Automatically selected the 'virtualbox' driver (alternates: [])
  Downloading VM boot image ...
    > minikube-v1.6.0.iso.sha256: 65 B / 65 B [--------------] 100.00% ? p/s 0s
    > minikube-v1.6.0.iso: 150.93 MiB / 150.93 MiB [-] 100.00% 5.67 MiB p/s 27s
  Creating virtualbox VM (CPUs=2, Memory=8192MB, Disk=20000MB) ...
  Preparing Kubernetes v1.17.0 on Docker '19.03.5' ...
  Downloading kubeadm v1.17.0
  Downloading kubelet v1.17.0
  Pulling images ...
  Launching Kubernetes ...  Waiting for cluster to come online ...
  Done! kubectl is now configured to use "minikube"
Checking:
$ kubectl get pods --all-namespaces
NAMESPACE     NAME                               READY   STATUS    RESTARTS   AGE
kube-system   coredns-6955765f44-knlcb           1/1     Running   0          29m
kube-system   coredns-6955765f44-t9cpn           1/1     Running   0          29m
kube-system   etcd-minikube                      1/1     Running   0          28m
kube-system   kube-addon-manager-minikube        1/1     Running   0          28m
kube-system   kube-apiserver-minikube            1/1     Running   0          28m
kube-system   kube-controller-manager-minikube   1/1     Running   0          28m
kube-system   kube-proxy-hv2wc                   1/1     Running   0          29m
kube-system   kube-scheduler-minikube            1/1     Running   0          28m
kube-system   storage-provisioner                1/1     Running   1          29m
Installing OpenFaaS
Developers recommend creating 2 namespaces for operation:
$ kubectl apply -f https://raw.githubusercontent.com/openfaas/faas-netes/master/namespaces.yml
namespace/openfaas created
namespace/openfaas-fn created
Adding the repository for helm:
$ helm repo add openfaas https://openfaas.github.io/faas-netes/
"openfaas" has been added to your repositories
The chart has the option to set a password before installation; we will take advantage of this and save the access data as a k8s secret:
$ PASSWORD=verysecurerandompasswordstring
$ kubectl -n openfaas create secret generic basic-auth --from-literal=basic-auth-user=admin --from-literal=basic-auth-password="$PASSWORD"
secret/basic-auth created
Executing the deployment:
$ helm repo update
Hang tight while we grab the latest from your chart repositories...
...Successfully got an update from the "openfaas" chart repository
Update Complete. Happy Helming!
$ helm upgrade openfaas --install openfaas/openfaas --namespace openfaas --set functionNamespace=openfaas-fn --set generateBasicAuth=false
Release "openfaas" does not exist. Installing it now.
NAME: openfaas
LAST DEPLOYED: Fri Dec 25 10:28:22 2019
NAMESPACE: openfaas
STATUS: deployed
REVISION: 1
TEST SUITE: None
NOTES:
To verify that openfaas has started, run:

  kubectl -n openfaas get deployments -l "release=openfaas, app=openfaas"
After some time, run the suggested command:
$ kubectl -n openfaas get deployments -l "release=openfaas, app=openfaas"
NAME                READY   UP-TO-DATE   AVAILABLE   AGE
alertmanager        1/1     1            1           114s
basic-auth-plugin   1/1     1            1           114s
faas-idler          1/1     1            1           114s
gateway             1/1     1            1           114s
nats                1/1     1            1           114s
prometheus          1/1     1            1           114s
queue-worker        1/1     1            1           114s
Checking functionality:
$ kubectl rollout status -n openfaas deploy/gateway
deployment "gateway" successfully rolled out
$ kubectl port-forward -n openfaas svc/gateway 8080:8080 &
[1] 6985
Forwarding from 127.0.0.1:8080 -> 8080
$ echo -n $PASSWORD | faas-cli login --username admin --password-stdin
Calling the OpenFaaS server to validate the credentials...
Handling connection for 8080
WARNING! Communication is not secure, please consider using HTTPS. Letsencrypt.org offers free SSL/TLS certificates.
credentials saved for admin http://127.0.0.1:8080
$ faas-cli list
Function                        Invocations     Replicas
Installing MongoDB
We install everything using helm:
$ helm repo add stable https://kubernetes-charts.storage.googleapis.com/
"stable" has been added to your repositories
$ helm install stable/mongodb --generate-name
NAME: mongodb-1577466908
LAST DEPLOYED: Fri Dec 25 11:15:11 2019
NAMESPACE: default
STATUS: deployed
REVISION: 1
TEST SUITE: None
NOTES:
** Please be patient while the chart is being deployed **

MongoDB can be accessed via port 27017 on the following DNS name from within your cluster:

    mongodb-1577466908.default.svc.cluster.local

To get the root password run:

    export MONGODB_ROOT_PASSWORD=$(kubectl get secret --namespace default mongodb-1577466908 -o jsonpath="{.data.mongodb-root-password}" | base64 --decode)

To connect to your database run the following command:

    kubectl run --namespace default mongodb-1577466908-client --rm --tty -i --restart='Never' --image bitnami/mongodb --command -- mongo admin --host mongodb-1577466908 --authenticationDatabase admin -u root -p $MONGODB_ROOT_PASSWORD

To connect to your database from outside the cluster execute the following commands:

    kubectl port-forward --namespace default svc/mongodb-1577466908 27017:27017 &
    mongo --host 127.0.0.1 --authenticationDatabase admin -p $MONGODB_ROOT_PASSWORD
Checking:
kubectl run --namespace default mongodb-1577466908-client --rm --tty -i --restart='Never' --image bitnami/mongodb --command -- mongo admin --host mongodb-1577466908 --authenticationDatabase admin -u root -p $(kubectl get secret --namespace default mongodb-1577466908 -o jsonpath="{.data.mongodb-root-password}" | base64 --decode)
If you don't see a command prompt, try pressing enter.

> db.version();
4.0.14
Press ctrl+D to exit the container.
Configuring emacs
In principle, everything was already set up according to , so I won't go into detail.
Breaking the game into functions
Interaction with functions is done via the http protocol, and end-to-end authentication between different functions is provided by JWT. MongoDB is used to store tokens, as well as game states, player data, the sequences of moves for all games, and other information. Let's take a closer look at the most interesting functions.
Registration
The input to this function is a JSON with the game nickname and password. When this function is called, it checks that the nickname is not already in the database; if successful, it inserts the nickname and password hash into the database. Registration is necessary for active participation in the game.
— is the place from which the result of the node's operation is extracted. The images of outputs are points that are always located on the right side of the node.
The function receives a JSON containing the gaming nickname and password. If the nickname exists in the database and the password is successfully verified against the one stored earlier, a JWT is returned, which must be passed to other functions upon their invocation. It also inserts various service records into the database, such as the last login time, etc.
View game list
Any unauthorized user can request a list of all games except for active ones. An authorized user will also see the list of active games. The result of the function is a JSON containing the game lists (game identifier, human-readable name, etc.).
Creating a Game
The function works only with authorized users, accepting the maximum number of players and game parameters (for example, which characters to activate in this game, the maximum number of players, etc.). One of the game parameters is the presence of a password for joining, which allows the creation of non-public games. By default, a public game is created. The result of the function's execution is a JSON that includes a success field for creation, a unique game identifier, and other parameters.
Join a game
The function works only with authorized users, accepting the game identifier and its password if it is a non-public game, and returns a JSON with the game's parameters. An authorized user who joins the game, as well as the game's creator, will thereafter be called participants of the game.
View game events
Any unauthorized user can request a list of events for inactive games, while an authorized user can get the list of events for any active game. An additional parameter of the function can be the event number that the user already has. In this case, only those events that occurred later will be returned in the list. Periodically invoking this function, an authorized user can see what is happening in the game. This function also returns a request for action, which the user can respond to using the function to send a game event.
Send a game event
The function works only for game participants: it allows starting the game, making a move, voting, writing a text message that appears in the game event list, etc.
The authorized user who created the game distributes roles to all participants, including themselves, who must confirm their roles using this same function. Once all roles are confirmed, the game automatically enters night mode.
Game statistics
The function works only for game participants, displays the game state, a list and number of players (nicknames), roles and their status (move made or not), as well as other information. Like the previous function, everything works only for game participants.
Periodically launched functions
If the game has not started within a specified time frame when creating the game, it will be automatically removed from the list of active games using the cleanup function.
Another periodic task is the forced switch of the game's mode from night to day and vice versa for games that have not done so during the turn (for example, a player who needs to respond to a game event did not submit their solution for any reason).
Announcement
- Setting up the development environment, breaking the task into functions
- Working on the backend
- Working on the frontend
- Setting up CI/CD, organizing testing
- Launching the trial game session
- Summary
Source: habr.com
