

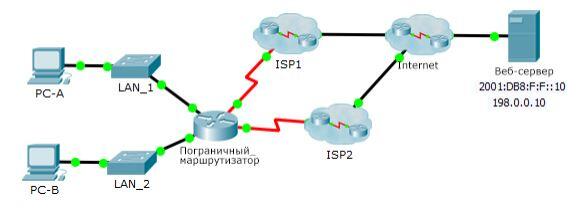
Network Topology
Since I have already learned to "somewhat" port QEMU to JavaScript, this time it was decided to do it wisely and not repeat past mistakes.
- Creating the Default Static Route
- Deploying a Floating Static Route
- Testing the Switch to a Floating Static Route upon Failure of the Primary Route
General information
So let's start with a few words about what a static and floating route actually is. Unlike dynamic routing, static routing requires manually constructing a route to a specific network. A floating static route serves to provide a backup path to the destination network in case the primary route fails.
In our example, the border router currently has only directly connected routes to ISP1, ISP2, LAN_1, and LAN_2 networks.
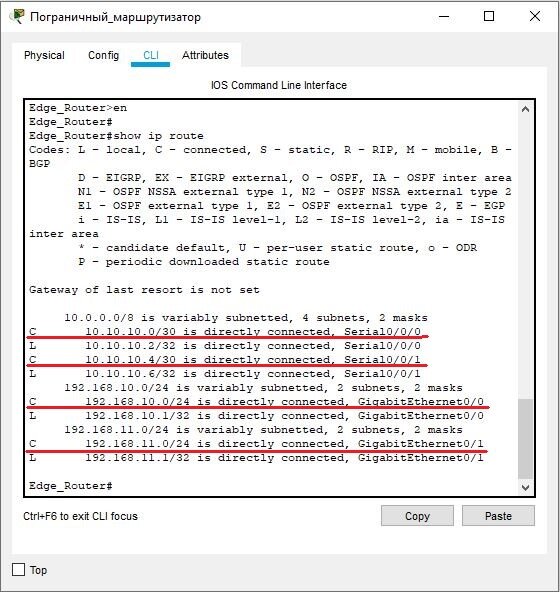
Creating the Default Static Route
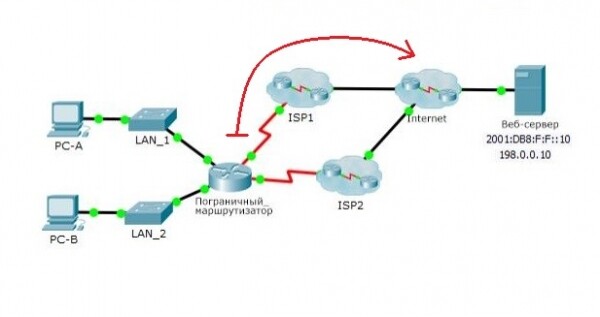
Before discussing the backup route, we first need to establish the primary route. Let the primary route from the border router go through ISP1 to the Internet, while the route through ISP2 will be the backup. To do this, we will set a default static route on the border router in global configuration mode:
Edge_Router>en
Edge_Router#conf t
Edge_Router(config)#ip route 0.0.0.0 0.0.0.0 s0/0/0
where:
- the first 32 bits of zeros represent the destination network address;
- the second 32 bits of zeros represent the subnet mask;
- s0/0/0 — the outgoing interface of the border router connected to the ISP1 network.
This entry indicates that if packets arriving at the border router from LAN_1 or LAN_2 contain a destination network address not present in the routing table, they will be forwarded through the s0/0/0 interface.
Let's check the routing table of the border router and send an echo request to web server from PC-A or PC-B:
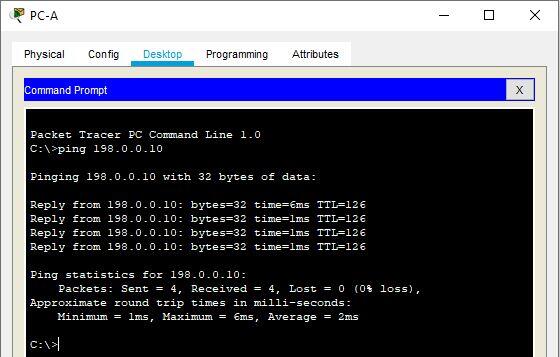
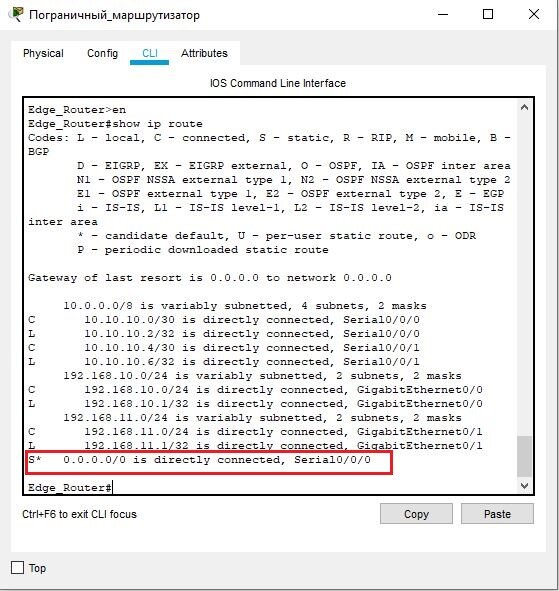
We see that a default static route entry has been added to the routing table (indicated by the S* entry). We will trace the route from PC-A or PC-B to the web-server:
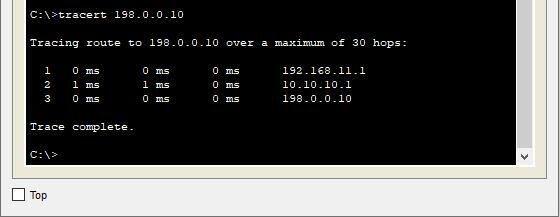
The first hop is from PC-B to the local IP address of the border router 192.168.11.1. The second hop is from the border router to 10.10.10.1 (ISP1). Remember this, we will compare the hops later.
Deploying a Floating Static Route
Now that we've set up the primary static route, let's create a floating static route through the ISP2 network. Creating a floating static route is no different from setting up a regular default static route, except that in the former, we also specify the administrative distance. The administrative distance indicates the reliability of the route. The fact is, the administrative distance of a static route is one, which means it has absolute priority over dynamic routing protocols, which have a much higher administrative distance, except for local routes — their distance is zero. Therefore, when creating a floating static route, the administrative distance should be set to a value greater than one, for example, 5. Thus, the floating route will not take priority over the primary static route, but during its unavailability, the default route will be considered primary.
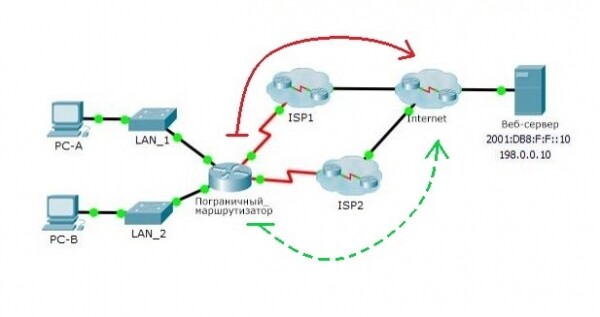
The syntax for configuring a floating static route is as follows:
Edge_Router(config)#ip route 0.0.0.0 0.0.0.0 s0/0/1 5where:
- 5 is the value for the administrative distance;
- s0/0/1 is the outgoing interface of the edge router connected to the ISP2 network.
It's important to note that while the primary route is operational, the floating static route will not be displayed in the routing table.To illustrate this further, let's display the contents of the routing table when the primary route is functioning correctly:
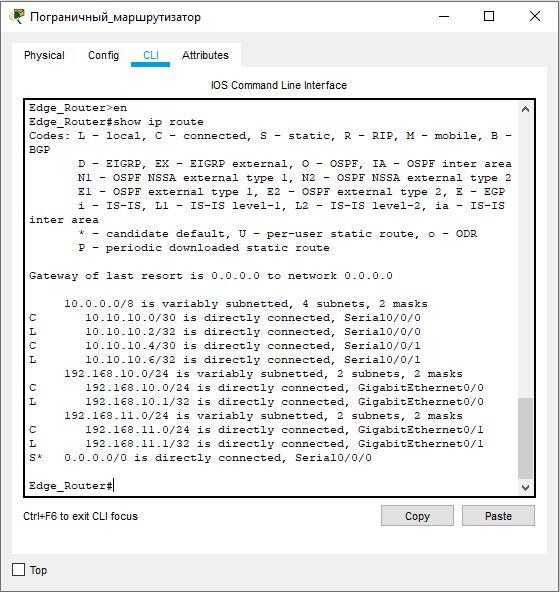
It is evident that the routing table still shows the default primary static route with the outgoing interface Serial0/0/0, and no other static routes are displayed in the routing table.
Testing the Switch to a Floating Static Route upon Failure of the Primary Route
Now, the most interesting part: let's simulate a failure of the primary route. This can be done by disabling the interface at the software level or simply disconnecting the connection between the router and ISP1. We will disable the Serial0/0/0 interface of the primary route:
Edge_Router>en
Edge_Router#conf t
Edge_Router(config)#int s0/0/0
Edge_Router(config-if)#shutdown
... and immediately check the routing table:
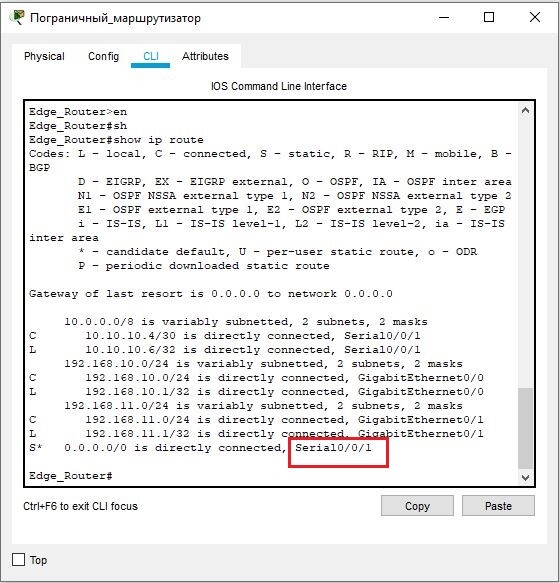
The figure above shows that after the failure of the main static route, the outgoing interface Serial0/0/0 changed to Serial0/0/1. In the first traceroute we performed earlier, the next hop from the border router was to the IP address 10.10.10.1. Let's compare the hops by performing a traceroute using the backup route:
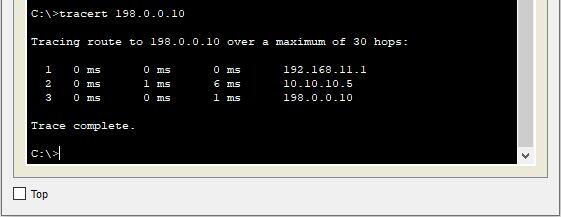
Now the hop from the border router to the web server is through the IP address 10.10.10.5 (ISP2).
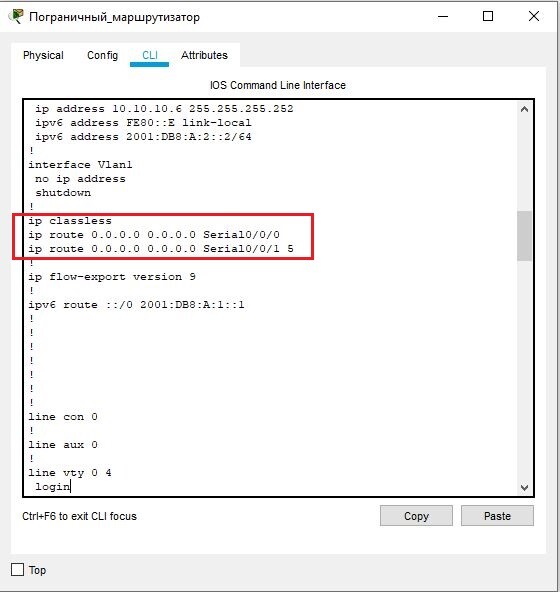
Of course, static routes can be viewed by displaying the router's current configuration:
Edge_Router>en
Edge_Router#show run
Source: habr.com
