

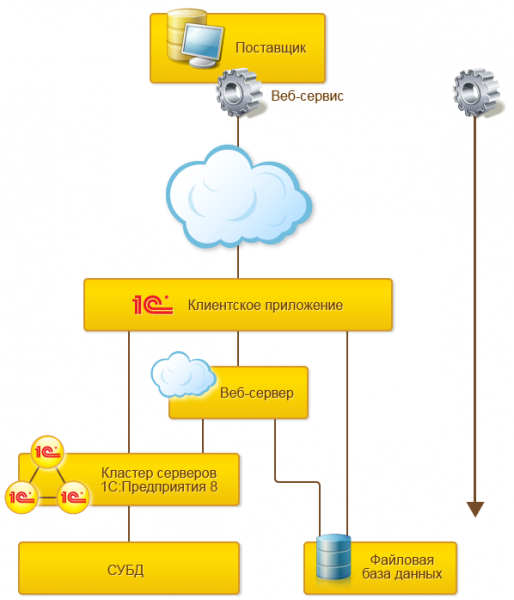
Today I would like to discuss how to set up a 1C server on Linux Debian 9 with web service publication.
What are 1C web services?
are one of the mechanisms of the platform used for integration with other information systems. It serves as a means to support SOA (Service-Oriented Architecture), which is the modern standard for application and information system integration. Essentially, it is the ability to create an HTML page with data, which can then be accessed by any other application to retrieve that data.
Advantages: it works quickly (even with a sufficiently large volume of data), and is relatively convenient.
Disadvantages: your 1C programmer will complain a lot and for a long time while writing a web service for your database. It’s quite peculiar to write.
I will not talk about how to write ... I will talk about how to publish it on Linux from the server console, as well as a bit about installing the 1C server on Linux.
So, we have Debian 9 netinst, let's get started:
We install PostgresPro (Please note that it is not free and is distributed only for the purpose of familiarizing oneself with its capabilities):
# apt-get update -y# apt-get install -y wget gnupg2 || apt-get install -y gnupg# wget -O - http://repo.postgrespro.ru/keys/GPG-KEY-POSTGRESPRO | apt-key add -# echo deb http://repo.postgrespro.ru/pgpro-archive/pgpro-11.4.1/debian stretch main > /etc/apt/sources.list.d/postgrespro-std.list# apt-get update -y# apt-get install -y postgrespro-std-11-server# /opt/pgpro/std-11/bin/pg-setup initdb# /opt/pgpro/std-11/bin/pg-setup service enable# service postgrespro-std-11 start# su - postgres# /opt/pgpro/std-11/bin/psql -U postgres -c "alter user postgres with password 'ВашПароль';"Let’s say PostgreSQL listens to all addresses and not just localhost.
# nano /var/lib/pgpro/std-11/data/postgresql.confUncomment and change which addresses to listen to:
…
#listen_addresses = ‘localhost’
…
At
…
listen_addresses = '*'
…
Next, we will allow users from our network to authenticate.
# nano /var/lib/pgpro/std-11/data/pg_hba.confWe will change:
# IPv4 local connections:
host all all 127.0.0.1/32 md5
to
host all all 192.168.188.0/24 md5
host all all 127.0.0.1/32 md5
More detailed information about various installations of Postgres for 1C can be read .
Next, we install the 1C server.
Upload the archive downloaded from the 1C website to the server (in my case, deb64_8_3_15_1534.tar.gz)
# tar -xzf deb64_8_3_15_1534.tar.gz
# dpkg -i *.deba couple more small things:
# apt install imagemagick unixodbc libgsf-binNow let's install Apache2.
# apt install apache2Through the administration console or via the 1C client, we create a database and upload our configuration...
Now we publish the database:
we go into the folder with 1C.
# cd /opt/1C/v8.3/x86_64/
./webinst -publish -apache24 -wsdir Test -dir /var/www/test/ -connstr "Srvr=10.7.12.108;Ref=test;" -confPath /etc/apache2/apache2.confLet’s go to var/www/test/ and see what has appeared there.
# cd /var/www/test# nano default.vrd«
<?xml version=«1.0» encoding=«UTF-8»?>
v8.1c.ru/8.2/virtual-resource-system
href="http://www.w3.org/2001/XMLSchema">www.w3.org/2001/XMLSchema
href="http://www.w3.org/2001/XMLSchema-instance">www.w3.org/2001/XMLSchema-instance
base="/Test"
ib="Srvr=192.168.188.150;Ref=Test;">
<standardOdata enable="false"
reuseSessions="autouse"
sessionMaxAge="20"
poolSize="10"
poolTimeout="5"/>
«
These are the schemes needed to launch the 1C web client… now you can access our test database via the browser at 'http://ServerAddress/Test' (case sensitivity matters! it's Linux) or specify the location type in the client with the address 'http://ServerAddress/Test', and the client will work with the published database.
BUT
What about web services? (In my test configuration, there are two: WebBuh for data exchange with accounting and toplog integration with the eponymous WMS system).
Well, let's add a couple of lines to our vrd file…
<?xml version=«1.0» encoding=«UTF-8»?>
v8.1c.ru/8.2/virtual-resource-system
href="http://www.w3.org/2001/XMLSchema">www.w3.org/2001/XMLSchema
href="http://www.w3.org/2001/XMLSchema-instance">www.w3.org/2001/XMLSchema-instance
base="/TestWeb"
ib="Srvr=IP_address;Ref=TestWebServ">
<standardOdata enable="false"
reuseSessions="autouse"
sessionMaxAge="20"
poolSize="10"
poolTimeout="5"/>
 # Вот тут начинается код который публикует веб-сервисы
 <point name="WebBuh" # Name of the web service in the configurator
 alias="Web_buh.1cws" # Web_buh.1cws - alias of the web service in the browser
 enable="true" # I think the following lines are clear enough
 reuseSessions="autouse"
 sessionMaxAge="20"
 poolSize="10"
 poolTimeout="5"/>
 <point name="TopLog" # second web service
 alias="toplog.1cws" # toplog.1cws
 enable="true"
 reuseSessions="autouse"
 sessionMaxAge="20"
 poolSize="10"
 poolTimeout="5"/>
let's save it.
And now our web service is available at 'http://ServerAddress/Test/Web_buh.1cws?'
Why did we have to do this manually?
Since our server has no graphical interface, it's impossible to launch the configurator on it, and consequently publish using the standard tools. The remote configurator that is installed on the client does not publish web services on the server. That’s why we have to edit the config manually based on the template described above.
— thank you
Source: habr.com
