


PowerShell Desired State Configuration (DSC) significantly simplifies the process of deploying and configuring operating systems, server roles, and applications when you have hundreds of servers.
However, when using DSC on-premises, i.e., not in MS Azure, a few nuances arise. These are particularly felt if the organization is large (with over 300 workstations and servers) and has not yet adopted the world of containers:
- There are no comprehensive system status reports. If the required configuration has not been applied on some servers, we won't know about it without these reports. It is quite difficult to obtain information from the built-in reporting server, and for a large number of hosts – it’s also time-consuming.
- There is a lack of scalability and fault tolerance. It is impossible to build a farm of polling DSC web servers that would share a single fault-tolerant database and a common storage for mof files of configurations, modules, and registration keys.
Today, I will explain how to solve the first problem and obtain data for reporting. It would be easier if SQL could be used as the database. MS built-in support only in Windows Server 2019 or in the Windows Server 1803 build. Retrieving data using the OleDB provider will also , as the DSC server uses a named parameter that is not fully supported by OleDbCommand.
I found a way: for those using Windows Server 2012 and 2016, one can the use of an SQL database as a backend for the polling DSC server. To do this, we will create a 'proxy' in the form of an .mdb file with linked tables that will redirect data obtained from client reports to the SQL server database.
Note: for Windows Server 2016, it is necessary to use , as Microsoft.Jet.OLEDB.4.0 is no longer supported.
I will not delve into the process of deploying the polling DSC server, as it is very well documented . I’ll just highlight a couple of points. If we are deploying the polling DSC on the same web server with WSUS or Kaspersky Security Center, then in the configuration creation script, the following parameters need to be changed:
UseSecurityBestPractices = $falseOtherwise, TLS 1.0 will be disabled, and you will not be able to connect to the SQL database. Kaspersky Security Center will also not function (the issue should be resolved in Kaspersky Security Center v11).
Enable32BitAppOnWin64 = $trueIf this change is not made, it will not be possible to run the AppPool of the DSC server on IIS with WSUS.
- When installing the DSC server together with WSUS, disable both static and dynamic caching for the DSC site.
Now let's configure the DSC server to use the SQL database.
Creating an SQL Database
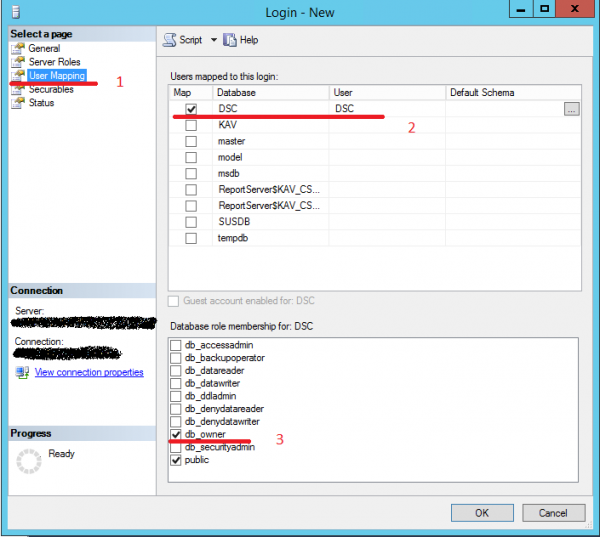
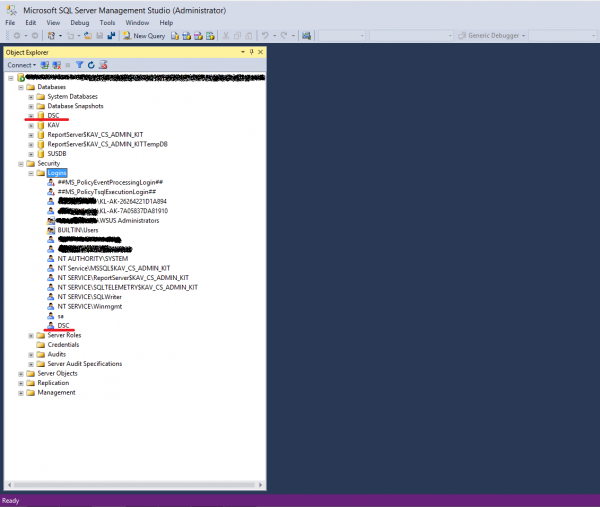
- We will create an empty SQL database named DSC.


- Let's create an account to connect to this database. First, ensure that both Windows and SQL account authentication is enabled on the SQL server.

- Go to the User Mapping section. Select the database, in this case, DSC. Grant database owner rights.
- Done.

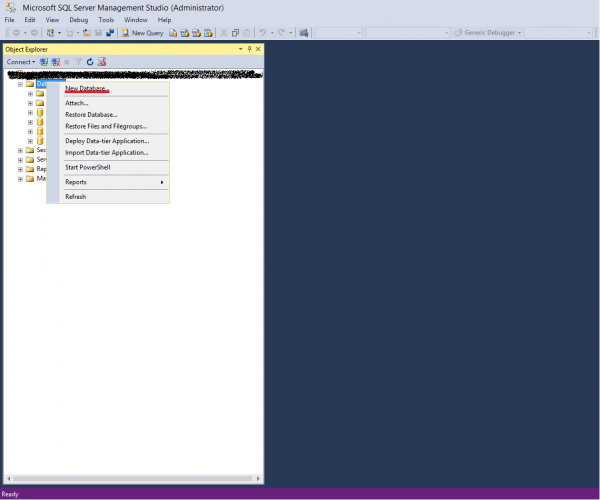
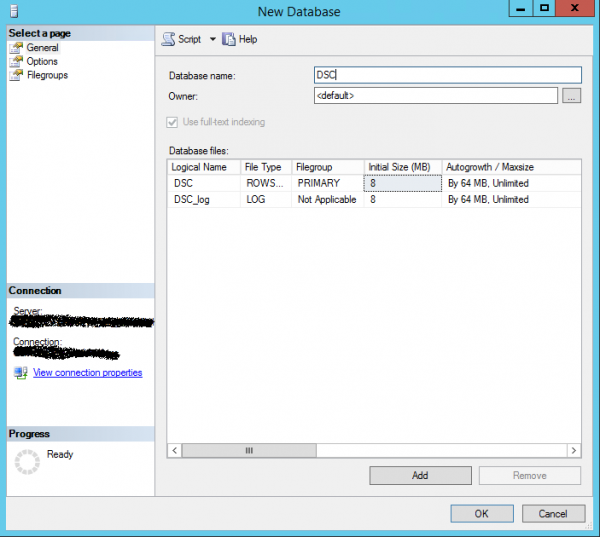
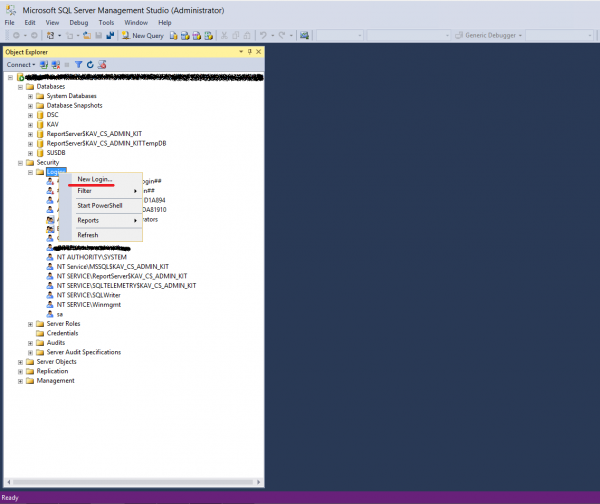
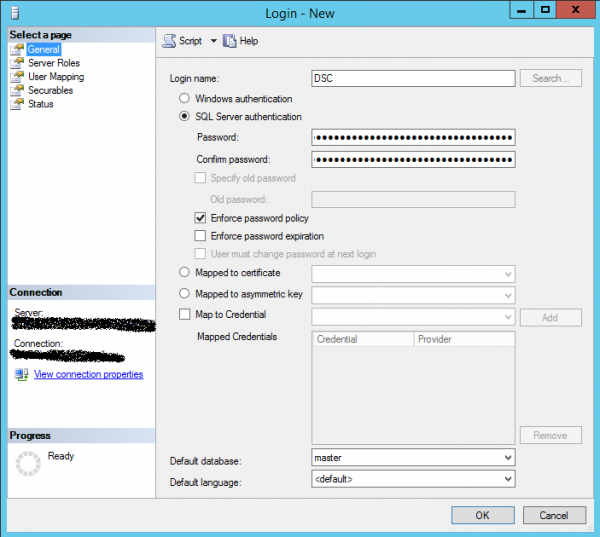
Creating a Schema for the DSC Database
You can create a schema for the DSC database in two ways:
- manually, through a TSQL script
SET ANSI_NULLS ON GO SET QUOTED_IDENTIFIER ON GO CREATE TABLE [dbo].[Devices]( [TargetName] [nvarchar](255) NOT NULL, [ConfigurationID] [nvarchar](255) NOT NULL, [ServerCheckSum] [nvarchar](255) NOT NULL, [TargetCheckSum] [nvarchar](255) NOT NULL, [NodeCompliant] [bit] NOT NULL, [LastComplianceTime] [datetime] NULL, [LastHeartbeatTime] [datetime] NULL, [Dirty] [bit] NOT NULL, [StatusCode] [int] NULL ) ON [PRIMARY] GO CREATE TABLE [dbo].[RegistrationData]( [AgentId] [nvarchar](255) NOT NULL, [LCMVersion] [nvarchar](255) NULL, [NodeName] [nvarchar](255) NULL, [IPAddress] [nvarchar](255) NULL, [ConfigurationNames] [nvarchar](max) NULL ) ON [PRIMARY] TEXTIMAGE_ON [PRIMARY] GO CREATE TABLE [dbo].[StatusReport]( [JobId] [nvarchar](50) NOT NULL, [Id] [nvarchar](50) NOT NULL, [OperationType] [nvarchar](255) NULL, [RefreshMode] [nvarchar](255) NULL, [Status] [nvarchar](255) NULL, [LCMVersion] [nvarchar](50) NULL, [ReportFormatVersion] [nvarchar](255) NULL, [ConfigurationVersion] [nvarchar](255) NULL, [NodeName] [nvarchar](255) NULL, [IPAddress] [nvarchar](255) NULL, [StartTime] [datetime] NULL, [EndTime] [datetime] NULL, [Errors] [nvarchar](max) NULL, [StatusData] [nvarchar](max) NULL, [RebootRequested] [nvarchar](255) NULL ) ON [PRIMARY] TEXTIMAGE_ON [PRIMARY] GO - import data from the empty devices.mdb within the PS module PSDesiredStateConfiguration using the SQL Data Import Wizard.
The Devices.mdb we will be working with is located at C:WindowsSysWOW64WindowsPowerShellv1.0ModulesPSDesiredStateConfigurationPullServer.
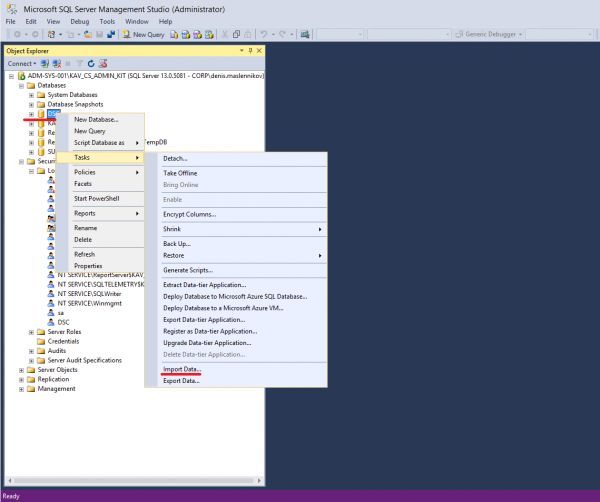
- To import the data, we will start the SQL Server Import and Export Wizard.

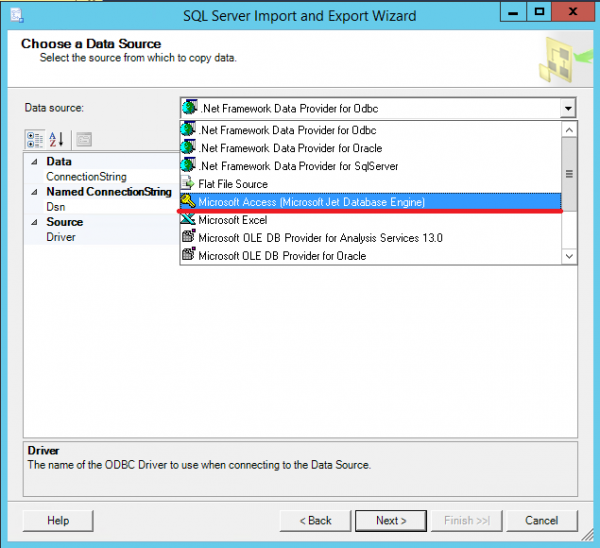
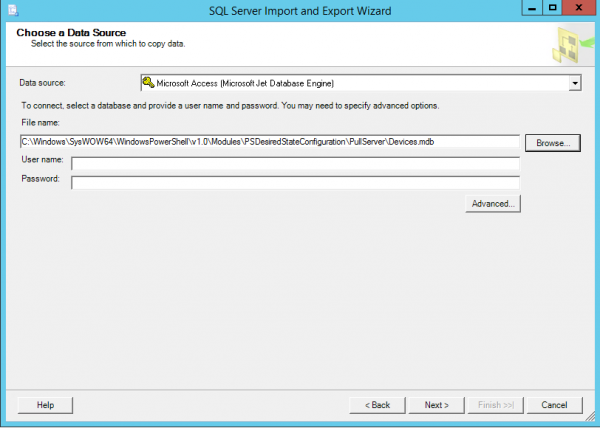
- Choose the source from which we will fetch the data – in our case, this is the Microsoft Access database. Click Next.

- Select the file from which we will import the schema.

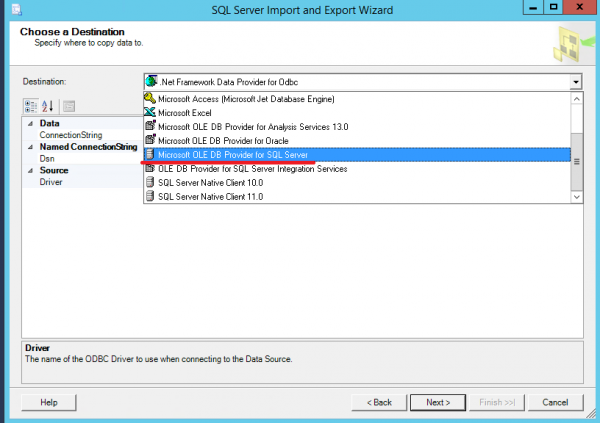
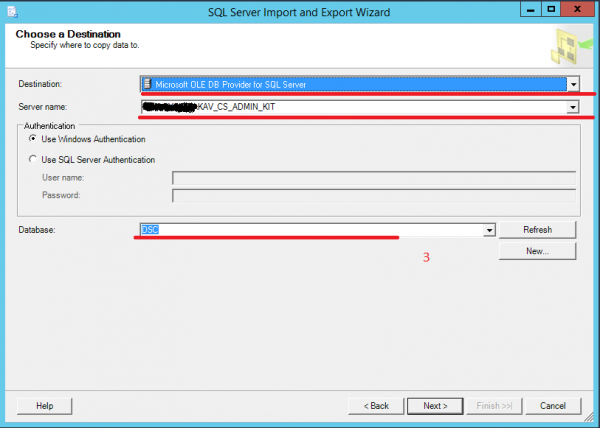
- Specify where to import it to – in our case, this is the SQL database.

- Select the SQL server (Server Name) and the database to which we will import data (DataBase).
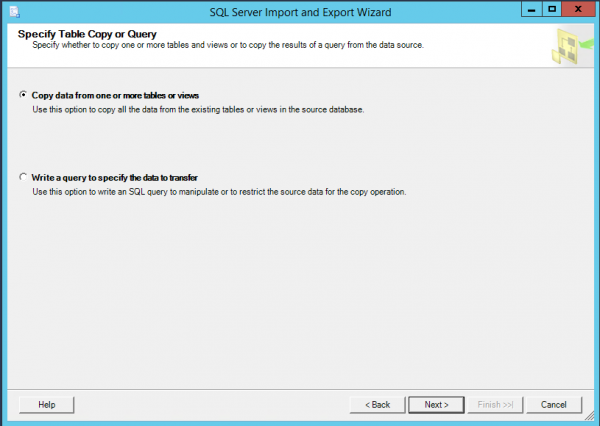
- Select the option Copy data from one or more tables or views.

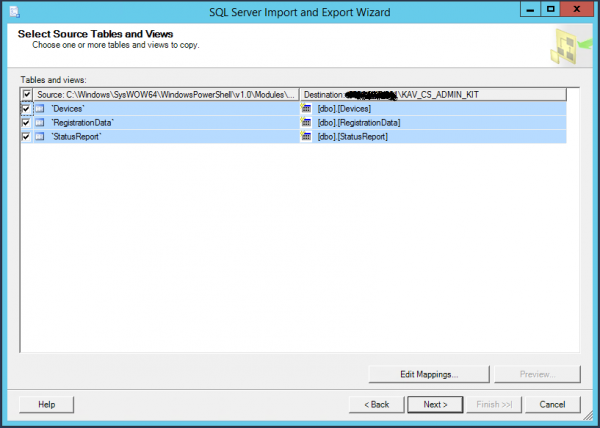
- Selecting the tables from which we will import the database schema.
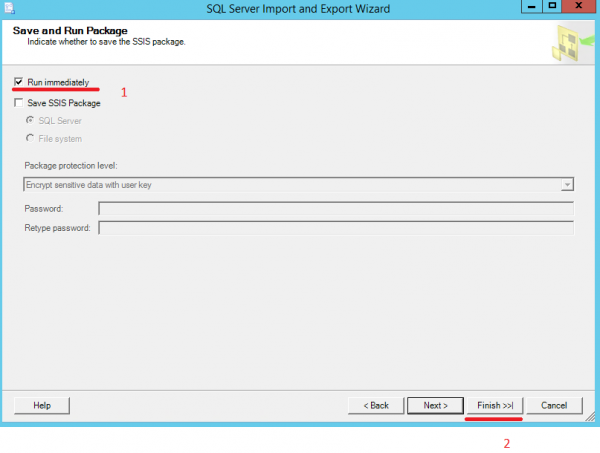
- Check the Run Immediately box and click Finish.

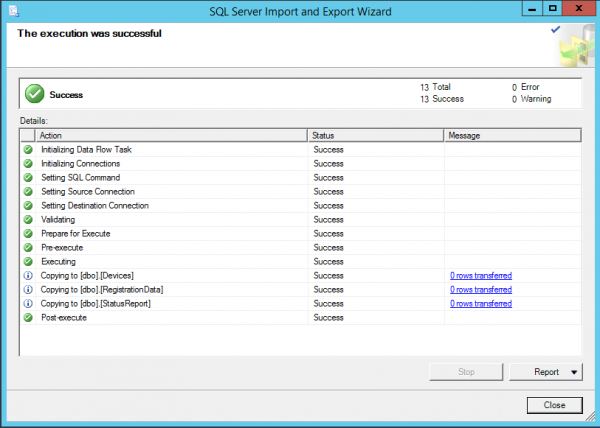
- Done.
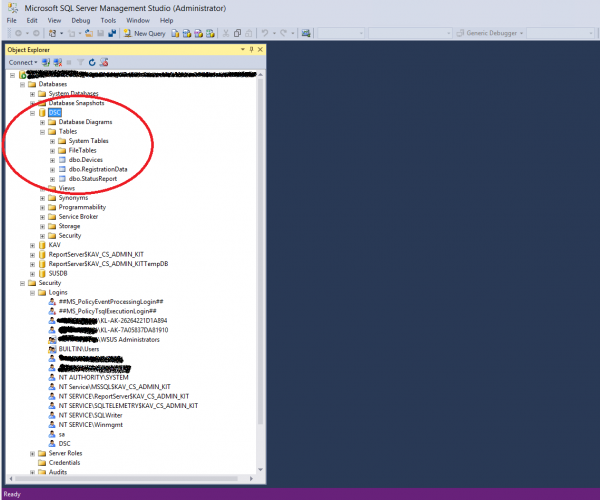
- As a result, tables should appear in the DSC database.
Configuration of the .mdb 'proxy' file
Creating an ODBC connection to the SQL server. It is assumed that MS Access is not installed on the server with DSC, so the databases.mdb setup is performed on an intermediate host with MS Access installed.
Let's create a system ODBC connection to the SQL server (the connection bitness must match the MS Access bitness – either 64 or 32). This can be done using:
— PowerShell cmdlet:
Add-OdbcDsn –Name DSC –DriverName 'SQL Server' –Platform '' –DsnType System –SetPropertyValue @('Description=DSC Pull Server',"Server=", 'Trusted_Connection=yes', 'Database=DSC') –PassThru— or manually, using the connection wizard:
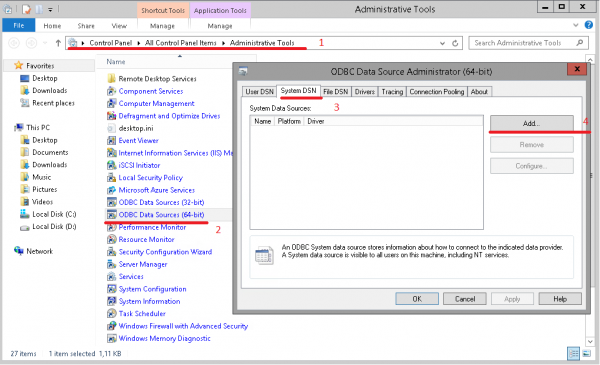
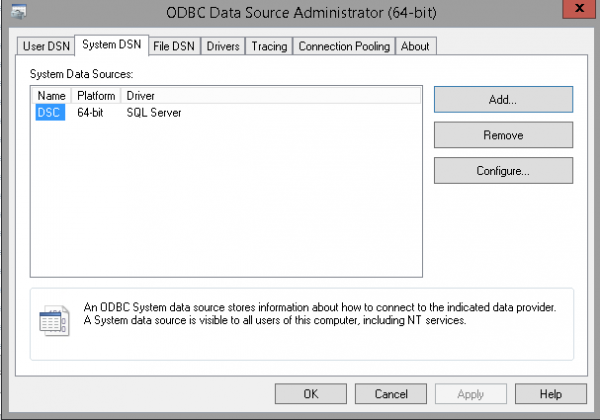
- Open Administrative tools. Select ODBC Data Sources depending on the version of MS Access installed. Go to the System DSN tab and create a system connection (Add).

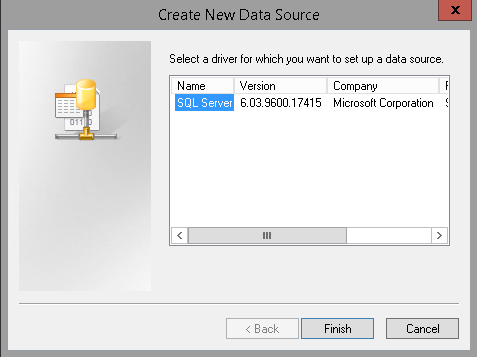
- Indicate that we will connect to the SQL server. Click Finish.

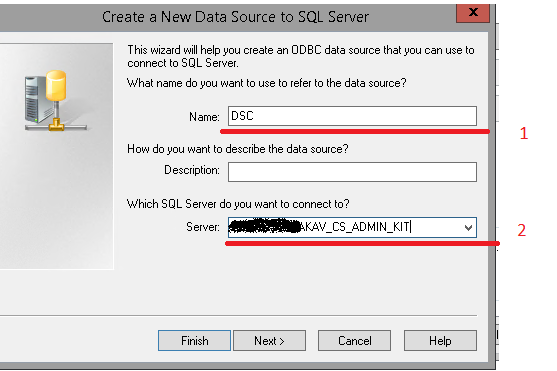
- Specify the name and server for the connection. Then, the connection with the same parameters will need to be created on the DSC server.

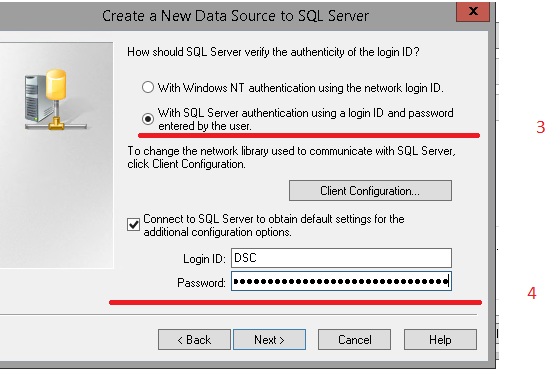
- Indicate that we will use the previously created login with the name DSC to connect to the SQL server.

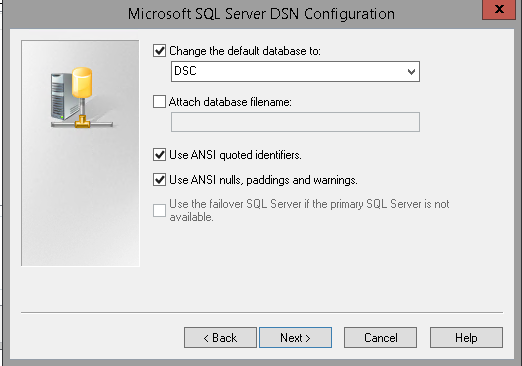
- Specify the database in the DSC connection settings.

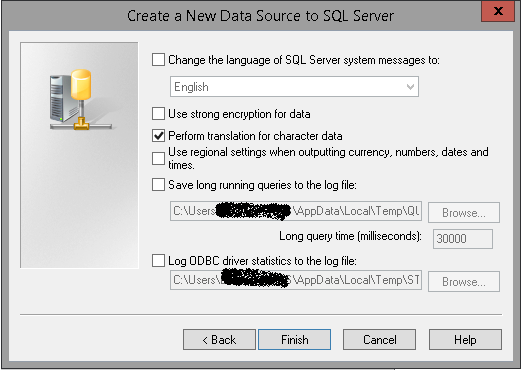
- Click Finish.

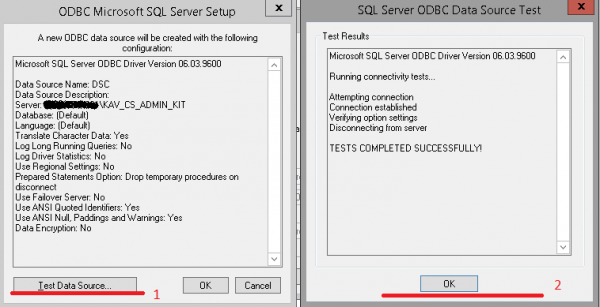
- Before completing the setup, check that the connection works (Test Data Source).

- Done.

Creating the devices.mdb database in MS Access. Launch MS Access and create a blank database named devices.mdb.
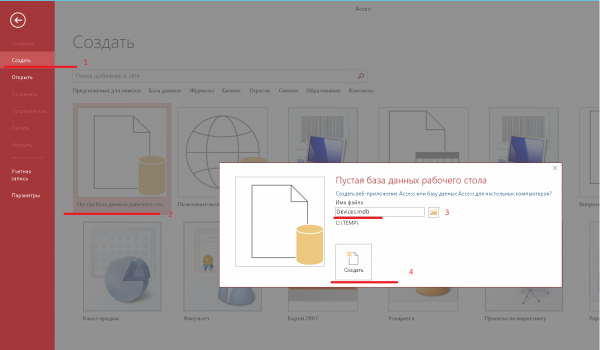
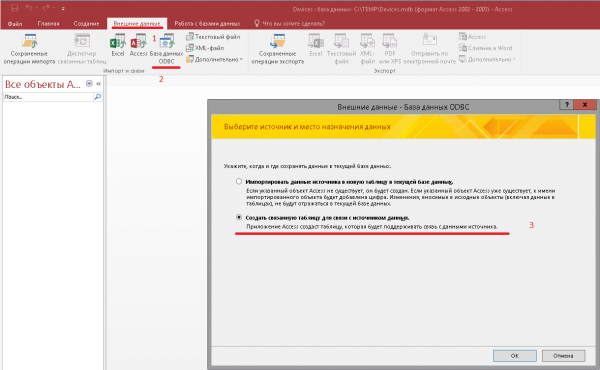
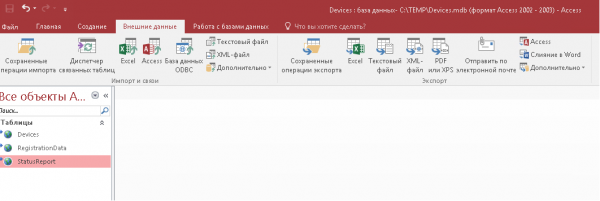
- Go to the External Data tab, click on ODBC Database. In the window that appears, select Create a linked table to connect to the data source.

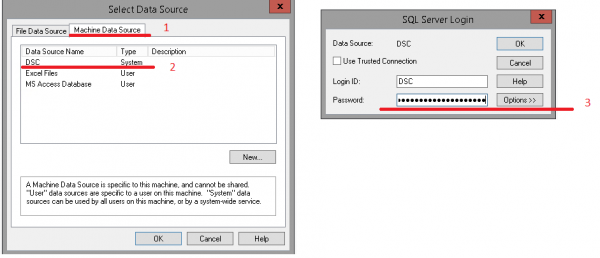
- In the new window, select the Machine Data Source tab and click OK. In the new window, enter the credentials to connect to the SQL server.

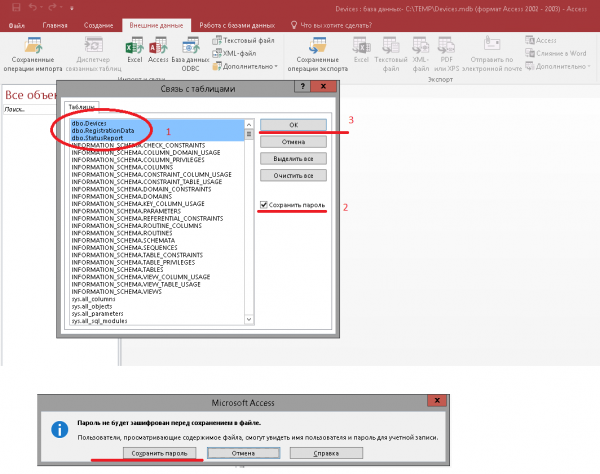
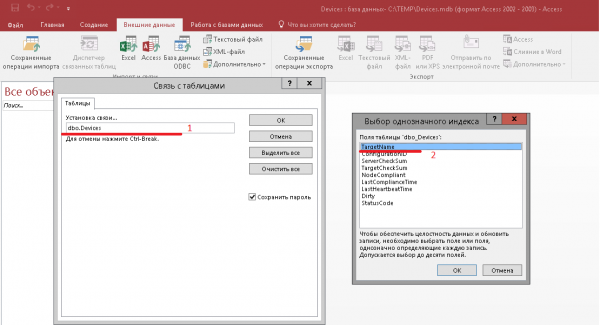
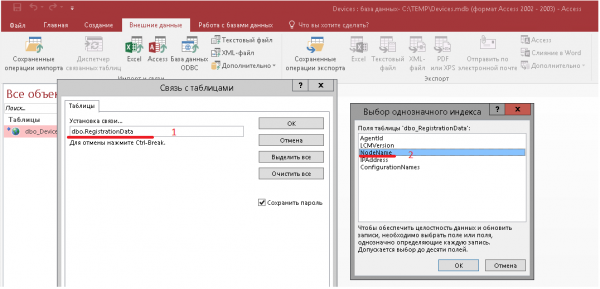
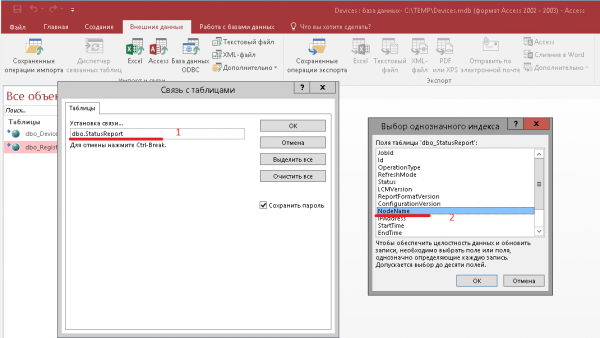
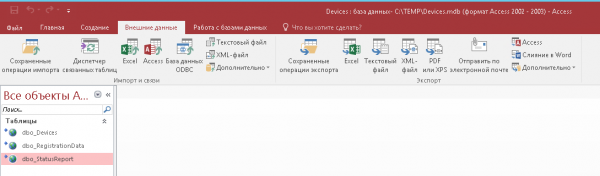
- Select the tables to be linked. Check the Save password option and click OK. Ensure to save the password each time for all three tables.

- In the indexes, the following should be selected:
— TargetName for the table dbo_Devices;
— NodeName or IPAddress for dbo_RegistrationData;
— NodeName or IPAddress for dbo_StatusReport.
- Rename the tables in MS Access by removing the dbo_ prefix so that DSC can use them.

- Done.

- Save the file and close MS Access. Now copy the resulting devices.mdb to the DSC server (by default in C:\Program Files\WindowsPowershell\DSCService) and replace the existing one (if any).
Setting up a DSC server for SQL use
- Let's return to the DSC server. To connect to the SQL server using our proxy file, we will create a new ODBC connection on the DSC server. The name, bitness, and connection settings should be the same as when creating the MDB file. You can copy an already configured empty devices.mdb from here.
- To use devices.mdb, changes need to be made in the web.config of the polling DSC server (by default – C:\inetpub\PSDSCPullServer\web.config):
— for Windows Server 2012
\n— for Windows Server 2016
\nThis completes the setup of the DSC server.
Checking the functionality of the DSC server
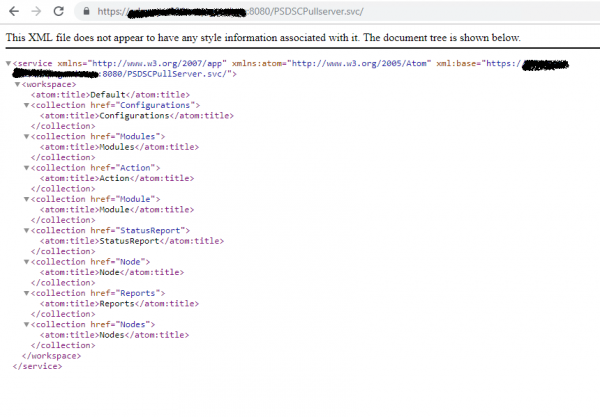
- Let's check that the DSC server is accessible through a web browser.

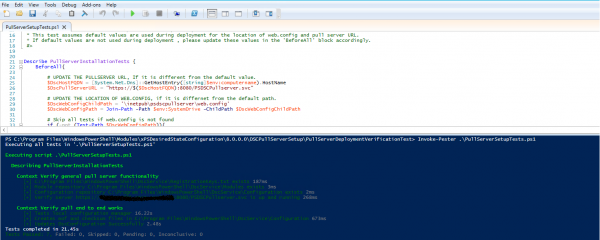
- Now let's verify that the polling DSC server is functioning properly. For this, the module xPSDesiredStateConfiguration contains a script pullserversetuptests.ps1. Before running this script, you need to install the Powershell module named Pester. Install it with Install-Module -Name Pester.
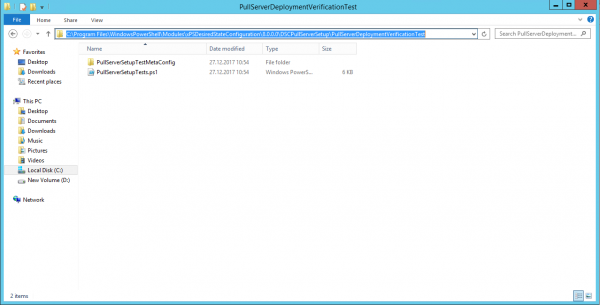
- Open C:\Program Files\WindowsPowerShell\Modules\xPSDesiredStateConfiguration\\DSCPullServerSetup\PullServerDeploymentVerificationTest (for example version 8.0.0.0).

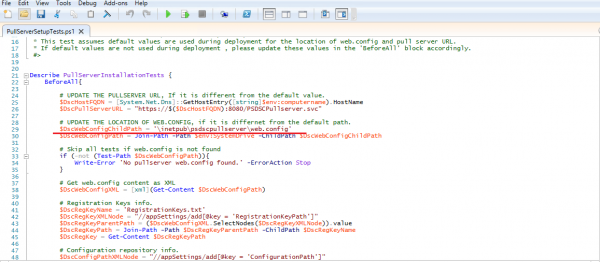
- Open PullServerSetupTests.ps1 and check the path to the DSC server's web.config. I highlighted in red the path to web.config, which the script will check. If needed, change this path.

- Run pullserversetuptests.ps1
Invoke-Pester .\PullServerSetupTests.ps1
Everything works.
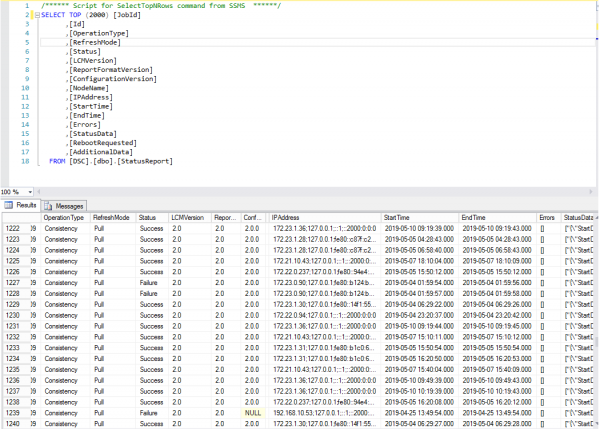
- In SQL Management Studio, we can see that the managed hosts are sending reports to the DSC reporting server and the data is being stored in the DSC database on the SQL server.

That's all for now. In the next articles, I plan to discuss how to build reports from the acquired data, as well as touch on issues of failover and scalability.
Source: habr.com
