

I have long wanted to "get hands-on" with internet services by setting up a web server from scratch and launching it on the Internet. In this article, I want to share the experience of transforming a home router from a narrowly functional device into a practically full-fledged server.
It all started when my trusty TP-Link TL-WR1043ND router no longer met the needs of my home network; I wanted the 5GHz band and fast access to files on a storage device connected to the router. After browsing specialized forums (4pda, ixbt), review sites, and looking at the selection in local stores, I decided to purchase the Keenetic Ultra.
Good owner reviews worked in favor of this device:
- no overheating issues (I had to give up on Asus products);
- reliability in operation (I crossed off TP-Link);
- ease of setup (I was afraid I wouldn't manage and crossed off Microtik).
I had to come to terms with the downsides:
- no WiFi6; I wanted to purchase equipment with a buffer for the future;
- 4 LAN ports; I wanted more, but that's already beyond the home category.
In the end, we ended up with this "server setup":
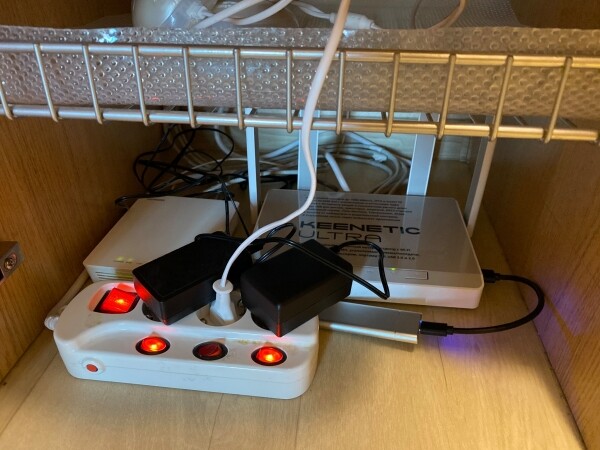
- to the left is the optical terminal from Rostelecom;
- to the right is our test router;
- a long-forgotten 128GB m.2 SSD connected to the router via a USB3 box from AliExpress, now securely fastened to the wall;
- in the foreground is an extension cord with independent socket switching, a wire from it goes to an inexpensive UPS;
- in the background is a bundle of twisted pair — during the apartment renovation, I immediately planned for RJ45 sockets in the places expected for equipment placement, so as not to depend on WiFi clutter.
So, we have the equipment, now we need to configure it:

- the initial setup of the router takes about 2 minutes; we specify the connection parameters to the provider (my optical terminal is switched to bridge mode, the router establishes a PPPoE connection), the WiFi network name, and the password — basically, that's it, the router starts up and works.
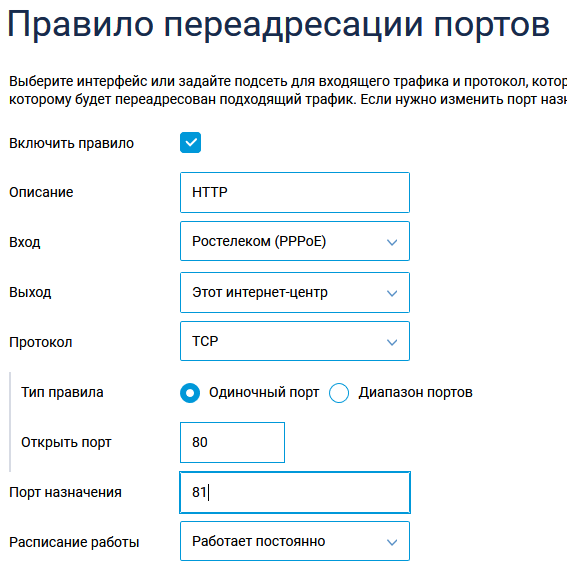
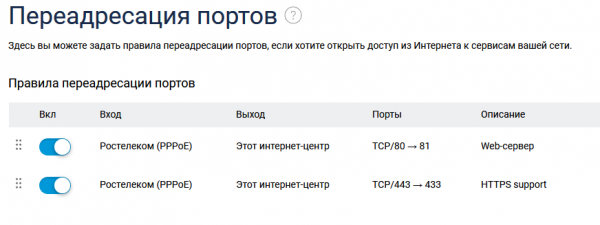
We set up port forwarding from external ports to the router's ports in the "Network Rules — Forwarding" section:
Now we can move on to the "advanced" part, which I wanted from the router:
- the functionality of a small NAS for the home network;
- performing the functions of a web server for several personal pages;
- The functionality of a personal cloud for accessing personal data from anywhere in the world.
The first is implemented with built-in tools, requiring no special effort:
- we take the appropriate storage device (USB flash drive, memory card in a card reader, external hard drive, or SSD in an external box) and format it to Ext4 using (I don't have a computer with Linux at hand; this can be done with built-in tools). As I understand it, the system writes logs to the flash drive only during operation, so if you limit them after the system setup — you can use memory cards, but if you plan to write a lot and often to the storage — an SSD or HDD is better.
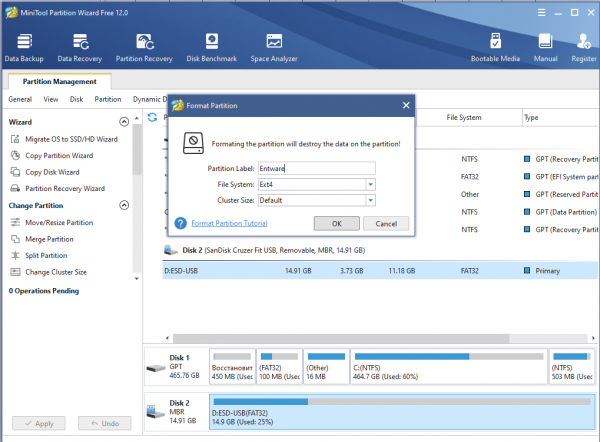
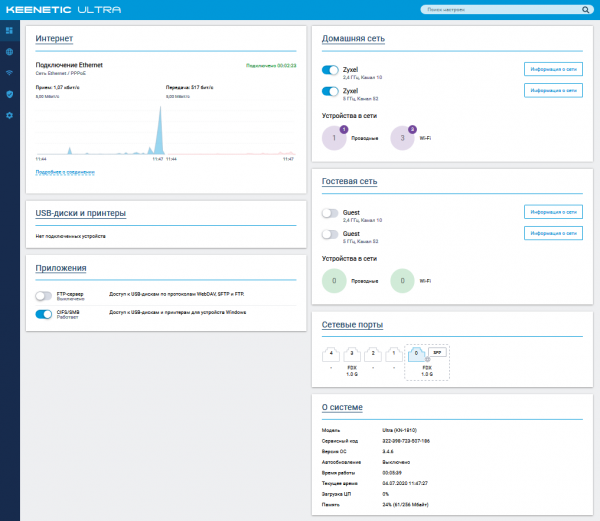
After that, we connect the storage to the router and watch it on the system monitor screen.
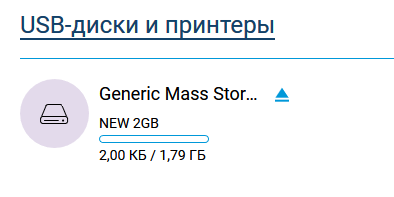
We click on 'USB Drives and Printers' in the 'Applications' section and set up the shared resource in the 'Windows Network' section:
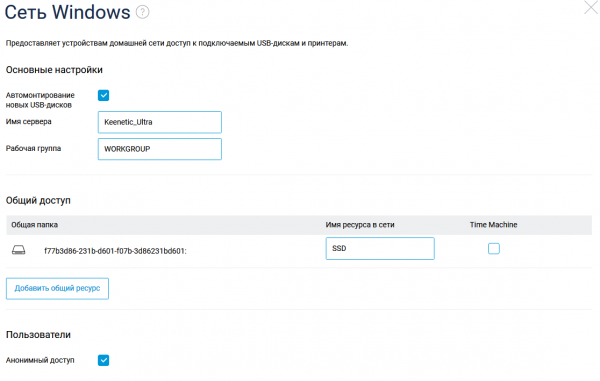
And we have a network resource that can be used from Windows computers; if necessary, connect it as a disk: net use y: \\192.168.1.1SSD /persistent:yes
The speed of such an improvised NAS is quite sufficient for home use; over the wire, it uses the full gigabit, while the WiFi speed is about 400-500 megabits.
Setting up storage is one of the necessary steps for configuring the server; next, we need to:
— and a static IP address (you can also do without it, using Dynamic DNS, but I already had a static IP, so it was easier to use — we receive DNS hosting and email on our domain);
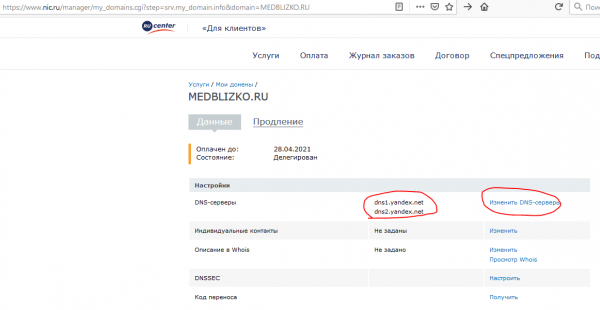
— and add A records pointing to your IP:
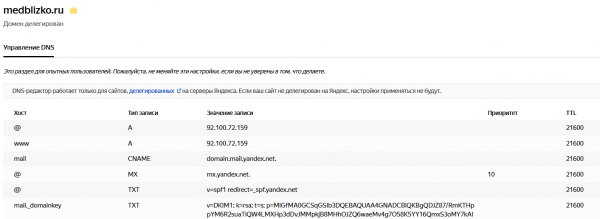
The activation of the domain delegation and DNS settings takes several hours, so in parallel, we handle the router setup.
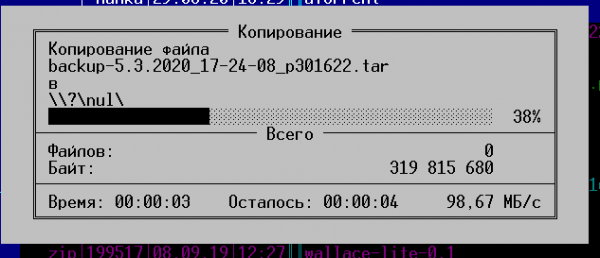
First, you need to install the Entware repository, from which we can install necessary packages on the router. I followed , but instead of uploading the installation package via FTP, I created a folder directly on the previously connected network drive and copied the file there normally.
After gaining SSH access, we change the password using the command passwd and install all necessary packages using the command opkg install [package names]:
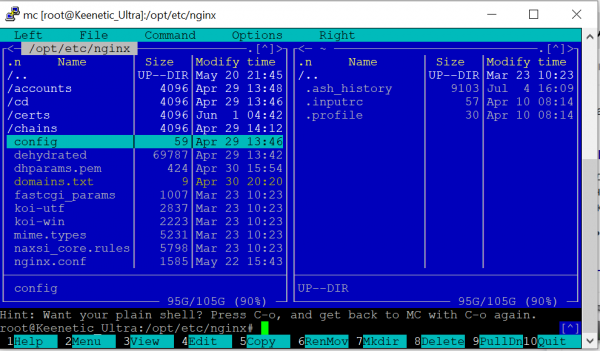
During the router setup, the following packages were installed (output of the command opkg list-installed):
Package list
bash — 5.0-3
busybox — 1.31.1-1
ca-bundle — 20190110-2
ca-certificates — 20190110-2
coreutils — 8.31-1
coreutils-mktemp — 8.31-1
cron — 4.1-3
curl — 7.69.0-1
diffutils — 3.7-2
dropbear — 2019.78-3
entware-release — 1.0-2
findutils — 4.7.0-1
glib2 — 2.58.3-5
grep — 3.4-1
ldconfig — 2.27-9
libattr — 2.4.48-2
libblkid — 2.35.1-1
libc — 2.27-9
libcurl — 7.69.0-1
libffi — 3.2.1-4
libgcc — 8.3.0-9
libiconv-full — 1.11.1-4
libintl-full — 0.19.8.1-2
liblua — 5.1.5-7
libmbedtls — 2.16.5-1
libmount — 2.35.1-1
libncurses — 6.2-1
libncursesw — 6.2-1
libndm — 1.1.10-1a
libopenssl — 1.1.1d-2
libopenssl-conf — 1.1.1d-2
libpcap — 1.9.1-2
libpcre — 8.43-2
libpcre2 — 10.34-1
libpthread — 2.27-9
libreadline — 8.0-1a
librt — 2.27-9
libslang2 — 2.3.2-4
libssh2 — 1.9.0-2
libssp — 8.3.0-9
libstdcpp — 8.3.0-9
libuuid — 2.35.1-1
libxml2 — 2.9.10-1
locales — 2.27-9
mc — 4.8.23-2
ndmq — 1.0.2-5a
nginx — 1.17.8-1
openssl-util — 1.1.1d-2
opkg — 2019-06-14-dcbc142e-2
opt-ndmsv2 — 1.0-12
php7 — 7.4.3-1
php7-mod-openssl — 7.4.3-1
poorbox — 1.31.1-2
terminfo — 6.2-1
zlib — 1.2.11-3
zoneinfo-asia — 2019c-1
zoneinfo-europe — 2019c-1
There might be something unnecessary here, but there's plenty of space on the storage, so I didn't bother to check.
After installing the packages, we configure nginx. I tried with two domains — the second one is set up for https, and it's still displaying a placeholder. Internal ports 81 and 433 are used instead of 80 and 443, as the router admin panels are using the normal ports.
etc/nginx/nginx.conf
user nobody;
worker_processes 1;
#error_log /opt/var/log/nginx/error.log;
#error_log /opt/var/log/nginx/error.log notice;
#error_log /opt/var/log/nginx/error.log info;
#pid /opt/var/run/nginx.pid;

events {
    worker_connections 64;
}

http {
    include mime.types;
    default_type application/octet-stream;
    #log_format main '$remote_addr - $remote_user [$time_local] "$request" '
    #                  '$status $body_bytes_sent "$http_referer" '
    #                  '"$http_user_agent" "$http_x_forwarded_for"';
    #access_log /opt/var/log/nginx/access.log main;
    sendfile on;
    #tcp_nopush on;
    #keepalive_timeout 0;
    keepalive_timeout 65;
    #gzip on;

server {
    listen 81;
    server_name milkov.su www.milkov.su;
    return 301 https://milkov.su$request_uri;
}

server {
        listen 433 ssl;
        server_name milkov.su;
        #SSL support
        include ssl.conf;
        location / {
            root /opt/share/nginx/html;
            index index.html index.htm;
        error_page 500 502 503 504 /50x.html;
        location = /50x.html {
            root html;
            }
        }
}


ssl_certificate /opt/etc/nginx/certs/milkov.su/fullchain.pem;
ssl_certificate_key /opt/etc/nginx/certs/milkov.su/privkey.pem;
ssl_ciphers 'ECDHE-RSA-AES128-GCM-SHA256:ECDHE-ECDSA-AES128-GCM-SHA256:ECDHE-RSA-AES256-GCM-SHA384:ECDHE-ECDSA-AES256-GCM-SHA384:DHE-RSA-AES128-GCM-SHA256:DHE-DSS-AES128-GCM-SHA256:kEDH+AESGCM:ECDHE-RSA-AES128-SHA256:ECDHE-ECDSA-AES128-SHA256:ECDHE-RSA-AES128-SHA:ECDHE-ECDSA-AES128-SHA:ECDHE-RSA-AES256-SHA384:ECDHE-ECDSA-AES256-SHA384:ECDHE-RSA-AES256-SHA:ECDHE-ECDSA-AES256-SHA:DHE-RSA-AES128-SHA256:DHE-RSA-AES128-SHA:DHE-DSS-AES128-SHA256:DHE-RSA-AES256-SHA256:DHE-DSS-AES256-SHA:DHE-RSA-AES256-SHA:AES128-GCM-SHA256:AES256-GCM-SHA384:AES128-SHA256:AES256-SHA256:AES128-SHA:AES256-SHA:AES:CAMELLIA:DES-CBC3-SHA:!aNULL:!eNULL:!EXPORT:!DES:!RC4:!MD5:!PSK:!aECDH:!EDH-DSS-DES-CBC3-SHA:!EDH-RSA-DES-CBC3-SHA:!KRB5-DES-CBC3-SHA';
ssl_prefer_server_ciphers on;
ssl_dhparam /opt/etc/nginx/dhparams.pem;
ssl_session_cache shared:SSL:10m;
ssl_session_timeout 5m;
ssl_stapling on;
In order for the site to work over https, I used the well-known script dehydrated, installing it according to . This process didn't cause any difficulties, I only stumbled on the fact that in the script text for it to work on my router /opt/etc/ssl/openssl.cnf:
[openssl_conf]
#engines=engines
And I’ll note that generating dhparams.pem with the command “openssl dhparam -out dhparams.pem 2048” on my router takes more than 2 hours; if it weren’t for the progress indicator, I would have lost patience and restarted it.
After obtaining the certificates, we restart nginx with the command "/opt/etc/init.d/S80nginx restart". Basically, the configuration is finished, but the site is still not there — if we place the index.html file in the /share/nginx/html directory, we will see a placeholder.
index.html
<!DOCTYPE html>
<html>
<head>
<title>Test Page!</title>
<style>
    body {
        width: 35em;
        margin: 0 auto;
        font-family: Tahoma, Verdana, Arial, sans-serif;
    }
</style>
</head>
<body>
<h1>Test Page!</h1>
<p>This is a simple static test page, absolutely nothing interesting.</p>
</body>
</html>
To present the information nicely, it’s easier for a non-professional like me to use ready-made templates; after a long search through various directories, I found — there is a good selection of free templates that do not require mandatory attribution (which is rare on the internet, as most templates under licenses require maintaining a link to the source from which they were obtained).
We choose a suitable template — there are options for various cases, we download the archive, and unpack it in the /share/nginx/html directory, which can be done from our computer. Then we edit the template (minimal HTML knowledge is needed to avoid disrupting the structure) and replace the graphics as shown in the image below.

In summary: the router is quite suitable for hosting a lightweight website, basically — if no heavy load is expected, one can , and experiment with more complex projects (I'm looking at Nextcloud/OwnCloud; there seem to be successful installations on such hardware). The ability to install packages increases its usefulness — for example, when I needed to secure the RDP port of a PC in the local network, I installed knockd on the router — and port forwarding to the PC was opened only after port knocking.
Why a router instead of a regular PC? A router is one of the few pieces of computer hardware that works around the clock in many apartments. A home router is typically completely silent, and a lightweight site with less than a hundred visits a day will not stress it at all.
Source: habr.com
