

We had 2 bags of grass, 75 mescaline pills, a Unix environment, a Docker repository, and the task to implement the commands docker pull and docker push without the Docker client.

UPD:
Question: What is all this for?
Answer: Load testing the product (NOT using Bash; the scripts are provided for educational purposes). It was decided not to use the Docker client to reduce additional layers (within reasonable limits) and thus emulate a higher load. As a result, we eliminated all system delays from the Docker client. We achieved a relatively clean load directly on the product.
GNU tools of various versions were used in the article.
First, let's clarify what these commands do.
So, what is docker pull used for? According to :
"Pull an image or a repository from a registry."
There we find a link to .
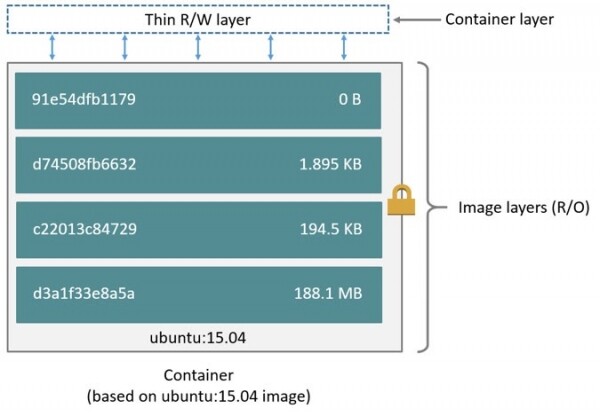
From this, we can understand that a Docker image is a set of layers that contain information about the latest changes in the image, which we obviously need. Next, let's look at .
Here it states the following:
"An 'image' is a combination of a JSON manifest and individual layer files. The process of pulling an > image centers around retrieving these two components."
So the first step according to the documentation is “Pulling an Image Manifest.”.
We won't be pulling it, of course, but we need the data from it. Next, an example of a request is provided: GET /v2/{name}/manifests/{reference}
"The name and reference parameters identify the image and are required. The reference may include a tag or digest."
Our Docker repository is deployed locally, let's try executing the request:
curl -s -X GET "http://localhost:8081/link/to/docker/registry/v2/centos-11-10/manifests/1.1.1" -H "header_if_needed"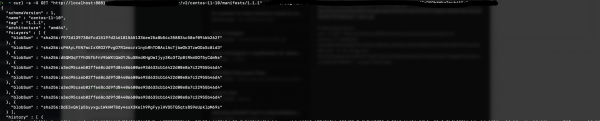
In response, we receive JSON, from which we are currently only interested in the layers, specifically their hashes. Once we have them, we can go through each one and execute the next request: "GET /v2/{name}/blobs/{digest}"
"Access to a layer will be gated by the name of the repository but is identified uniquely in the registry by digest."
The digest, in this case, is the hash we obtained.
Let's try
curl -s -X GET "http://localhost:8081/link/to/docker/registry/v2/centos-11-10/blobs/sha256:f972d139738dfcd1519fd2461815651336ee25a8b54c358834c50af094bb262f" -H "header_if_needed" --output firstLayer
Let's see what file we received as the first layer.
file firstLayer
That is, layers are essentially tar archives, and by unpacking them in the correct order, we will obtain the contents of the image.
Let's write a small Bash script to automate all of this.
#!/bin/bash -eu

downloadDir=$1
# url as http://localhost:8081/link/to/docker/registry
url=$2
imageName=$3
tag=$4

# array of layers
layers=($(curl -s -X GET "$url/v2/$imageName/manifests/$tag" | grep -oP '(?<=blobSum" : ").+(?=")'))

# download each layer from array
for layer in "${layers[@]}"; do
    echo "Downloading ${layer}"
    curl -v -X GET "$url/v2/$imageName/blobs/$layer" --output "$downloadDir/$layer.tar"
done

# find all layers, untar them and remove source .tar files
cd "$downloadDir" && find . -name "sha256:*" -exec tar xvf {} ;
rm sha256:*.tar
exit 0
Now we can run it with the desired parameters and get the content of the required image
./script.sh dirName "http://localhost:8081/link/to/docker/registry" myAwesomeImage 1.0Part 2 — docker push
This will be a bit more complicated.
Let's start again with . So we need to upload each layer, assemble the corresponding manifest, and upload that as well. It sounds simple enough.
After studying the documentation, we can break the upload process into several steps:
- Initialization of the process — "POST /v2/{repoName}/blobs/uploads/"
- Uploading a layer (we will use a monolithic upload, i.e., each layer is sent in its entirety) — "PUT /v2/{repoName}/blobs/uploads/{uuid}?digest={digest}"
Content-Length: {size of layer}
Content-Type: application/octet-stream
Layer Binary Data". - Uploading the manifest — "PUT /v2/{repoName}/manifests/{reference}."
But one step is missing in the documentation, without which nothing will go through. For a monolithic upload, just like for a partial (chunked) upload, before uploading the layer, you need to execute a PATCH request:
"PATCH /v2/{repoName}/blobs/uploads/{uuid}"
Content-Length: {size of chunk}
Content-Type: application/octet-stream
{Layer Chunk Binary Data}".
Otherwise, you won't be able to progress beyond the first step, as instead of the expected response code 202, you will receive a 4xx.
Now the algorithm looks like:
- Initialization
- Patch the layer
- Upload the layer
- Upload the manifest
Steps 2 and 3 will be repeated as many times as there are layers to upload.
To start, we need any image. I will use archlinux:latest
docker pull archlinux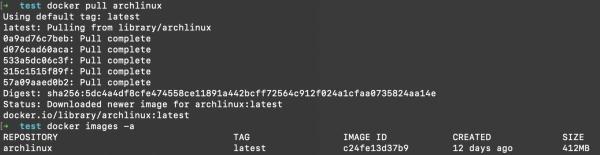
Now let's save it locally for further examination
docker save c24fe13d37b9 -o savedArch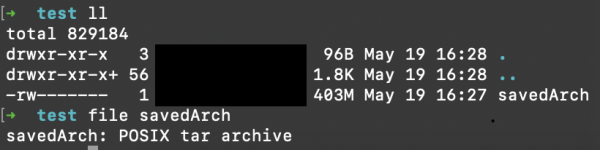
Let's unpack the obtained archive in the current directory
tar xvf savedArch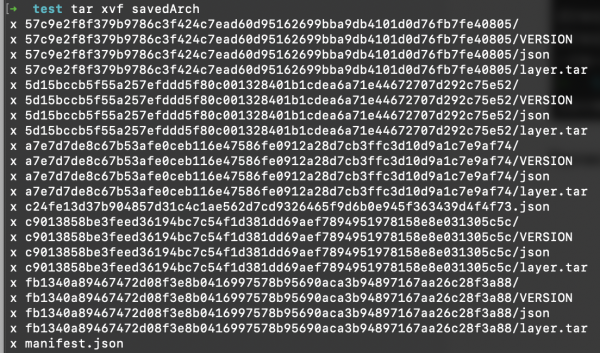
As we can see, each layer is in a separate folder. Now let's look at the structure of the manifest we've obtained
cat manifest.json | json_pp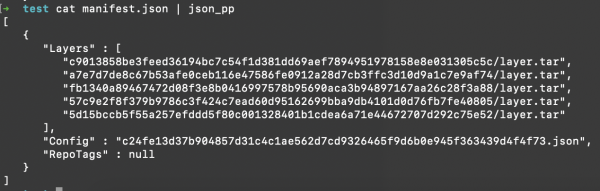
Not much. Let's see what manifest is needed for upload, according to .
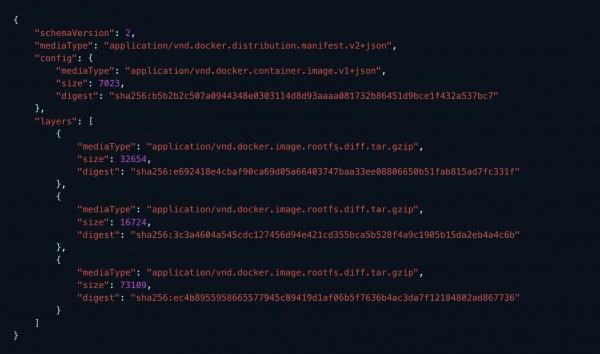
Clearly, the existing manifest doesn't fit our needs, so let's create our own with layers and configs.
We will always have at least one config file and an array of layers. The schema version is 2 (relevant at the time of writing this article), and we will leave mediaType unchanged:
echo ‘{
   "schemaVersion": 2,
   "mediaType": "application/vnd.docker.distribution.manifest.v2+json",
   "config": {
      "mediaType": "application/vnd.docker.container.image.v1+json",
      "size": config_size,
      "digest": "config_hash"
   },
   "layers": [
      ’ > manifest.json
After creating the basic manifest, we need to fill it with valid data. For this, we use the layer's JSON object template:
{
         "mediaType": "application/vnd.docker.image.rootfs.diff.tar.gzip",
         "size": ${layersSizes[$i]},
         "digest": "sha256:${layersNames[$i]}"
      },
we will add this to the manifest for each layer.
Next, we need to find out the configuration file size and replace the placeholders in the manifest with real data.
sed -i "s/config_size/$configSize/g; s/config_hash/$configName/g" $manifestFileNow we can initiate the upload process and save the uuid, which must accompany all subsequent requests.
The complete script looks something like this:
#!/bin/bash -eux

imageDir=$1
# url as http://localhost:8081/link/to/docker/registry
url=$2
repoName=$3
tag=$4
manifestFile=$(readlink -f ${imageDir}/manifestCopy)
configFile=$(readlink -f $(find $imageDir -name "*.json" ! -name "manifest.json"))

# calc layers sha 256 sum, rename them accordingly, and add info about each to manifest file
function prepareLayersForUpload() {
  info_file=$imageDir/info
  # lets calculate layers sha256 and use it as layers names further
  layersNames=($(find $imageDir -name "layer.tar" -exec shasum -a 256 {} ; | cut -d" " -f1))

  # rename layers according to shasums. !!!Set required amount of fields for cut command!!!
  # this part definitely can be done easier but i didn't found another way, sry
  find $imageDir -name "layer.tar" -exec bash -c 'mv {} "$(echo {} | cut -d"/" -f1,2)/$(shasum -a 256 {} | cut -d" " -f1)"' ;

  layersSizes=($(find $imageDir -name "*.tar" -exec ls -l {} ; | awk '{print $5}'))

  for i in "${!layersNames[@]}"; do
    echo "{
         "mediaType": "application/vnd.docker.image.rootfs.diff.tar.gzip",
         "size": ${layersSizes[$i]},
         "digest": "sha256:${layersNames[$i]}"
      }," >> $manifestFile
  done
  # remove last ','
  truncate -s-2 $manifestFile
  # add closing brakets to keep json consistent
  printf "nt]n}" >> $manifestFile
}

# calc config sha 256 sum and add info about it to manifest
function setConfigProps() {
  configSize=$(ls -l $configFile | awk '{print $5}')
  configName=$(basename $configFile | cut -d"." -f1)

  sed -i "s/config_size/$configSize/g; s/config_hash/$configName/g" $manifestFile
}

#prepare manifest file
prepareLayersForUpload
setConfigProps
cat $manifestFile

# initiate upload and get uuid
uuid=$(curl -s -X POST -I "$url/v2/$repoName/blobs/uploads/" | grep -oP "(?<=Docker-Upload-Uuid: ).+")

# patch layers
# in data-binary we're getting absolute path to layer file
for l in "${!layersNames[@]}"; do
  pathToLayer=$(find $imageDir -name ${layersNames[$l]} -exec readlink -f {} ;)
    curl -v -X PATCH "$url/v2/$repoName/blobs/uploads/$uuid"
  -H "Content-Length: ${layersSizes[$i]}"
  -H "Content-Type: application/octet-stream"
  --data-binary "@$pathToLayer"

# put layer
  curl -v -X PUT "$url/v2/$repoName/blobs/uploads/$uuid?digest=sha256:${layersNames[$i]}"
  -H 'Content-Type: application/octet-stream'
  -H "Content-Length: ${layersSizes[$i]}"
  --data-binary "@$pathToLayer"
done

# patch and put config after all layers
curl -v -X PATCH "$url/v2/$repoName/blobs/uploads/$uuid"
  -H "Content-Length: $configSize"
  -H "Content-Type: application/octet-stream"
  --data-binary "@$configFile"

  curl -v -X PUT "$url/v2/$repoName/blobs/uploads/$uuid?digest=sha256:$configName"
  -H 'Content-Type: application/octet-stream'
  -H "Content-Length: $configSize"
  --data-binary "@$configFile"

# put manifest
curl -v -X PUT "$url/v2/$repoName/manifests/$tag"
  -H 'Content-Type: application/vnd.docker.distribution.manifest.v2+json'
  --data-binary "@$manifestFile"

exit 0
we can use a ready-made script:
./uploadImage.sh "~/path/to/saved/image" "http://localhost:8081/link/to/docker/registry" myRepoName 1.0UPD:
What did we achieve as a result?
Firstly, we obtained real data for analysis, as tests run in blazemeter, and the data from the Docker client's requests are much less informative compared to pure HTTP requests.
Secondly, the transition allowed us to increase the number of virtual users for Docker uploads by approximately 150%, while achieving an average response time that was 20-25% faster. For Docker downloads, we managed to increase the number of users by 500%, with an average response time reduced by about 60%.
Thank you for your attention.
Source: habr.com
