

Recently, I encountered a rather unpopular creature in the world of DevOps: Azure DevOps pipelines. I immediately sensed a lack of clear instructions or articles on the topic. I'm not sure what this is related to, but Microsoft clearly has work to do in promoting the tool. Today, we will build a pipeline for automated testing within the Azure cloud.
So, the task is:
We have software that is built using Azure DevOps, collected from a WIX project. If there's interest, I can write about this tool as well. Essentially, it's a more optimized method for automating the build of Windows installers, replacing the standard InstallShield. So, our software successfully builds and generates an artifact, a setup.exe, which installs the application onto a Windows system. We need to set this application up in a virtual machine that mimics production, copy automated tests prepared by the testing team there, run them, and retrieve the results to determine whether the branch is good or bad before merging. Just like in GitLab, only through a more complex process.
As the virtualization environment where we'll execute our tests, we will obviously use Azure DevTest Labs, a kind of entity in Azure subscriptions that is created to run all kinds of testing nonsense at reasonable costs.
1. Cloud-side integration
First, we need to integrate our DevTest Labs with Azure DevOps, for which we need a Service Principal—essentially, a service account that allows the pipelines to access the cloud and create/delete resources there for themselves.
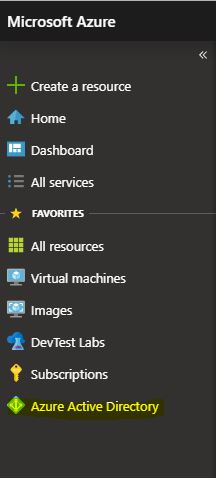
We go to the subscription and find the Azure Active Directory service.
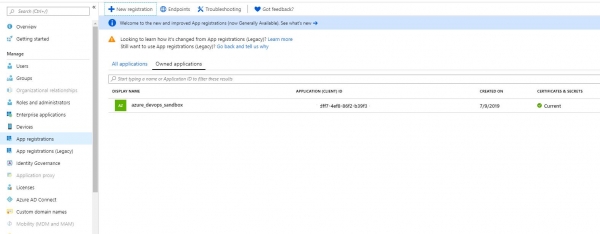
We locate App Registrations and click on New Registration; this will create our service principal. I won’t go into detail about which settings to select during creation, as this may vary across different subscriptions.
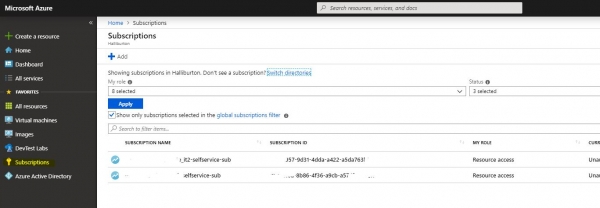
Now we need to grant permissions to our service principal. For this, we go to the subscriptions, represented by a key icon. We select our subscription.
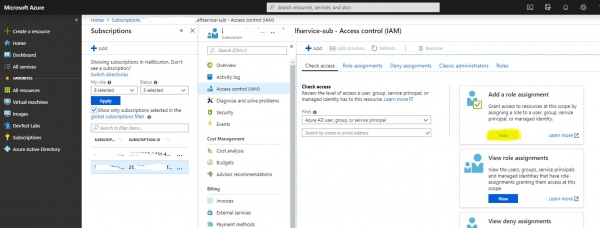
Next, in Access Control, we click Role Assignment and search for this account by the name we just created. We assign the Contributor role, which is sufficient.
Next, we return to our Service Principal in Azure AD and open its properties. Later, we will need all the IDs available there, so we save them.
This concludes our portal settings, and we will now move to Azure DevOps.
2. Integration on the Azure DevOps Side
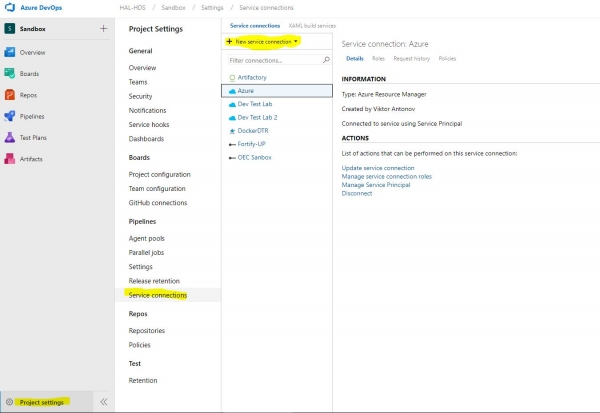
First, we will go to the project settings and select Service Connections. We create a new Azure Resource Manager connection.
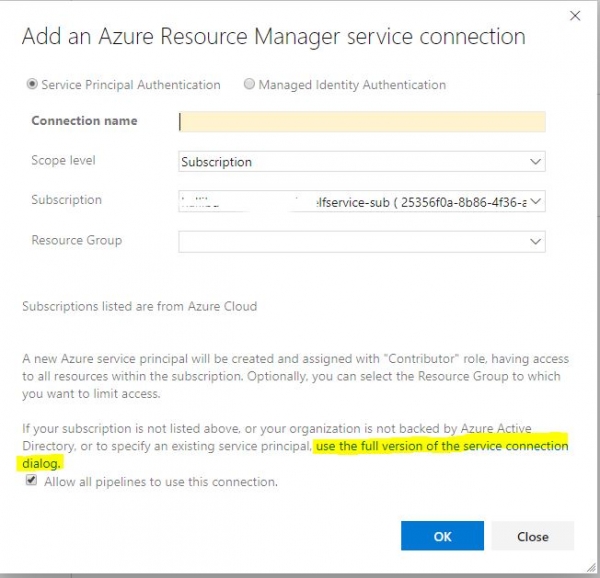
Now we need all the IDs we recorded. Click on use the full version of the service connection dialog. Enter all the information we received from the Service Principal. Click verify, and if everything is fine, save the connection. Now our pipelines can use it to connect to the cloud.
3. Creating a Pipeline
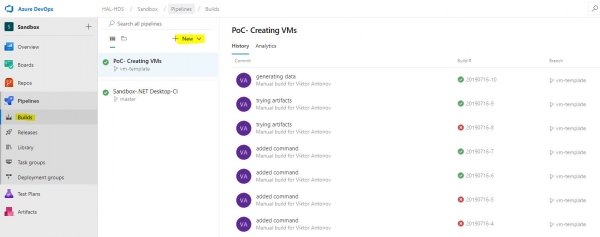
Now we proceed to the most interesting part, building the actual pipeline. Open the Pipelines-Builds menu.
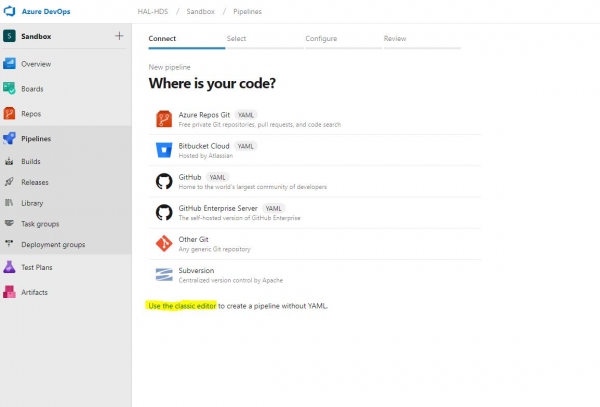
We are greeted by the new build creation menu, which by default will try to create a YAML file with a suitable configuration. We politely decline this and choose the classic option. It's understandable that Microsoft wants to make everything user-friendly and allow maximum customization of pipelines via YAML, but the sparse documentation and the practical non-functionality of many modules tell us that it's still too early to use this functionality.
From the range of templates, we will need the simple Empty Pipeline. After its creation, we are greeted by an empty editing window, where we will spend quite a bit of time.
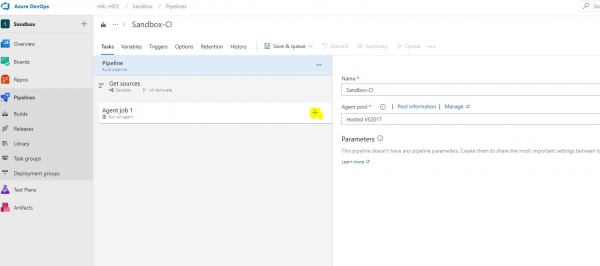
So, we click on + and enter a kind of module shop, from where we will need the following components in the list.
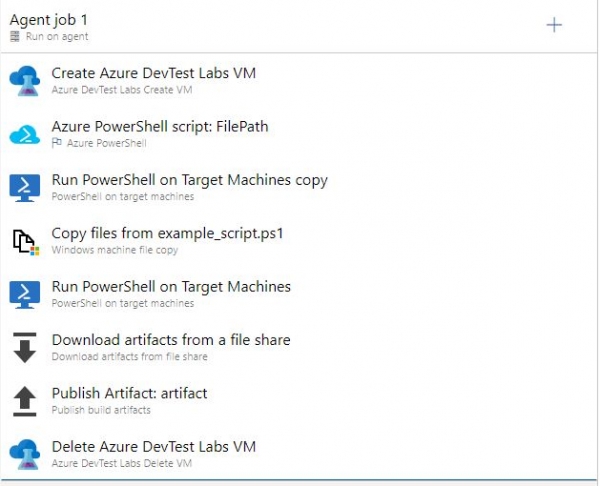
Before we start configuring the pipeline tasks, we need to create and add several files to the project. These will be the ARM Template of our virtual machine, which we will generate in Azure DevTest Labs, a script to retrieve the machine's IP address after it is created, and optionally, scripts for our tests or whatever we want to run on the host.
4. Generating the ARM Template
To create a virtual machine, we will first need to generate a template, a JSON file that we will include in the project code so that the pipeline can read it from there.
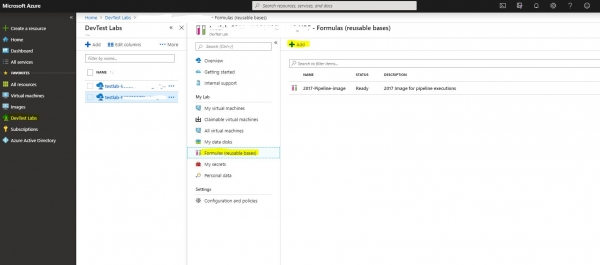
Go to our lab and find the Formulas (reusable bases) menu, and click to create a new one.
We will encounter a long list of images as a base, choose the machine size, and everything is the same as when creating a virtual machine. At this stage, we won't stop; we will immediately move to the last item in the machine's properties, namely artifacts. You can use any configurations necessary for your environment. For example, I add a machine to domain I also add a service account as an admin so that the pipeline can access this machine under that account. This can vary, but for successful code testing, we need one artifact, which we will detail further. To ensure that the latest version of the software we are testing is installed on our machine, we will use the artifact 'Download Azure Pipelines Artifact and Run Script'. Remember at the beginning I mentioned that a build with the application installer is being collected somewhere? Right now, we need to instruct the virtual machine, specifically the template, to go fetch this artifact. And not just fetch it but also install it, for which we fill in specific fields specifying the project, build name, and secret key. The secret key, as in all such systems, is generated in the account, in this case, in Azure DevOps, and is saved in Secrets in your lab. There's a small caveat: while we will save it in Secrets, it doesn't affect the template, as it will run under a different user within the pipeline, so we will need to manually enter the secret key into the template again.
Another artifact that needs to be included is 'Configure WinRM', as we will need it for subsequent access to the machine. There is only one parameter, hostname. Since we do not know it in advance, we will use the variable %COMPUTERNAME%.
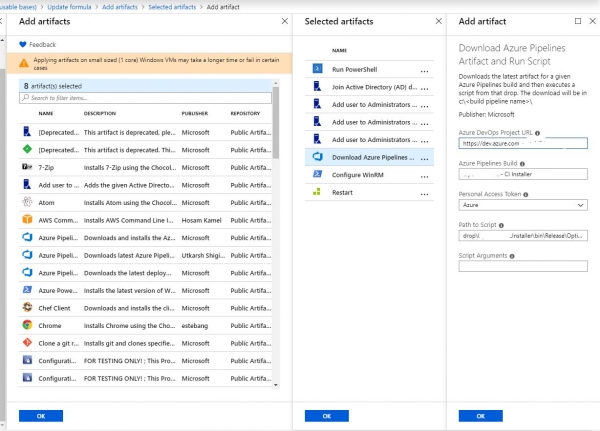
So we have added all the necessary artifacts; let's move on to the reason we are here. We extract the generated ARM Template from the Advanced tab of the same formula creation window.
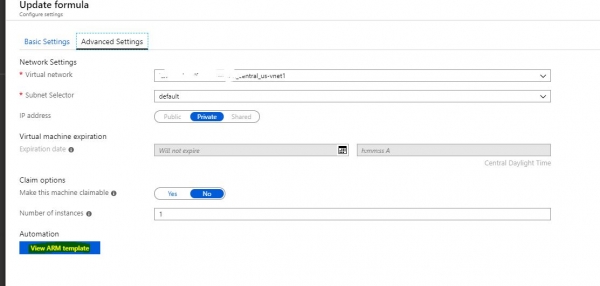
We copy the page content into the file VMtemplate.json and place it in the project root. We no longer need the cloud; let's return to the pipeline.
5. Pipeline Configuration
Let's start with the most important and interesting part: creating the virtual machine. That's the reason we did all these integrations and templates. In the Azure RM Subscription section, we select our Service connection that we configured in step 2. Next, the available lab environment should pop up. Then, we choose the JSON we generated and define some required variables. You can set the machine's login and password directly or through variables, but I'm not sure it works; whatever I wrote, I couldn't log into the machine with those credentials later. It's crucial to give the machine a name that is as unique as possible. For this, I use a build environment variable.
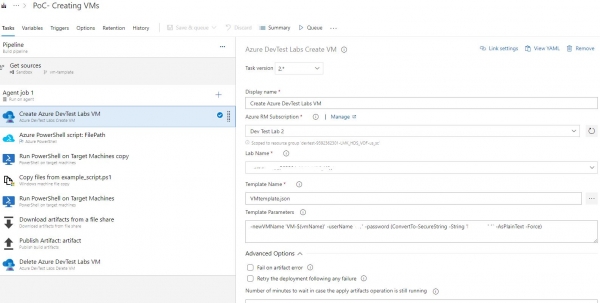
Next, we configure another important aspect. After the machine is up, we need to know its parameters, preferably not just for ourselves but for the pipeline. To do this, we create a script, for example, GetLabVMParams.ps1, and place it in the same project. I took the script text from the Microsoft website but modified it slightly for my environment since it was fetching the PublicIP and FQDN of the machine. I don't have either of those, but I do have a PrivateIP which is not easy to obtain, so I added a snippet.
Param( [string] $labVmId)

$labVmComputeId = (Get-AzureRmResource -Id $labVmId).Properties.ComputeId

# Get lab VM resource group name
$labVmRgName = (Get-AzureRmResource -Id $labVmComputeId).ResourceGroupName

# Get the lab VM Name
$labVmName = (Get-AzureRmResource -Id $labVmId).Name

# Get lab VM public IP address
# $labVMIpAddress = (Get-AzureRmPublicIpAddress -ResourceGroupName $labVmRgName -Name $labVmName).IpAddress

# Get lab VM FQDN
# $labVMFqdn = (Get-AzureRmPublicIpAddress -ResourceGroupName $labVmRgName -Name $labVmName).DnsSettings.Fqdn

# Get lab VM private IP address
$VmNetworkdetails= (((Get-AzureRmVM -ResourceGroupName $labVmRgName -Name $labVmName).NetworkProfile).NetworkInterfaces).Id
$nicname = $VmNetworkdetails.substring($VmNetworkdetails.LastIndexOf("/")+1)
$labVMnetwork = (Get-AzureRmNetworkInterface -Name $nicname -ResourceGroupName $labVmRgName)|Select-Object -ExpandProperty IPConfigurations
$labVMIpAddress = $labVMnetwork.PrivateIpAddress

# Set a variable labVmRgName to store the lab VM resource group name
Write-Host "##vso[task.setvariable variable=labVmRgName;]$labVmRgName"

# Set a variable labVMIpAddress to store the lab VM Ip address
Write-Host "##vso[task.setvariable variable=labVMIpAddress;]$labVMIpAddress"

# Set a variable labVMFqdn to store the lab VM FQDN name
Write-Host "##vso[task.setvariable variable=labVMFqdn;]$labVMFqdn"

Write-Output $labVMIpAddress

Set-Item wsman:localhostclienttrustedhosts * -Force
Out of everything the script reads, we only need the variable labVMIpAddress. At least that's what I need; you might need something else, so I didn't delete anything and just commented out the extras.
I will also explain the last line of the script; it allows our build machine to access any host via WinRM.
The next step is to launch our wonderful script. It will require the same connection to the cloud, along with the input variable containing the machine ID, which will already be known from the previous step. How? Here, we need to mention such a remarkable thing as Output Variables. Each step can have a list of variables that are passed on to the next steps in the pipeline. Accordingly, for our super script, that variable will be labVMIpAddress, so make sure to specify it.
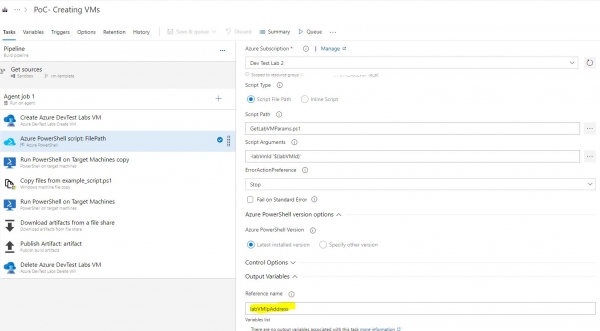
Next, I perform fairly simple actions, which can also vary from case to case. I execute a remote script to create a share where I will later upload my scripts.
New-Item "C:test" –type directory
New-SMBShare –Name "test" –Path "C:test"  –FullAccess everyone
From the task names, it is clear that next we copy a sample script to the machine and execute it in another step. For the remote machine address, we will need our variable $(labVMIpAddress). Next, we use the task 'retrieve artifact from the share' and copy the results of the script execution into our build environment, and then, using the same standard task, we save these files as build artifacts. After we no longer need the machine, we kill it as the final step. The main complexity, as seen from the volume of this article, is integrating with the cloud and establishing contact with the virtual machine you created; after that, you can have as much fun as you need.
This is my first article, so please don't be too harsh; feedback is welcome.
Source: habr.com
