

The latest patch for Zimbra Collaboration Suite Open-Source Edition 8.8.15 LTS has introduced full support for the long-term release of the Ubuntu 18.04 LTS operating system. This allows system administrators to create server infrastructures with Zimbra OSE that will be supported and receive security updates until the end of 2022. Implementing a collaboration system in your enterprise that remains relevant for more than three years while requiring minimal maintenance efforts is a great opportunity for businesses to reduce IT infrastructure ownership costs. Additionally, for SaaS providers, this option for deploying Zimbra OSE will enable them to offer more attractive but margin-friendly tariff plans to clients. Let’s explore how to install Zimbra OSE 8.8.15 on Ubuntu 18.04.

The server requirements for installing Zimbra OSE include a 4-core processor, 8 gigabytes of RAM, 50 gigabytes of hard disk space, as well as a FQDN, a DNS server for redirection, and an MX record. It is important to note that the bottleneck limiting the performance of Zimbra OSE is usually not the processor or RAM, but the hard drive. Therefore, it would be wise to purchase a high-speed SSD for the server, which won't have a significant impact on the overall server cost but will greatly increase the performance and responsiveness of Zimbra OSE. Let’s create a server with Ubuntu 18.04 LTS and Zimbra Collaboration Suite 8.8.15 LTS onboard and the domain name mail.company.ru.
The greatest challenges in installing Zimbra for beginners come from creating a FQDN and a DNS server for redirection. To ensure everything works smoothly, we will create a DNS server using the dnsmasq utility. First, we need to disable the systemd-resolved service. This can be done using the commands sudo systemctl disable systemd-resolved and sudo systemctl stop systemd-resolved. We will also remove the resolv.conf file using the command sudo rm /etc/resolv.conf and immediately create a new one using the command echo "nameserver 8.8.8.8" > /etc/resolv.conf.
Once this service is disabled, we need to install dnsmasq. This can be done using the command sudo apt-get install dnsmasq. After the installation is complete, dnsmasq needs to be configured by editing the configuration file. /etc/dnsmasq.confAs a result, it should look something like this:
server=8.8.8.8
listen-address=127.0.0.1
domain=company.ru   # Define domain
mx-host=company.ru,mail.company.ru,0
address=/mail.company.ru/***.16.128.192
With this, we have set the server address with Zimbra, configured the forwarding DNS server and MX record, and can now move on to other settings.
Using the command sudo hostnamectl set-hostname mail.company.ru we will set the domain name for the Zimbra OSE server, and then add the corresponding information to /etc/hosts using the command echo "***.16.128.192 mail.company.ru" | sudo tee -a /etc/hosts.
After that, we just need to restart the dnsmasq service using the command sudo systemctl restart dnsmasq and add A and MX records using the commands dig A mail.company.ru and dig MX company.ru. Once all this is done, you can proceed to install the Zimbra Collaboration Suite Open-Source Edition.
The installation of Zimbra OSE begins with downloading the distribution. You can do this using the command wget . Once the distribution is downloaded, you will need to unpack it using the command tar xvf zcs-8.8.15_GA_3869.UBUNTU18_64.20190917004220.tgz. After the unpacking is complete, you will need to navigate to the unpacked folder using the command cd zcs*/, and then start the installation script using the command ./install.sh.
After launching the installer, you will need to accept the terms of use and agree to use the official Zimbra repositories for updates. You will then be prompted to select packages for installation. When the packages are selected, a warning will appear that the system will be changed during the installation. Once the user agrees to the changes, the missing modules and updates will begin to download and install. After the installation is complete, the installer will prompt you to perform the initial setup of Zimbra OSE. At this stage, you will need to set the administrator password. To do this, first go to item 7 in the menu, and then select item 4. After that, the installation of Zimbra Open-Source Edition will be complete.
Once the installation of Zimbra OSE is complete, you only need to open the necessary web ports for its operation. This can be done using the built-in Ubuntu firewall called ufw. To get everything working, you must first allow unrestricted access from the administrative subnet using the command ufw allow from 192.168.0.1/24, and then in the configuration file /etc/ufw/applications.d/zimbra create a Zimbra profile:
[Zimbra]

title=Zimbra Collaboration Server
description=Open source server for email, contacts, calendar, and more.
ports=25,80,110,143,443,465,587,993,995,3443,5222,5223,7071,9071/tcp
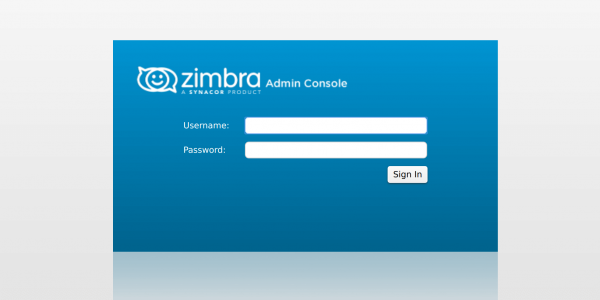
Next, using the command sudo ufw allow Zimbra you need to activate the created Zimbra profile, and then restart ufw with the command sudo ufw enable. We will also open access to the server via SSH using the command sudo ufw allow ssh. After the necessary ports are open, you can access the Zimbra administration console. To do this, you need to enter in the browser's address bar mail.company.ru:7071, or, if using a proxy, mail.company.ru:9071, and then enter admin as the username and the password that you set during the installation of Zimbra.
After completing the installation of Zimbra OSE, you will have a fully functional solution for email and collaboration in your organization's infrastructure. However, the capabilities of your mail server can be significantly expanded by using Zextras Suite Pro extensions. They allow adding support for mobile devices, collaboration on documents, spreadsheets, and presentations in the Zimbra Collaboration Suite Open-Source Edition, and optionally, you can add support for text and video chats as well as video conferencing in Zimbra OSE.
Installing Zextras Suite Pro is quite simple; just download the distribution from the official Zextras website using the command wget , then unpack this archive tar xfz zextras_suite-latest.tgz, navigate to the folder with the unpacked files cd zextras_suite/ and run the installation script using the command ./install.sh all. After that, all that remains is to clear the Zimbra OSE cache with the command zmprov fc zimlet and you can start using Zextras Suite.
It is important to note that to use the Zextras Docs extension, which allows employees to collaboratively work on text documents, spreadsheets, and presentations, a separate server application needs to be installed. The distribution for the operating system can be downloaded from the Zextras website. . Additionally, the functionality for online communication among employees using Zextras Team is available on mobile devices through an app that can also be downloaded for free from and . Furthermore, there is a mobile application for accessing the Zextras Drive cloud storage, which is available for and devices running on .
. By installing Zimbra OSE 8.8.15 LTS and Zextras Suite Pro on Ubuntu 18.04 LTS, you can achieve a fully functional collaborative solution that, due to its long support lifecycle and low licensing cost, will significantly reduce the total cost of ownership of the company's IT infrastructure.
The safety alphabet in Kubernetes: authentication, authorization, auditing
Source: habr.com
