

Note: translation.: the original article was written by Josh Rosso — an architect at VMware, previously working at companies like CoreOS and Heptio, and co-author of Kubernetes alb-ingress-controller. The author shares a brief recipe that may be very helpful for "old-school" operations engineers who prefer vim even in the era of cloud-native dominance.
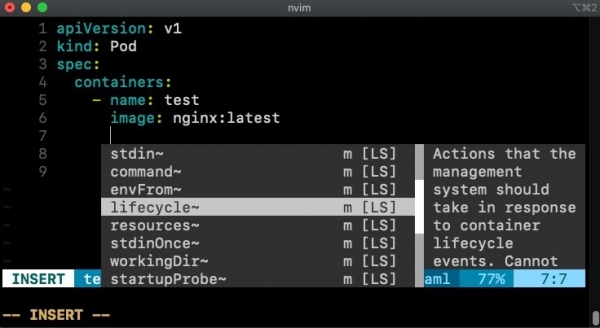
Are you writing YAML manifests for Kubernetes in vim? Have you spent countless hours trying to figure out where the next field should go in this specification? Or maybe you would appreciate a quick reminder of the difference args and command? Есть хорошие новости! Vim легко привязать к , to get auto-completion, validation, and other conveniences. This article will discuss how to set up the language server client for this purpose.
(The original article also , where the author talks and demonstrates the content of the material.)
Language server
Language servers (language servers) provide language capabilities to editors and IDEs, interacting with each other via a special protocol — (LSP). This is a wonderful approach: it allows a single implementation to provide data to multiple editors/IDEs at once. I have already about — a language server for Golang — and how to use it in . The steps for achieving auto-completion in YAML for Kubernetes are similar.
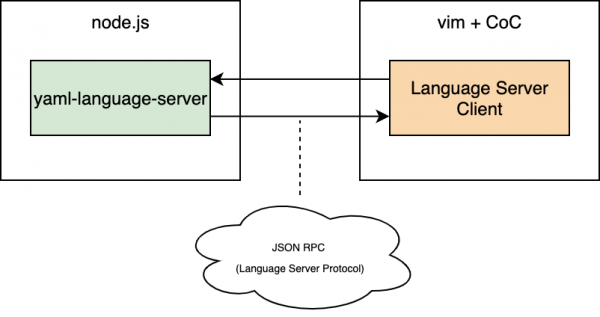
To make vim work as described, you will need to install a language server client. The two methods I know are and . In this article, I will consider coc.vim — it is currently the most popular plugin. You can install it via :
" Use release branch (Recommend)
Plug 'neoclide/coc.nvim', {'branch': 'release'}

" Or build from source code by use yarn: https://yarnpkg.com
Plug 'neoclide/coc.nvim', {'do': 'yarn install --frozen-lockfile'}
To run coc (and, thus, the yaml-language-server) you will need to have node.js installed:
curl -sL install-node.now.sh/lts | bash Once coc.vim set up, install the server extension coc-yaml from vim:
:CocInstall coc-yaml 
Finally, you will likely want to start with the configuration coc-vim, presented . In particular, it activates the combination +space to trigger auto-completion.
Setting up the detection of the yaml-language-server
To coc You can use the yaml-language-server; it needs to be instructed to load the Kubernetes schema when editing YAML files. This is done by modifying coc-config:
:CocConfig The configuration will require adding kubernetes for all files yaml. I additionally use the language server for golang, so my overall config looks like this:
{
  "languageserver": {
      "golang": {
        "command": "gopls",
        "rootPatterns": ["go.mod"],
        "filetypes": ["go"]
      }
  },

  "yaml.schemas": {
      "kubernetes": "/*.yaml"
  }
}
kubernetes — a reserved field that informs the language server to load the Kubernetes schema from the URL specified in . yaml.schemas can be extended to support additional schemas — see the .
Now you can create a YAML file and start using autocompletion. Pressing +space (or another combination set up in vim) should show available fields and documentation according to the current context:
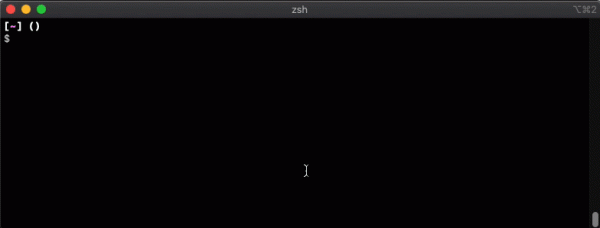
Here, +space works because I set up inoremap coc#refresh(). If you haven’t done this — see for a sample configuration.
Choosing the Kubernetes API version
As of this writing, the yaml-language-server comes with schemas for Kubernetes 1.14.0. I couldn’t find a way to dynamically select the schema, so I opened . Fortunately, since the language server is written in TypeScript, it is quite easy to manually change the version. You simply need to find the file server.ts.
To find it on your machine, just open a YAML file with vim and look for the process with yaml-language-server.
ps aux | grep -i yaml-language-server

joshrosso         2380  45.9  0.2  5586084  69324   ??  S     9:32PM   0:00.43 /usr/local/Cellar/node/13.5.0/bin/node /Users/joshrosso/.config/coc/extensions/node_modules/coc-yaml/node_modules/yaml-language-server/out/server/src/server.js --node-ipc --node-ipc --clientProcessId=2379
joshrosso         2382   0.0  0.0  4399352    788 s001  S+    9:32PM   0:00.00 grep -i yaml-language-server
The process 2380 is relevant for us: it is the one used by vim while editing the YAML file.
As you can easily see, the file is located in /Users/joshrosso/.config/coc/extensions/node_modules/coc-yaml/node_modules/yaml-language-server/out/server/src/server.js. It is sufficient to edit it, changing the value of KUBERNETES_SCHEMA_URL, for example, to version 1.17.0:
// old 1.14.0 schema
//exports.KUBERNETES_SCHEMA_URL = "https://raw.githubusercontent.com/garethr/kubernetes-json-schema/master/v1.14.0-standalone-strict/all.json";
// new 1.17.0 schema in instrumenta repo
exports.KUBERNETES_SCHEMA_URL = "https://raw.githubusercontent.com/instrumenta/kubernetes-json-schema/master/v1.17.0-standalone-strict/all.json";
Depending on the version you are using, coc-yaml the location of the variable in the code may vary. Also, note that I changed the repository from garethr to instrumenta. It seems that garethr migrated to support schemas there.
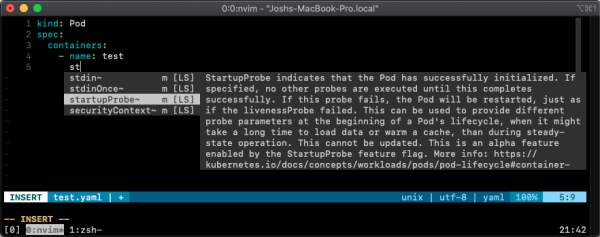
To check if the change has taken effect, see if the field that did not exist before [in earlier versions of Kubernetes] appears. For example, the schema for K8s 1.14 did not have this field. :
Summary
I hope this feature delights you as much as it did me. Happy YAML-ing! Don’t forget to check out these repositories to better understand the utilities mentioned in the article:
- coc-vim: ;
- coc-yaml: .
P.S. from the translator
And there is also , and .
Also read in our blog:
- «»;
- «».
Source: habr.com
