

Using virtual machines on Linux in Hyper-V out of the box is a slightly less comfortable experience than with guest Windows-machines. The reason for this is that Hyper-V wasn't originally designed for desktop use; you can't simply install the Guest Additions package and get working graphics acceleration, clipboard, shared directories, and other perks, like you can with VirtualBox.
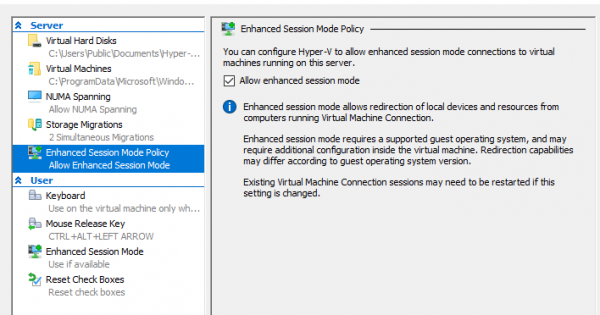
Hyper-V itself provides - so, guests can use the shadow copy service (VSS) of the host, guests can send a shutdown signal, guests can synchronize the system time with the virtualization host, files can be exchanged with the virtual machine from the host (Copy-VMFile in PowerShell). For some guest operating systems, which of course includes Windows, in the Virtual Machine Connection application (vmconnect.exe) Enhanced Session Mode is available, which works via the RDP protocol and allows you to forward disk devices and printers to the virtual machine, as well as use the shared clipboard.
Enhanced Session Mode works out of the box Windows in Hyper-V immediately after installation. With guests on Linux you need to install an RDP server that supports vsock (a special virtual network address space in Linux, designed to communicate with the hypervisor). If for Ubuntu in the VMCreate application that comes with Hyper-V on desktop editions Windows, there is a special prepared virtual machine template in which an RDP server works with vsock already pre-installed, then with other distributions it is less and less clear - for example, the author We managed to enable ESM in Fedora. Here we also activate Enhanced Session Mode for the Arch virtual machine. Linux.
Installing integration services
Everything is more or less simple here, we just need to install the package hyperv from community repository:
% sudo pacman -S hypervEnable VSS services, exchange and files:
% for i in {vss,fcopy,kvp}; do sudo systemctl enable hv_${i}_daemon.service; doneXRDP Installation
Repository provides scripts on GitHub that automate the process of installing and configuring XRDP for Arch Linux и UbuntuLet's install Git, if it's not already installed, along with a compiler and other software for manual builds, and then clone the repository:
% sudo pacman -S git base-devel
% git clone https://github.com/microsoft/linux-vm-tools.git
% cd linux-vm-tools/arch
At the time of this writing, the most recent release of XRDP, which is installed by the script makepkg.shproposed in the repository is 0.9.11, vsock://-addresses, so you have to install XRDP from Git and the Xorg driver for it from AUR manually. The patch for XRDP offered in the AUR is also slightly outdated, so you will have to edit the PKGBUILD and the patch manually.
We clone the repositories with PKGBUILDs from the AUR (usually this procedure, along with the assembly, is automated by programs like , but the author did this whole procedure on a clean system):
% git clone https://aur.archlinux.org/xrdp-devel-git.git
% git clone https://aur.archlinux.org/xorgxrdp-devel-git.git
Let's install XRDP itself first. Let's open the file PKGBUILD any text editor.
Let's edit the build parameters. The PKGBUILD for building XRDP from Git does not include vsock support in the build, so let's enable it ourselves:
 build() {
   cd $pkgname
   ./configure --prefix=/usr
               --sysconfdir=/etc
               --localstatedir=/var
               --sbindir=/usr/bin
               --with-systemdsystemdunitdir=/usr/lib/systemd/system
               --enable-jpeg
               --enable-tjpeg
               --enable-fuse
               --enable-opus
               --enable-rfxcodec
               --enable-mp3lame
-              --enable-pixman
+              --enable-pixman
+              --enable-vsock
   make V=0
 }
In a patch arch-config.diff, ruling units and XRDP startup scripts under the file paths used in Arch Linux, contains a patch to the script instfiles/xrdp.sh, which at the time of writing from the XRDP distribution, so the patch will have to be edited manually:
  [Install]
  WantedBy=multi-user.target
-diff -up src/xrdp-devel-git/instfiles/xrdp.sh.orig src/xrdp-devel-git/instfiles/xrdp.sh
---- src/xrdp-devel-git/instfiles/xrdp.sh.orig  2017-08-30 00:27:28.000000000 -0600
-+++ src/xrdp-devel-git/instfiles/xrdp.sh   2017-08-30 00:28:00.000000000 -0600
-@@ -17,7 +17,7 @@
- # Description: starts xrdp
- ### END INIT INFO
-
--SBINDIR=/usr/local/sbin
-+SBINDIR=/usr/bin
- LOG=/dev/null
- CFGDIR=/etc/xrdp
-
 diff -up src/xrdp-devel-git/sesman/startwm.sh.orig src/xrdp-devel-git/sesman/startwm.sh
 --- src/xrdp-devel-git/sesman/startwm.sh.orig  2017-08-30 00:27:30.000000000 -0600
Build and install the package with the command % makepkg --skipchecksums -si (key --skipchecksums is needed to disable checksum verification of source files, since we edited them manually).
Let's go to the directory xorgxrdp-devel-git, after which we simply build the package with the command % makepkg -si.
Let's go to the directory linux-vm-tools/arch and run the script install-config.sh, which sets XRDP, PolicyKit and PAM settings:
% sudo ./install-config.shScript installs legacy setting use_vsock, which is ignored since version 0.9.11, so let's edit the configuration file /etc/xrdp/xrdp.ini manually:
 ;   port=vsock://<cid>:<port>
-port=3389
+port=vsock://-1:3389

 ; 'port' above should be connected to with vsock instead of tcp
 ; use this only with number alone in port above
 ; prefer use vsock://<cid>:<port> above
-use_vsock=true
+;use_vsock=true

 ; regulate if the listening socket use socket option tcp_nodelay
Add to file ~/.xinitrc launching your preferred window manager/desktop environment, which will be executed when the X server is started:
% echo "exec i3" > ~/.xinitrcLet's turn off the virtual machine. Enable the vsock transport for the VM by running the following command in PowerShell as an administrator:
PS Admin > Set-VM -VMName НАЗВАНИЕ_МАШИНЫ -EnhancedSessionTransportType HvSocketLet's turn on the virtual machine again.
connection
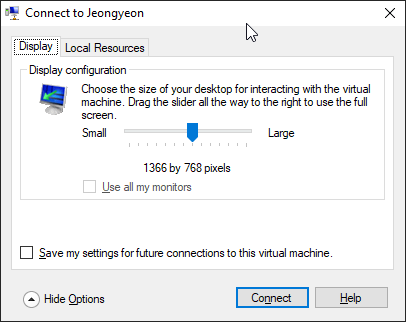
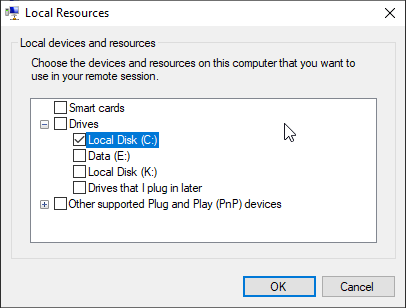
As soon as the XRDP service starts after the system starts, the vmconnect application will determine this and the menu item will become available. View -> Enhanced session. When you select this item, we will be prompted to set the screen resolution, and on the tab local resources in the dialog that opens, you can select the devices forwarded inside the RDP session.
Let's connect. We will see the XRDP login window:
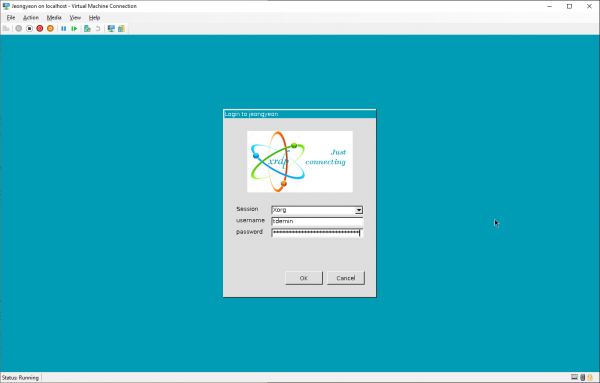
Enter your username and password.
Using
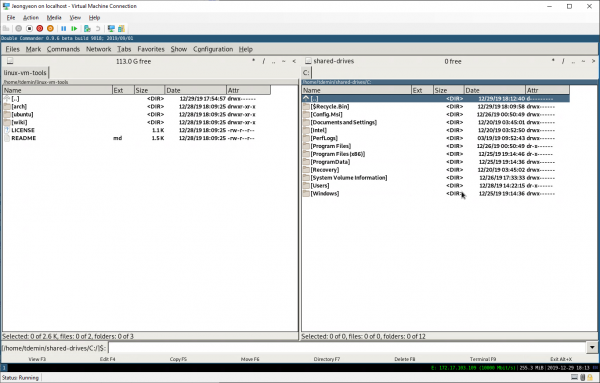
The profit from these manipulations is noticeable: the RDP session works much more responsive than when working with a virtual display without Enhanced Session. The disks forwarded inside the VM via RDP are available in the directory ${HOME}/shared-drives:
The clipboard is working fine. You cannot throw printers inside, this is not only not supported, but also . The sound also does not work, but the author did not need it. In order to capture keyboard shortcuts like Alt + Tab, you need to expand vmconnect to full screen.
If for any reason you want to use the built-in vmconnect application instead of the Windows RDP client or, for example, connect to this machine from another machine, then you will need to change the file /etc/xrdp/xrdp.ini port + tcp://:3389. If the virtual machine is connected to the Default Switch and receives network settings via DHCP, then you can connect to it from the host at название_машины.mshome.net. You can only log in to TTY from the vmconnect application by turning off Enhanced Mode.
Used sources:
- Bug reports on GitHub: ,
Source: habr.com
