


Today we will create a so-called. Yandex function (official name ), which colluded with the mailing list service will send "soap" to peacefully sleeping users (just kidding - I know that we are all against spam).
I am also an opponent (but without fanaticism) of traditional servers, and a supporter of the so-called. serverless integration platform (serverless) solutions, because I don’t like (and really don’t know how) to administer servers, and even more so - to pay for the time when they are not loaded. Another thing is functions. Someone serves them without me, and I pay only for calls. At the beginning of October 2019, Yandex presented its Yandex Cloud Functions - it seems the first in the Russian Federation serverless integration platform. And what is especially nice - for Alice's skills they are generally free, so since then they have been in my peripheral vision. But let's get started already.
Let's imagine such a scenario. Your application (for example, Alice's skill which by the way also works on Yandex functions) prompts the user to buy a digital product, such as additional options, and the user makes a payment. Some payment system (confusingly similar to ) processes the payment, and sends it to the address you provided (and we will have a link to call Yandex functions) HTTP- a request containing payment details, such as the amount, full name, phone number and e-mail of the payer. We want to process this data in some way, for example: check the amount, make the appropriate entries in the database, send to users SMS и Email with confirmation of receipt of payment and further instructions. Such a microservice.
About how from Yandex functions make entries in the database Cloud Firestore we have already covered in the tutorial (and in the future, I think, we will consider an example for another database - ). About how to send to users SMS and integrate our application with Yandex.Money - We'll figure it out in the near future. Now let's just deal with sending letters.
1. Create an account in SendGrid
NoteSendGrid is just my choice, which I made for several reasons, the main of which is that they have a ready-made SDK for Node.js. You can choose any other mailing service.
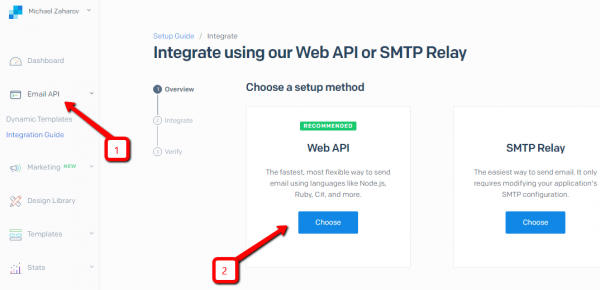
Move on and fill out the registration form there. Then we go to Dashboard, in the navigation bar select Email API -> Integration Guide, and on the main panel - WebAPI and press the button Choose. All as in the picture:
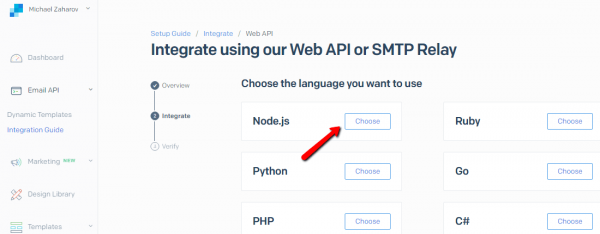
In the next step, choose Node.js:
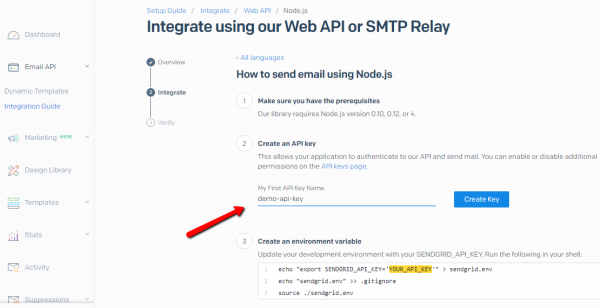
Next, we invent for our API-key name (will be displayed only in the console in the list of keys, and has nothing to do with our future code; I came up with an imperishable demo-api-key) and press the button Create Key:
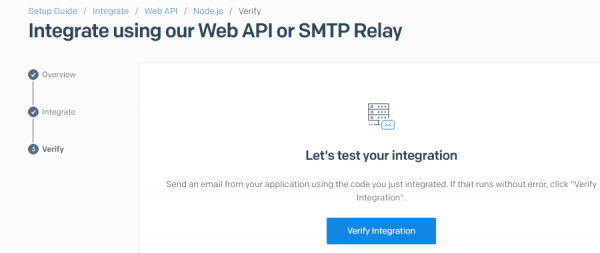
The key will be generated, we will copy it and keep it in the deepest secrecy. And we will have a screen with a button Verify Integration, as in the picture below, but we won’t press it yet, but move on to writing code:
2. Code writing
And the code itself, as you can see, is ridiculously small - 22 lines!
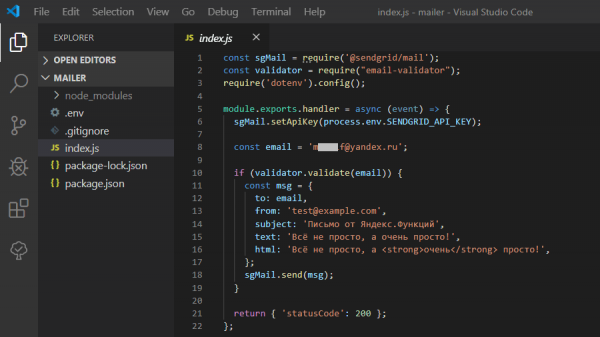
In line #8 my mail is written in hardcode (and therefore bashfully covered) - you specify yours. In real life, we will receive all data (including Email) from the object events. For example, if the method POST an object is sent to our function user with field (property) Email, the value of this field can be obtained like this:
const { user } = event;
const email = user.email;
And if the email address is passed to the function by the method GET, For example: https://functions.yandexcloud.net/123abc?email=user@example.com
parameter value Email can be obtained like this:
const email = event.queryStringParameters.email;To take a look at what exactly is contained in an object events, you can create a simple Yandex function and twist it with requests:
module.exports.handler = async function (event) {
  return {
   'statusCode': 200,
   'body': JSON.stringify(event)
  };
};
More (but less intelligibly) about this is stated in the official documentation. .
So, we create a project directory (for example, mailers), go to it, initialize the project, install the dependencies:
mkdir mailer
cd mailer
npm init -y
npm i @sendgrid/mail email-validator dotenv
Only the package is required here @sendgrid/mail... Package email-validator checks the validity of the mail address (how did I not guess right away?), but if we are sure of it (it has been checked for a long time without us), we can not install it (and, of course, do not check in the code). Plastic bag dotenv designed to read records from a file .env as runtime variables. But in Yandex functions it is possible to put these variables directly into the runtime environment. How? - I'll show it below. Therefore the package dotenv you can also not install, and the file .env - do not create, and at the same time the code in the file index.js do not change. But here we have installed this package, so we create files index.js и .env:
touch index.js
touch .env
In file index.js write 22 lines of code shown in the screenshot above (only in the line #8 change your mail), and in the file .env - (without any quotes and punctuation marks) specify a pair - the name / value of the key API, which we recently received in the console SendGrid:
SENDGRID_API_KEY=your-very-secret-sendgrid-api-key
And if you want less work, clone the repository, install the packages:
git clone https://github.com/stmike/ycf-sendgrid-mailer-tutorial.git
cd ycf-sendgrid-mailer-tutorial
npm i
In file index.js, in line #8 change mail; create a file in the root directory .env, and in it specify the name/value of the key APIas shown just above.
3. Deploy
More or less clear and detailed about Yandex.Cloud and how to place Yandex functions described in my article - I send the ignorant to this country, and for everyone else (and those who returned) - then a small comic (ie a series of pictures and text).
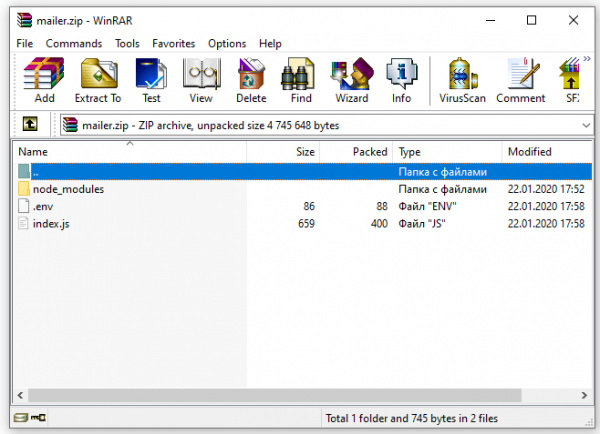
Create zip-archive (let's call it, for example, mailer.zip), which includes the directory node_modules and files .env, index.js - everything from our project directory:
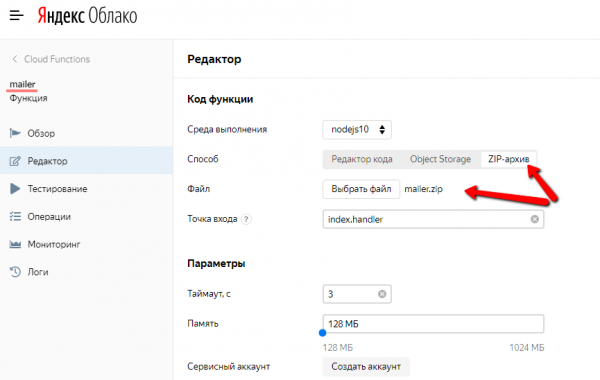
We create a function with the name ... right - mailers, in the left navigation menu, select Editor, fill in the required fields, and switch to the tab ZIP archive uploading our archive mailer.zip:
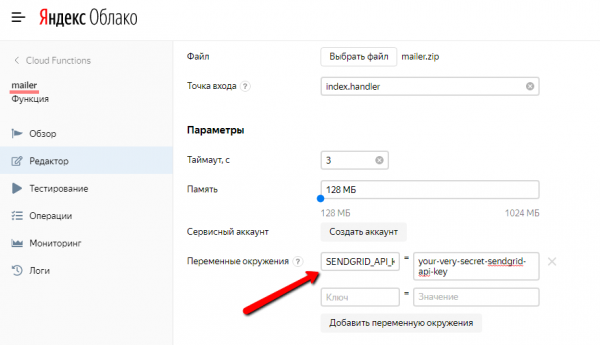
And here is the previously mentioned option to download API key directly here instead of creating a file in the project .env, and don't install the package dotenv. But we have already done all this, so I show it just for information. That is - no need to duplicate!
Now click on the button in the upper right corner Create Versionand wait a couple of seconds. When everything is ready, we will automatically go to the section Review. There we enable the option public functionso that it can be interacted with from the outside world.
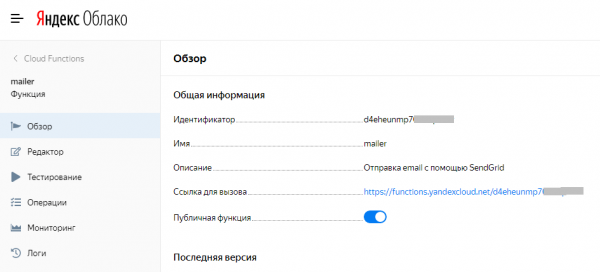
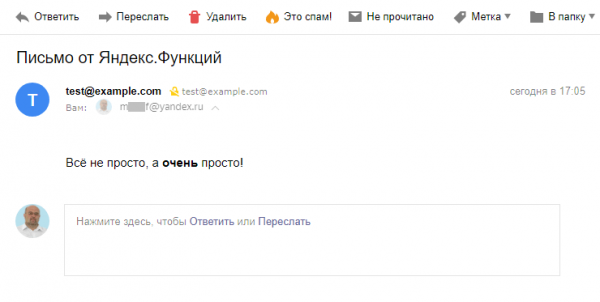
See the blue link next to the inscription Link to call? Click it. An empty browser window will open... But wait, I received an email:
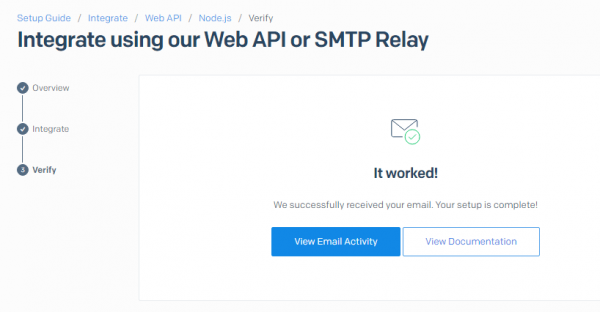
Now you can return to the console SendGrid, and press the button Verify Integration. The system will check everything through its channels, and as a result it should return such a screen:
So, guys (and girls, of course) - everything is really very simple and elegant! There will be more articles. If you're interested in reading this, subscribe so you don't miss it.
4. Donations
Source: habr.com
