

Why GCP?
When writing Telegram bots, I faced the question of how to make the bot run continuously, quickly and for free. Options like Heroku and PythonAnywhere have too low limits if you have more than one bot. So, I decided to use GCP. The platform offers $300 for free for a year + huge discounts when using these funds (up to 94%).

How to host your bot?
Step 1. Register on GCP
Go to the website and click Get started for free.

Enter your details and card information. Funds will not be charged from the card unless you activate a paid subscription.

Step 2. Create a virtual machine
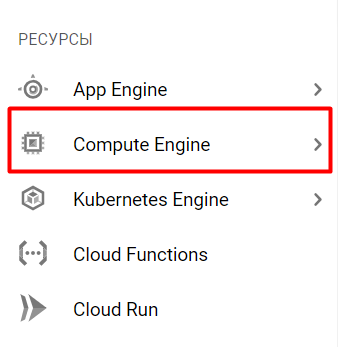
After registration, you will land on the main service page. You need to select the Compute Engine tab in the Resources section.
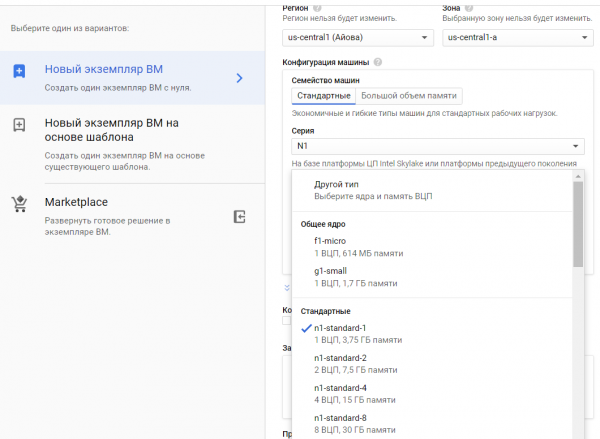
You need to create a new instance.

If you are not deploying a database on virtual machine, you can take g1-small, otherwise I recommend n1-standard.
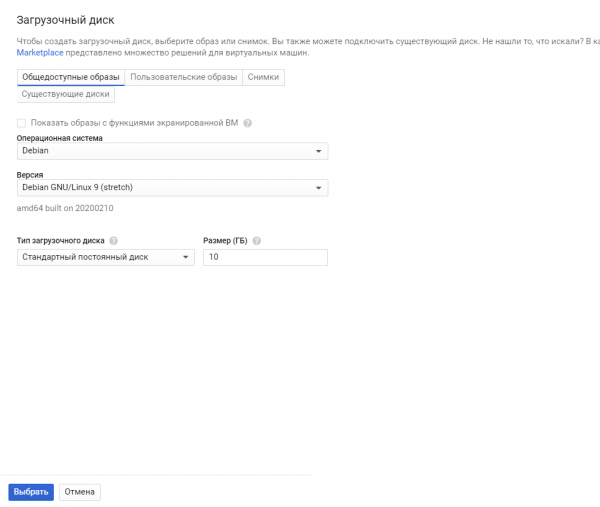
You will also need to select an OS. I chose Debian GNU/Linux 9 (stretch).
That's it, the VM is created. Usually, its deployment takes from 1 to 5 minutes.
Step 3. Configure the virtual machine
You can connect via SSH from your PC or interact through the platform.
To do this, click on SSH.

A Linux terminal will open in a new window.
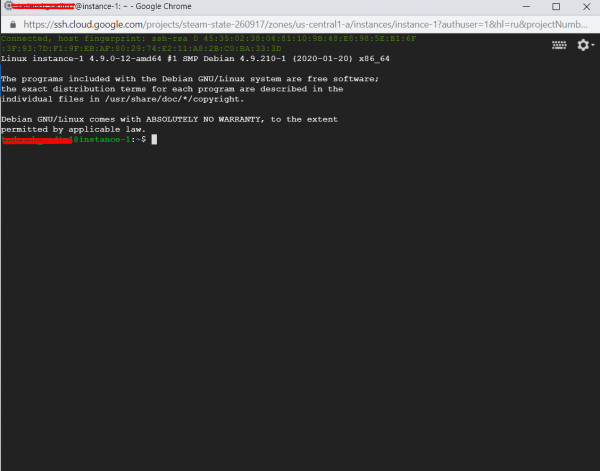
Now let's proceed to the configuration. First, enter the command:
sudo apt-get updateto update the information about the latest package versions.
Then enter:
sudo apt-get install python3-setuptools
sudo apt-get install python3-pip
You don't need to install Python itself; it's already there.
Now you need to install all the required libraries. There is a small nuance: all libraries need to be installed twice:
pip3 install ‘name_of_package’for use with the python3 command, and
sudo pip3 install ‘name_of_package’ for systemd. This utility will help you run the bot and restart it if it crashes.
The easiest way to run the bot is through python3, but it will turn off if you disconnect. You can use screen, but the bot won't restart automatically. You can also use crontab with port checking, but I think this option is more complicated than systemd.
Step 4. Upload the bot to the server
There are two ways to upload your bot. If you are not familiar with Git, you can simply archive the bot into a .tar file and upload it to the server:
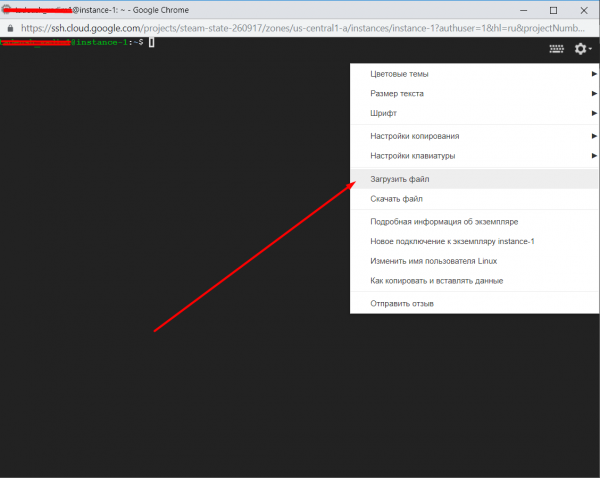
After that, we unpack it with the command:
tar -xvf yourfile.tarNow your bot is stored in the folder with the name of the archive.
The second method is through Git. I think it’s unnecessary to explain how to do this to people who know how to use it.
After installing it with the command:
sudo apt install gitYou can clone it to your VM.
After this, we move on to configuring systemd. For this, navigate to its directory:
cd /etc/systemd/systemAnd create the bot.service file:
sudo nano bot.serviceEnter the following in the opened window:
[Unit]
Description=Telegram bot 'Bot Name'
After=syslog.target
After=network.target

[Service]
Type=simple
User=root
WorkingDirectory=/home/your_username/folder_name_with_bot
ExecStart=/usr/bin/python3 /home/your_username/folder_name_with_bot/bot.py

RestartSec=10
Restart=always

[Install]
WantedBy=multi-user.target
Close and save the file. You can close it using the command Ctrl+X.
After this, enter the commands one by one:
sudo systemctl daemon-reload
sudo systemctl enable bot
sudo systemctl start bot
sudo systemctl status bot
If everything goes well, you will see something like this:
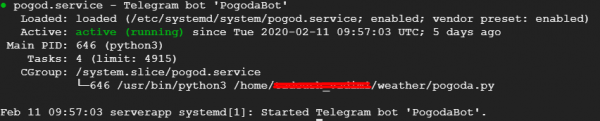
That’s it, now your bot runs on its own. I hope my article helps you host your bot.
P.S.
1. Check your bot for errors
Run your bot and check its functionality before launching it through systemd. To do this, navigate to the bot folder and run it using python.
cd
python3 bot.py
2. Add encoding to the py script files
#!/usr/bin/env python
# -*- coding: utf-8 -*-
Insert at the beginning of the file.
3. Errors in systemd
If you checked the bot for errors and it was working fine, but it doesn't want to start in systemd, you can check the logs to understand what the error is by viewing the file:
sudo nano /var/log/syslogYou can download this file and view it on your computer using Notepad++.
4. Update the bot
If you want to add or upload a new version of the bot, enter the command:
sudo systemctl stop botPerform all necessary manipulations. Then enter the following commands to get it running again:
sudo systemctl daemon-reload
sudo systemctl start bot
sudo systemctl status bot
Source: habr.com
