


In most cases, connecting a router to a VPN is not difficult, but if you want to protect an entire network while maintaining optimal connection speed, the best solution would be to use a VPN tunnel. .
Routers Mikrotik have established themselves as reliable and very flexible solutions, but unfortunately and it is unknown when it will appear and in what form. Recently, the developers of the WireGuard VPN tunnel proposed , which will make their VPN tunnel software part of the Linux kernel, we hope this will facilitate its implementation in RouterOS.
But for now, unfortunately, to set up WireGuard on a Mikrotik router, you need to change the firmware.
We flash Mikrotik, install and configure OpenWrt.
First, you need to ensure that OpenWrt supports your model. You can check the correspondence of the model to its marketing name and image .
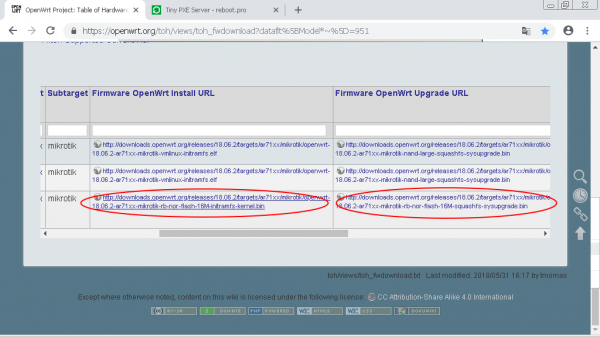
Go to openwrt.com .
For this device, we need 2 files:
You need to download both files: Install and Upgrade.
1. Network setup, downloading and configuring a PXE server
Download for the latest version of Windows.
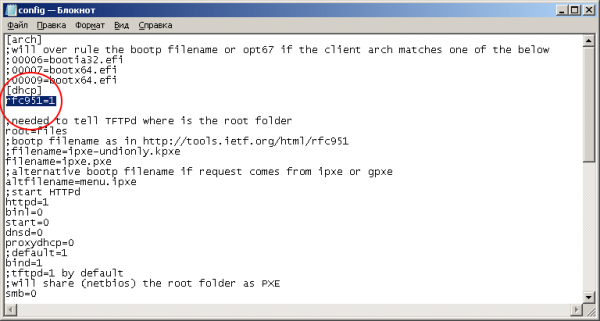
Extract to a separate folder. In the config.ini file, add the parameter rfc951=1 section [dhcp]. This parameter is the same for all Mikrotik models.
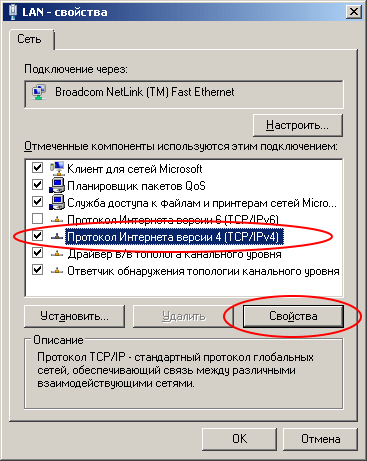
Now let's go to network settings: you need to set a static IP address on one of the network interfaces of your computer.
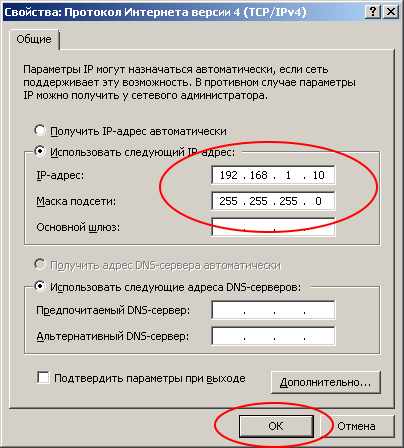
IP address: 192.168.1.10
Subnet mask: 255.255.255.0
Run Tiny PXE Server as Administrator and select in the field DHCP Server server with address 192.168.1.10
In some versions of Windows, this interface may only appear after connecting Ethernet. I recommend connecting the router and directly linking the router and PC with a patch cable.
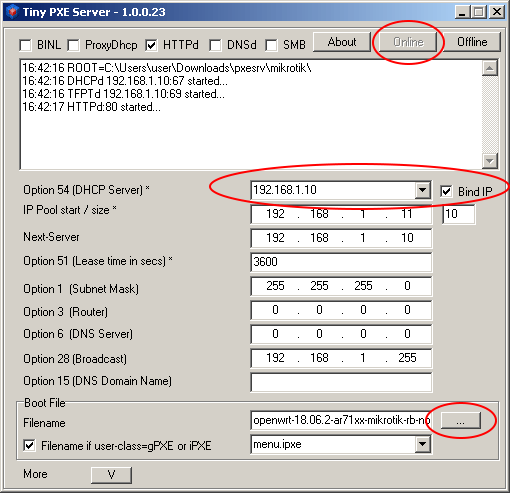
Click the button "…" (bottom right) and specify the folder where you downloaded the firmware files for Mikrotik.
Select the file whose name ends with "initramfs-kernel.bin or elf"
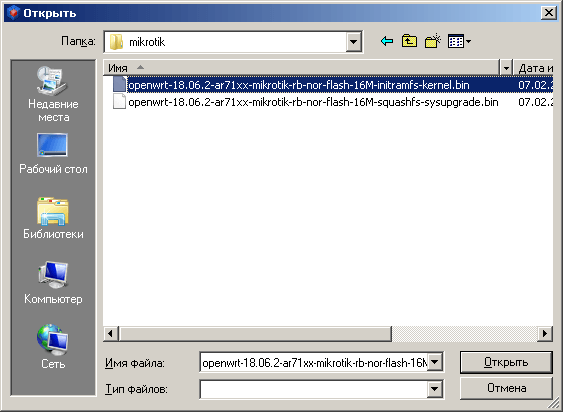
2. Booting the router from the PXE server
Connect the PC and the first port (wan, internet, poe in, …) of the router with a cable. After this, take a toothpick, insert it into the hole marked "Reset."

Turn on the power to the router and wait about 20 seconds, then release the toothpick.
In the next minute, the following messages should appear in the Tiny PXE Server program window:
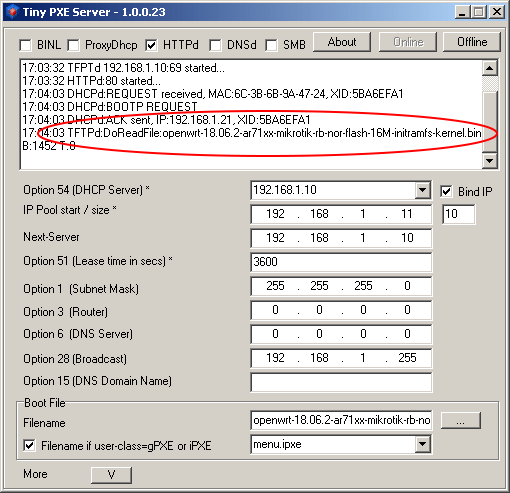
If the message appears, you're heading in the right direction!
Restore the settings on the network adapter and set it to obtain an address dynamically (via DHCP).
Connect to the LAN ports of the Mikrotik router (2…5 in our case) using the same patch cable. Just switch it from port 1 to port 2. Open the address in your browser.
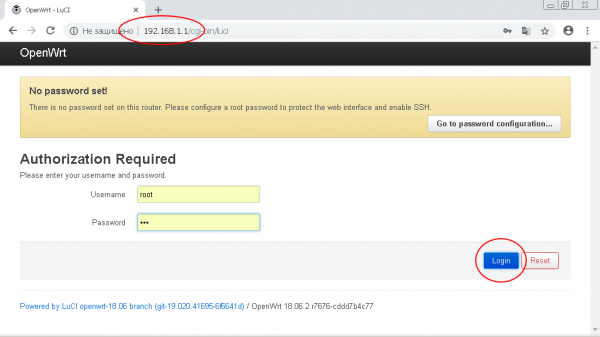
Log into the OpenWRT admin interface and navigate to the menu section 'System -> Backup/Flash Firmware'
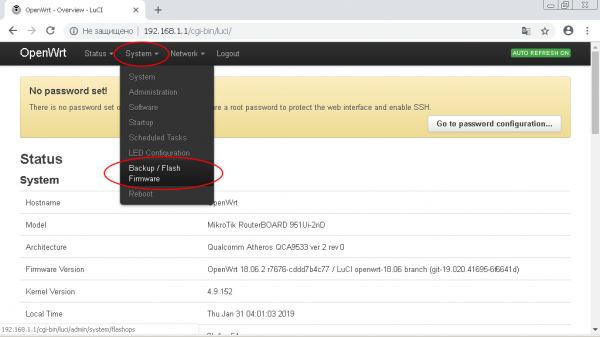
In the 'Flash new firmware image' subsection, click the 'Choose File (Browse)' button.
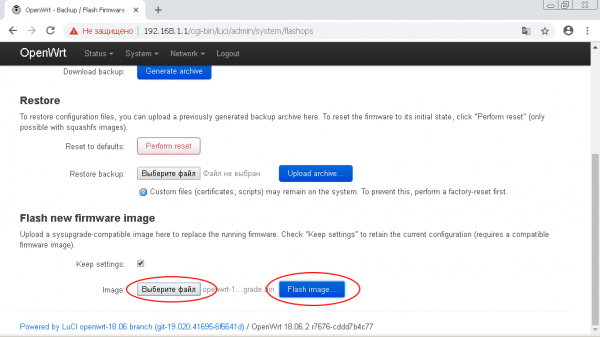
Specify the path to the file, which should end with '-squashfs-sysupgrade.bin'.
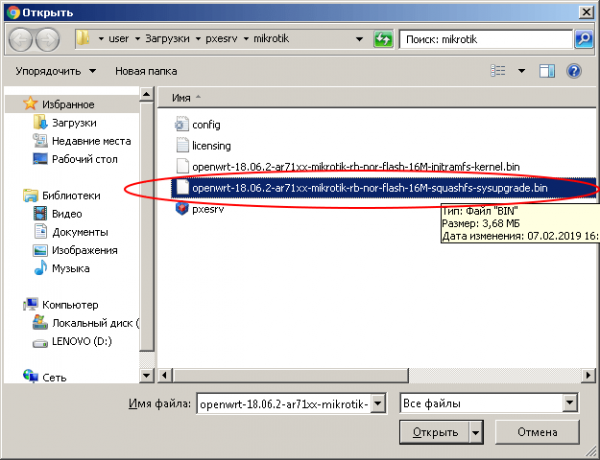
After that, click the 'Flash Image' button.
In the next window, click the 'Proceed' button. The firmware will begin uploading to the router.
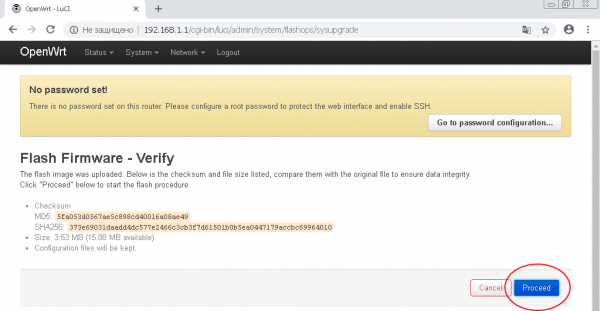
!!! DO NOT DISCONNECT THE ROUTER'S POWER DURING THE FIRMWARE PROCESS !!!
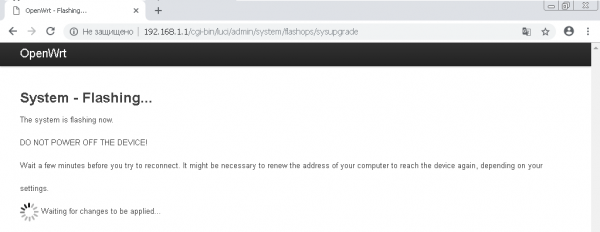
After flashing and rebooting the router, you'll have a Mikrotik with OpenWRT firmware.
Possible issues and their solutions
Many Mikrotik devices released in 2019 use the FLASH-NOR memory chip type GD25Q15/Q16. The issue is that when re-flashing, the model data is not preserved.
If you see the error 'The uploaded image file does not contain a supported format. Make sure that you choose the generic image format for your platform.', the flash is likely the problem.
You can easily check this: run the model ID check command in the device terminal
root@OpenWrt: cat /tmp/sysinfo/board_nameAnd if you receive the response 'unknown', you need to manually specify the device model as 'rb-951-2nd'
To obtain the device model, execute the command
root@OpenWrt: cat /tmp/sysinfo/model
MikroTik RouterBOARD RB951-2nd
Having obtained the device model, set it manually:
echo 'rb-951-2nd' > /tmp/sysinfo/board_nameAfter that, you can flash the device through the web interface or using the 'sysupgrade' command
Create a VPN server with WireGuard
If you already have a server with WireGuard configured, you can skip this step.
I will use the application for setting up my personal VPN server which I have already .
Setting up WireGuard Client on OpenWRT
Connect to the router via SSH protocol:
ssh root@192.168.1.1Install WireGuard:
opkg update
opkg install wireguard
Prepare the configuration (copy the code below into a file, replace the indicated values with your own, and run it in the terminal).
If you're using MyVPN, you only need to change the following in the configuration WG_SERV — server IP, WG_KEY — private key from the wireguard configuration file and WG_PUB — public key.
WG_IF="wg0"
WG_SERV="100.0.0.0" # server IP address
WG_PORT="51820" # wireguard port
WG_ADDR="10.8.0.2/32" # wireguard address range

WG_KEY="xxxxx" # private key
WG_PUB="xxxxx" # public key

# Configure firewall
uci rename firewall.@zone[0]="lan"
uci rename firewall.@zone[1]="wan"
uci rename firewall.@forwarding[0]="lan_wan"
uci del_list firewall.wan.network="${WG_IF}"
uci add_list firewall.wan.network="${WG_IF}"
uci commit firewall
/etc/init.d/firewall restart

# Configure network
uci -q delete network.${WG_IF}
uci set network.${WG_IF}="interface"
uci set network.${WG_IF}.proto="wireguard"
uci set network.${WG_IF}.private_key="${WG_KEY}"

uci add_list network.${WG_IF}.addresses="${WG_ADDR}"

# Add VPN peers
uci -q delete network.wgserver
uci set network.wgserver="wireguard_${WG_IF}"
uci set network.wgserver.public_key="${WG_PUB}"
uci set network.wgserver.preshared_key=""
uci set network.wgserver.endpoint_host="${WG_SERV}"
uci set network.wgserver.endpoint_port="${WG_PORT}"
uci set network.wgserver.route_allowed_ips="1"
uci set network.wgserver.persistent_keepalive="25"
uci add_list network.wgserver.allowed_ips="0.0.0.0/1"
uci add_list network.wgserver.allowed_ips="128.0.0.0/1"
uci add_list network.wgserver.allowed_ips="::/0"
uci commit network
/etc/init.d/network restart
The WireGuard setup is now complete! All traffic on all connected devices is secured by the VPN connection.
Links
(additional instructions for configuring L2TP, PPTP on standard Mikrotik firmware are available)
Source: habr.com
