

Hello, Habr! We are already about the LEGO MINDSTORMS Education EV3 platform. The main objectives of this platform are hands-on learning, developing STEAM skills, and fostering engineering thinking. It allows for laboratory work to study mechanics and dynamics. Laboratory stands made of LEGO bricks and utilities for data registration and processing make experiments even more interesting and visual, helping children better understand physics. For instance, students can collect data on melting temperatures and, using an app, organize and present it in the form of a graph. But this is just the beginning: today we will discuss how to supplement this kit with the MicroPython programming environment and use it for robotics education.
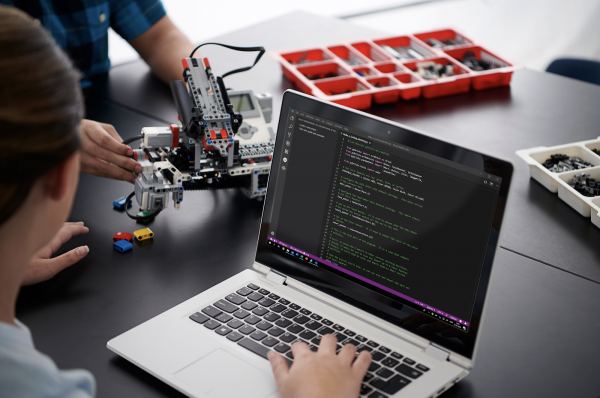
Learning Programming with EV3
Modern students want to see vibrant results. Yes, they get bored if the program outputs numbers to the console, and they want to view colorful graphs, diagrams, and create real robots that move and execute commands. Regular code also seems too complex for children, so it's better to start learning with something simpler.
The basic programming environment of EV3 is built on the graphical language LabVIEW and allows you to set algorithms for the robot visually: commands are represented as blocks that can be dragged and connected.
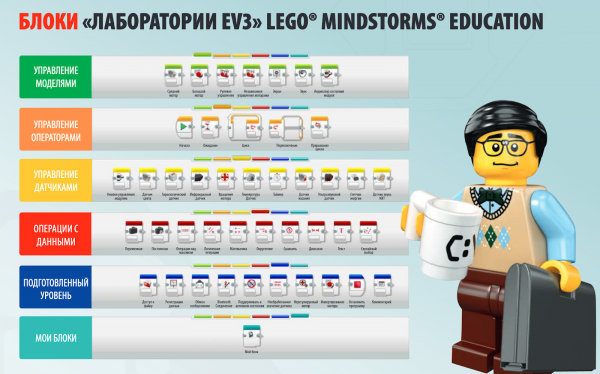
This method works well when demonstrating how algorithms are built, but it is not suitable for programs with many blocks. As scenarios become more complex, it is necessary to switch to programming using code, but children find this step challenging.
Here are a few tricks, one of which is to show that code performs the same tasks as blocks. In the EV3 environment, this can be done through integration with MicroPython: children create the same program in the basic programming environment using blocks and in Python in Microsoft Visual Studio Code. They see that both methods work the same way, but using code makes solving complex tasks more convenient.
Moving to MicroPython
The EV3 environment is built on an ARM9 processor, and developers have intentionally left the architecture open. This decision allowed alternative firmware to be implemented, one of which is an image for working with MicroPython. It enables the use of Python for programming the EV3, making the set even closer to real-life tasks.
To get started, you need to download onto any microSD card, insert it into the EV3 microcomputer, and turn it on. Then, you need to install for Visual Studio. And you can start working.
Programming the first robot with MycroPython
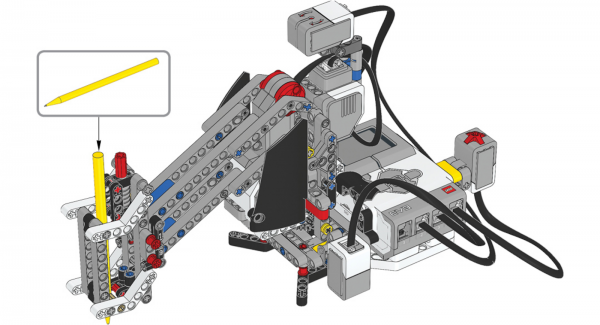
On our there are several lessons for mastering the basic concepts of robotics. Models based on the EV3 introduce children to the fundamentals used in autonomous vehicles, factory assembly robots, and CNC machines.
We will take as an example a drafting machine that can be taught to draw patterns and geometric figures. This case is a simplified version of adult welding or milling robots and demonstrates how the EV3 can be used alongside MicroPython for teaching students. Additionally, the drafting machine can mark holes in a printed circuit board for dad, but that's another level that requires mathematical calculations.
For our work, we will need:
- a basic LEGO MINDSTORMS Education EV3 set;
- a large sheet of graph paper;
- colored markers.
The assembly of the robot can be found in , and we will consider an example of programming.
First, we initialize the EV3 modules library:
#!/usr/bin/env pybricks-micropython
from pybricks import ev3brick as brick
from pybricks.ev3devices import (Motor, TouchSensor, ColorSensor, GyroSensor)
from pybricks.parameters import Port, Stop, Direction, Color, ImageFile
from pybricks.tools import wait
We configure the platform that rotates the pen holder like a motor in port B. We set the gear ratio of a two-stage gear train with 20-12-28 teeth respectively.
turntable_motor = Motor(Port.B, Direction.CLOCKWISE, [20, 12, 28])
We configure the lifting mechanism for the pen as a motor in port C:
seesaw_motor = Motor(Port.C)
We set up a gyroscope that measures the tilt angle of the pen holder in port 2:
gyro_sensor = GyroSensor(Port.S2)
We configure a color sensor in port 3. This sensor is used to detect the white paper under the drafting machine:
color_sensor = ColorSensor(Port.S3)
We configure a touch sensor in port 4. The robot starts drawing when the sensor is pressed:
touch_sensor = TouchSensor(Port.S4)
We define functions that raise and lower the pen:
def pen_holder_raise():
  seesaw_motor.run_target(50, 25, Stop.HOLD)
  wait(1000)

def pen_holder_lower():
  seesaw_motor.run_target(50, 0, Stop.HOLD)
  wait(1000)
Defining a function to turn the pen holder to a specified angle or until a certain angle is reached:
def pen_holder_turn_to(target_angle):
  if target_angle > gyro_sensor.angle():
If the target angle is greater than the current angle of the gyro sensor, continue moving clockwise with a positive speed:
    turntable_motor.run(70)

while gyro_sensor.angle() < target_angle:

pass
  elif target_angle < gyro_sensor.angle():
If the target angle is less than the current angle of the gyro sensor, then we move counterclockwise:
    turntable_motor.run(-70)

while gyro_sensor.angle() > target_angle:

pass
Stop the rotating platform when the target angle is reached:
turntable_motor.stop(Stop.BRAKE)
Set the initial position of the pen holder to the top position:
pen_holder_raise()
Now we enter the main part of the program — an infinite loop. First, the EV3 waits for the color sensor to detect white paper or the blue starting cell and for the touch sensor to be pressed. Then it draws a pattern, returns to the starting position, and repeats everything again.
When the device is not ready, the LEDs on the controller turn red, and a "thumbs down" image is displayed on the LCD screen:
while True:
  brick.light(Color.RED)
  brick.display.image(ImageFile.THUMBS_DOWN)
Wait for the color sensor to read blue or white, set the LED color to green, display a "thumbs up" image on the LCD screen, and indicate that the device is ready for use:
  while color_sensor.color() not in (Color.BLUE, Color.WHITE):

wait(10)
  brick.light(Color.GREEN)
  brick.display.image(ImageFile.THUMBS_UP)
Wait for the touch sensor to be pressed, set the gyro sensor's angle value to 0, and start drawing:
  while not touch_sensor.pressed():

wait(10)
  gyro_sensor.reset_angle(0)
  pen_holder_turn_to(15)
  pen_holder_lower()
  pen_holder_turn_to(30)
  pen_holder_raise()
  pen_holder_turn_to(45)
  pen_holder_lower()
  pen_holder_turn_to(60)
Raise the pen holder and return it to the starting position:
  pen_holder_raise()
  pen_holder_turn_to(0)
This is the simple program we've created. Now let's run it and watch the drawing robot in action.
What do such examples provide?
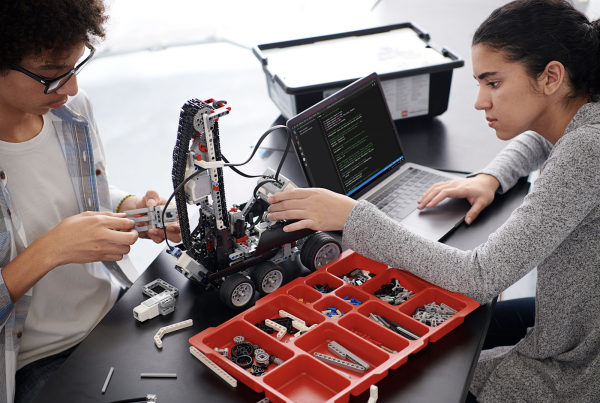
EV3 is a tool for career guidance within STEM professions and an entry point into engineering specialties. Since practical tasks can be solved with it, children gain experience in technical developments and creating industrial robots, learn to model real situations, understand programs, and analyze algorithms, and master basic programming constructs.
Support for MicroPython makes the EV3 platform suitable for teaching in high school. Students can take on the role of programmers in one of the most popular modern languages, learn about professions related to programming and engineering design. EV3 kits demonstrate that writing code is not scary, prepare for serious engineering tasks, and help make the first step toward mastering technical specialties. For those who work in schools and are involved in education, we have prepared and educational materials. They detail the skills developed by completing various tasks and how these skills align with educational standards.
Source: habr.com
