

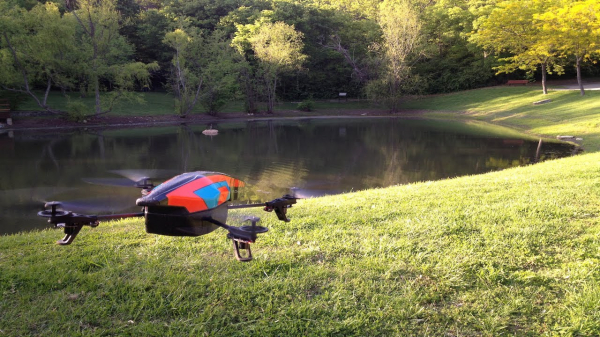
In this tutorial, we will explore creating a drone program with voice control using Node.js and the Web Speech API. The copter is a Parrot ARDrone 2.0.
Reminder: for all readers of 'Habr' - a discount of 10,000 rubles when enrolling in any Skillbox course with the promo code 'Habr'.
Skillbox recommends: Practical Course .
Introduction
Drones are amazing. I really enjoy playing with my copter, capturing photos and videos, or just having fun. But unmanned aerial vehicles (UAVs) are not only used for entertainment. They are utilized in filmmaking, studying glaciers, and by military and agricultural sectors.
In this tutorial, we will examine how to create a program that allows controlling the drone using voice commands. Yes, the copter will do what you tell it. At the end of the article, you'll find the ready-made program and a video for controlling the UAV.
Hardware
We need the following:
- Parrot ARDrone 2.0;
- Ethernet cable;
- a good microphone.
Development and management will be carried out on workstations with Windows/Mac/Ubuntu. Personally, I worked with Mac and Ubuntu 18.04.
Software
Download the latest version of Node.js from .
We also need .
Understanding the copter
Let's try to understand how the Parrot ARDrone works. This copter has four motors.
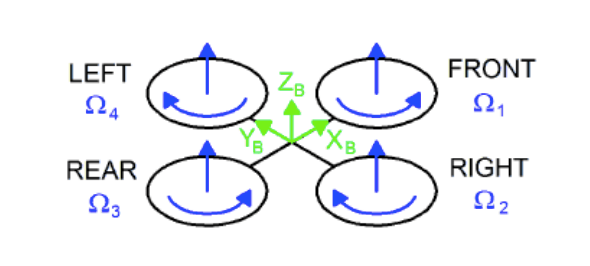
Opposing motors work in the same direction. One pair spins clockwise, the other counterclockwise. The drone moves by tilting relative to the ground, changing the motor speeds, and performing several other maneuvering movements.
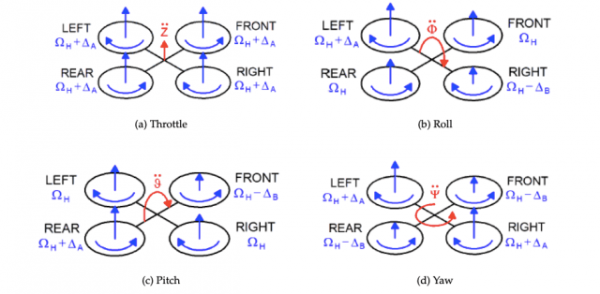
As we see in the diagram above, changing different parameters leads to a change in the copter's movement direction. For example, increasing or decreasing the speeds of the left and right rotors creates a roll. This allows the drone to fly forward or backward.
By changing the speeds and directions of the motors, we set tilt angles that allow the copter to move in other directions. For this project, we don't need to study aerodynamics; just understanding the basic principles will suffice.
How the Parrot ARDrone works
The drone acts as a Wi-Fi access point. To send and receive commands to the copter, you need to connect to this point. There are many different applications that allow you to control copters, and it looks something like this:
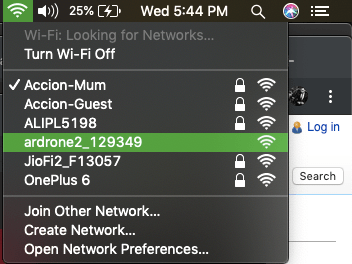
Once the drone is connected, open the terminal and type telnet 192.168.1.1 — this is the IP address of the copter. For Linux, you can use .
Application architecture
Our code will be divided into the following modules:
- user interface with a speech API for voice recognition;
- filtering commands and matching with a reference;
- sending commands to the drone;
- live video streaming.
The API works provided there is an internet connection. To ensure this, we also add an Ethernet connection.
It's time to create an application!
Let's code
First, let's create a new folder and switch to it using the terminal.
Next, we create a Node project using the commands below.
First, we install the required dependencies.
npm install
We will support the following commands:
- takeoff;
- landing;
- up — the drone ascends half a meter and hovers;
- down — descends half a meter and hovers;
- left — moves left half a meter;
- right — moves right half a meter;
- turn — turns clockwise 90 degrees;
- forward — moves forward half a meter;
- backward — moves backward half a meter;
- stop.
Here's the code that allows receiving commands, filtering them, and controlling the drone.
const express = require('express');
const bodyparser = require('body-parser');
var arDrone = require('ar-drone');
const router = express.Router();
const app = express();
const commands = ['takeoff', 'land','up','down','goleft','goright','turn','goforward','gobackward','stop'];

var drone  = arDrone.createClient();
// disable emergency
drone.disableEmergency();
// express
app.use(bodyparser.json());
app.use(express.static(__dirname + '/public'));

router.get('/',(req,res) => {
    res.sendFile('index.html');
});

router.post('/command',(req,res) => {
    console.log('command received ', req.body);
    console.log('existing commands', commands);
    let command = req.body.command.replace(/\/\/g,'');
    if(commands.indexOf(command) !== -1) {
        switch(command.toUpperCase()) {
            case "TAKEOFF":
                console.log('taking off the drone');
                drone.takeoff();
            break;
            case "LAND":
                console.log('landing the drone');
                drone.land();
            break;
            case "UP":
                console.log('taking the drone up half meter');
                drone.up(0.2);
                setTimeout(() => {
                    drone.stop();
                    clearTimeout();
                },2000);
            break;
            case "DOWN":
                console.log('taking the drone down half meter');
                drone.down(0.2);
                setTimeout(() => {
                    drone.stop();
                    clearTimeout();
                },2000);
            break;
            case "GOLEFT":
                console.log('taking the drone left 1 meter');
                drone.left(0.1);
                setTimeout(() => {
                    drone.stop();
                    clearTimeout();
                },1000);
            break;
            case "GORIGHT":
                console.log('taking the drone right 1 meter');
                drone.right(0.1);
                setTimeout(() => {
                    drone.stop();
                    clearTimeout();
                },1000);
            break;
            case "TURN":
                console.log('turning the drone');
                drone.clockwise(0.4);
                setTimeout(() => {
                    drone.stop();
                    clearTimeout();
                },2000);
            break;
            case "GOFORWARD":
                console.log('moving the drone forward by 1 meter');
                drone.front(0.1);
                setTimeout(() => {
                    drone.stop();
                    clearTimeout();
                },2000);
            break;
            case "GOBACKWARD":
                console.log('moving the drone backward 1 meter');
                drone.back(0.1);
                setTimeout(() => {
                    drone.stop();
                    clearTimeout();
                },2000);
            break;
            case "STOP":
                drone.stop();
            break;
            default:
            break;
        }
    }
    res.send('OK');
});

app.use('/',router);

app.listen(process.env.port || 3000);
Here is the HTML and JavaScript code that listens to the user and sends the command to the Node server.
<!DOCTYPE html>
    <head>
        <meta charset="utf-8">
        <meta http-equiv="X-UA-Compatible" content="IE=edge">
        <title>Voice Controlled Notes App</title>
        <meta name="description" content="">
        <meta name="viewport" content="width=device-width, initial-scale=1">
        <link rel="stylesheet" href="https://cdnjs.cloudflare.com/ajax/libs/shoelace-css/1.0.0-beta16/shoelace.css">
        <link rel="stylesheet" href="styles.css">

    </head>
    <body>
        <div class="container">

            <h1>Voice Controlled Drone</h1>
            <p class="page-description">A small app that lets you control an AR drone using voice commands.</p>

            <h3 class="no-browser-support">Sorry, your browser does not support the Web Speech API. Please try opening this demo in Google Chrome.</h3>

            <div class="app">
                <h3>Give the command</h3>
                <div class="input-single">
                    <textarea id="note-textarea" placeholder="Create a new note by typing or using voice commands." rows="6"></textarea>
                </div>
                <button id="start-record-btn" title="Start Recording">Start Recognition</button>
                <button id="pause-record-btn" title="Pause Recording">Pause Recognition</button>
                <p id="recording-instructions">Press the <strong>Start Recognition</strong> button and grant access.</p>

            </div>

        </div>

        <script src="https://cdnjs.cloudflare.com/ajax/libs/jquery/3.2.1/jquery.min.js"></script>
        <script src="script.js"></script>

    </body>
</html>
And here is the JavaScript code to handle voice commands, sending them to the Node server.
try {
 var SpeechRecognition = window.SpeechRecognition || window.webkitSpeechRecognition;
 var recognition = new SpeechRecognition();
 }
 catch(e) {
 console.error(e);
 $('.no-browser-support').show();
 $('.app').hide();
 }
// other code, please refer GitHub source
recognition.onresult = function(event) {
// event is a SpeechRecognitionEvent object.
// It holds all the lines we have captured so far.
 // We only need the current one.
 var current = event.resultIndex;
// Get a transcript of what was said.
var transcript = event.results[current][0].transcript;
// send it to the backend
$.ajax({
 type: 'POST',
 url: '\/command\/',
 data: JSON.stringify({command: transcript}),
 success: function(data) { console.log(data) },
 contentType: "application\/json",
 dataType: 'json'
 });
};
Launching the application
The program can be launched as follows (ensure that the drone is connected to Wi-Fi and the Ethernet cable is connected to the computer).
Open localhost:3000 in your browser and click Start Recognition.
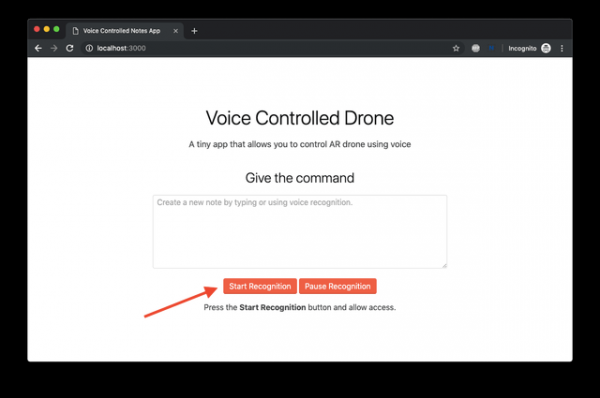
Try controlling the drone and enjoy.
Video streaming from the drone
In the project, create a new file and copy the following code into it:
const http = require("http");
const drone = require("dronestream");

const server = http.createServer(function(req, res) {

require("fs").createReadStream(__dirname + "\/public\/video.html").pipe(res);
 });

drone.listen(server);

server.listen(4000);
Here is the HTML code, place it inside the public folder.
<!doctype html>
 <html>
 <head>
 <meta http-equiv="content-type" content="text/html; charset=utf-8">
 <title>Stream as Module</title>
 <script src="/dronestream/nodecopter-client.js" type="text/javascript" charset="utf-8"></script>
 </head>
 <body>
 <h1 id="heading">Drone Video Stream</h1>
 <div id="droneStream" style="width: 640px; height: 360px"> </div>

<script type="text/javascript" charset="utf-8">

new NodecopterStream(document.getElementById("droneStream"));

</script>

</body>
</html>
Run and connect to localhost:8080 to view the video from the front camera.
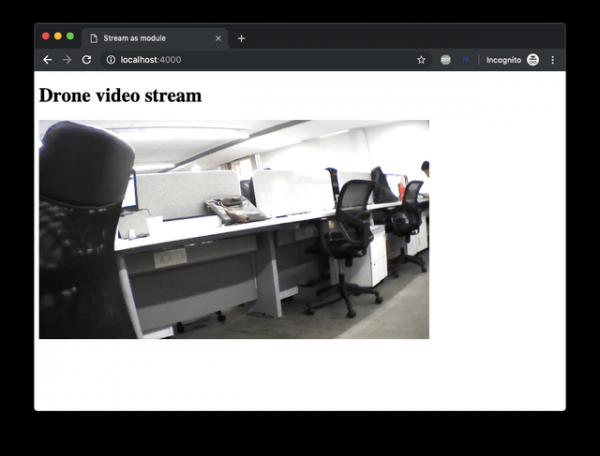
Helpful tips
- Operate this drone indoors.
- Always put the protective cover on the drone before takeoff.
- Check if the battery is charged.
- If the drone behaves oddly, hold it from below and flip it over. This action will put the drone into emergency mode, and the rotors will stop immediately.
Finished code and demonstration
Done!
Writing code and then watching the machine start to obey will be a delight for you! Now we have learned how to teach the drone to listen to voice commands. In reality, there are many more possibilities: face recognition, autonomous flights, gesture recognition, and much more.
What can you suggest to improve the program?
Skillbox recommends:
- Applied Online Course .
- Online Course .
- Practical Year Course .
Source: habr.com
