

Hi all! Today we want to present to the IT community our product - an IDE for working with API . Perhaps some of you already know about us from . However, there was no comprehensive review of the tool, so we are eliminating this annoying flaw.
Motivation
I would like to start with how, in fact, we came to such a life and decided to file our own tool for advanced work with the API. Let's start with a list of features that a product should have, which, in our opinion, can be called an “IDE for working with APIs”:
- Create and execute queries and scripts (query sequences)
- Writing various kinds of tests
- Test generation
- Working with API description, including import from such formats as Swagger, OpenAPI, WADL, etc.
- Request Mocking
- Good support for one or more scripting languages, including integration with popular libraries
- etc.
The list can be supplemented to taste. Moreover, it is important to create not only the IDE itself, but also a certain infrastructure, such as cloud synchronization, command line tools, an online monitoring service, etc. In the end, the trends of recent years dictate to us not only the powerful functionality of the application, but also its pleasant interface.
Who needs such a tool? Obviously, all those who are somehow connected with the development and testing of the API are developers and testers =). Moreover, if for the former it is often enough to execute single requests and simple scripts, then for testers this is one of the main tools, which, among other things, should include a powerful mechanism for writing tests with the ability to run them in CI.
So, following these guidelines, we began to create our product. Let's see what we got at this stage.
Quick start
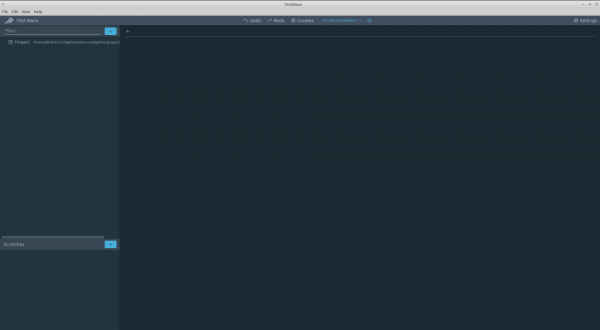
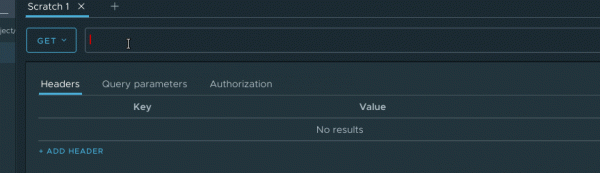
Let's start with the first acquaintance with the application. You can download it Currently, all 3 major platforms are supported - Windows, Linux, MacOS. Download, install, and launch. When you first launch it, you may see the following window:
Click on the plus sign at the top of the content area to create your first request. The query tab looks like this:
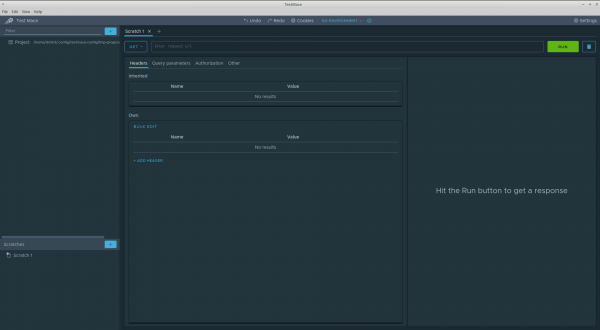
Let's dwell on it in more detail. The request interface is very similar to the interface of popular rest clients, which makes it easy to migrate from such tools. Let's make the first request to the url
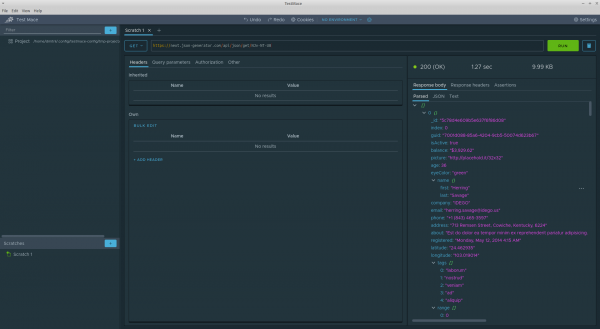
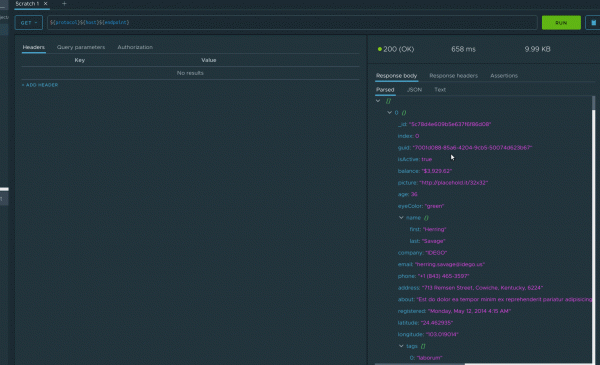
In general, at first glance, the response panel also does not throw any surprises. However, I will draw your attention to some points:
- The response body is presented in the form of a tree, which, firstly, adds information content and, secondly, allows you to add some interesting features, which are described below.
- There is an Assertions tab that displays a list of tests for a given request
As you can see, our tool can be used as a convenient rest client. However, we would not have gathered here if its capabilities were limited only to sending requests. Next, I will outline the basic concepts and functionality of TestMace.
Basic concepts and features
Node
The functionality of TestMace is divided into different types of nodes. In the example above, we have demonstrated the operation of the RequestStep node. However, the following node types are now also available in the application:
- RequestStep. This is the node with which you can create a request. It can only have one Assertion node as a child element.
- assertion. Node is used to write tests. Can only be a child node of the RequestStep node.
- Folder. Allows you to group Folder and RequestStep nodes within yourself.
- project. This is the root node, created automatically when the project is created. The rest repeats the functionality of the Folder node.
- Link. Link to a Folder or RequestStep node. Allows you to reuse queries and scripts.
- etc.
The nodes are located in scratches (panel on the bottom left, used to quickly create "one-time" requests) and in project (panel on the top left), which we will dwell on in more detail.
Project
When you start the application, you may have noticed a lone line Project in the upper left corner. This is the root of the project tree. When you run a project, a temporary project is created, the path to which depends on your operating system. At any time, you can move the project to a location convenient for you.
The main purpose of the project is the ability to save developments in the file system and further synchronize through version control systems, run scripts in CI, review changes, etc.
Variables
Variables are one of the key mechanisms of an application. Those of you who work with tools like TestMace may already know what I'm talking about. So, variables are a way to store common data and communication between nodes. An analogue, for example, are environment variables in Postman or Insomnia. However, we went further and developed the theme. In TestMace, variables can be set at the node level. Any. There is also a mechanism for inheriting variables from ancestors and overlapping variables in descendants. In addition, there are a number of built-in variables, the names of built-in variables begin with $. Here are some of them:
$prevStep— reference to the variables of the previous node$nextStep- reference to the variables of the next node$parent- the same, but only for the ancestor$response- response from the server$env- current environment variables$dynamicVar- dynamic variables created during script or query execution
$env - these are essentially ordinary variables of the Project node level, however, the set of environment variables varies depending on the selected environment.
The variable is accessed via ${variable_name}
The value of a variable can be another variable, or even an entire expression. For example, the url variable could be an expression like
http://${host}:${port}/${endpoint}.
Separately, it is worth noting the possibility of assigning variables during script execution. For example, it often becomes necessary to save the authorization data (token or the entire header) that came from the server after a successful login. TestMace allows you to store such data in dynamic variables of one of the ancestors. In order to avoid collisions with already existing "static" variables, dynamic variables are placed in a separate object $dynamicVar.
Scenarios
Using all of the above features, you can execute entire query scripts. For example, creating an entity -> requesting an entity -> deleting an entity. In this case, for example, you can use the Folder node to group multiple RequestStep nodes.
Expression completion and highlighting
For convenient work with variables (and not only), auto-completion is necessary. And of course, highlighting the value of the expression, so that it is easier and more convenient to clarify what this or that variable is equal to. Here is just the case when it is better to see once than hear a hundred times:
It is worth noting that autocompletion is implemented not only for variables, but also, for example, for headers, values of certain headers (for example, autocompletion for the Content-Type header), protocols, and much more. The list is constantly updated with the growth of the application.
undo/redo
Undo/redo changes is a very convenient thing, but for some reason it is not implemented everywhere (and API tools are no exception). But we are not one of those!) Undo/redo is implemented within the framework of the entire project, which allows us to undo not only editing a certain node, but also its creation, deletion, movement, etc. The most critical operations require confirmation.
Creating Tests
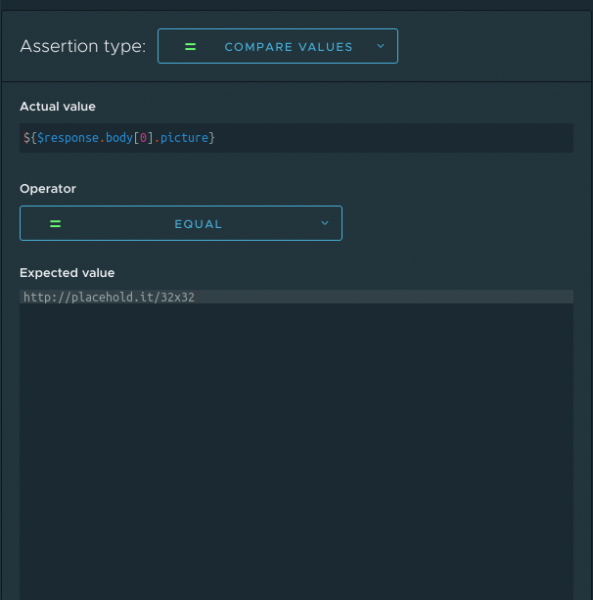
The Assertion node is responsible for creating tests. One of the main features is the ability to create tests without programming, using built-in editors.
Assertion node consists of a set of assertions (statements). Each assertion has its own type, at the moment there are several types of assertions
Compare values - just compares 2 values. There are several comparison operators equal to, not equal to, greater than, greater than or equal to, less than, less than or equal to.
Contains value - checks if a substring is in a string.
XPath - checks that the selector in XML contains a certain value.
JavaScript assertion is an arbitrary javascript script that returns true on success and false on failure.
I note that only the last one requires programming skills from the user, the remaining 3 assertions are created using a graphical interface. For example, here is how the dialog for creating a compare values assertion looks like:
The icing on the cake is the rapid creation of assertions from the response, just take a look at this!
However, such assertions have obvious limitations where you can use javascript assertions. And here TestMace also provides a comfortable environment with auto-completion, syntax highlighting, and even a static analyzer.
API Description
TestMace allows not only to use the API, but also to document it. At the same time, the description itself also has a hierarchical structure and organically fits into the rest of the project. In addition, at the moment it is possible to import API descriptions from Swagger 2.0 / OpenAPI 3.0 formats. The description itself is not just dead weight, but is tightly integrated with the rest of the project, in particular, auto-completion of urls, HTTP headers, query parameters, and more is available, and in the future we plan to add tests for matching the response to the API description.
Node Sharing
Case: you would like to share a problem request or even a whole script with a colleague or just attach it to a bug. TestMace also covers this case: the application allows you to serialize any node and even a subtree into a url. Copy-paste and you have already easily transferred the request to another machine or project.
Human readable project storage format
At the moment, each node is stored in a separate file with the yml extension (as in the case of the Assertion node), or in a folder with the name of the node and the index.yml file in it.
For example, here is how the file with the request that we made in the review above looks like:
index.yml
children: []
variables: {}
type: RequestStep
assignVariables: []
requestData:
  request:
    method: GET
    url: 'https://next.json-generator.com/api/json/get/NJv-NT-U8'
  headers: []
  disabledInheritedHeaders: []
  params: []
  body:
    type: Json
    jsonBody: ''
    xmlBody: ''
    textBody: ''
    formData: []
    file: ''
    formURLEncoded: []
  strictSSL: Inherit
authData:
  type: inherit
name: Scratch 1
As you can see, everything is very clear. If desired, this format is quite comfortable to edit manually.
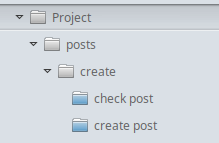
The hierarchy of folders in the file system completely repeats the hierarchy of nodes in the project. For example, a script like:
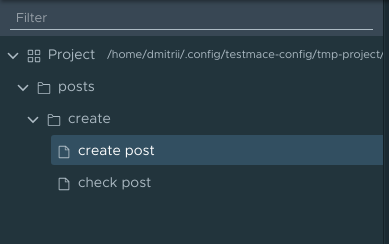
Maps in the file system to the following structure (only the folder hierarchy is shown, but the point is clear)
This makes the project review process easier.
Import from Postman
After reading all of the above, some users will want to try (right?) a new product or (what the hell is not joking!) to fully use in their project. However, the migration can be stopped by a large number of developments in the same Postman. For such cases, TestMace supports importing collections from Postman. At the moment, import without tests is supported, but in the future we do not exclude their support.
Plans
I hope that many of those who have read up to this point liked our product. However, that's not all! Work on the product is in full swing and here are some features that we plan to add soon.
Cloud sync
One of the most requested features. At the moment, we suggest using version control systems as synchronization, for which we make the format more friendly for this type of storage. However, this workflow is not suitable for everyone, so it is planned to add the synchronization mechanism familiar to many through our servers.
CLI
As mentioned above, IDE-level products are not complete without all sorts of integrations with existing applications or workflow. CLI is just the same necessary for integrating tests written in TestMace into the continuous integration process. Work on the CLI is in full swing, in early versions there will be a project launch with a simple console report. In the future, we plan to add report output in JUnit format.
Plugin system
Despite the power of our tool, the set of cases that need to be solved is limitless. In the end, there are tasks that are specific to a particular project. That is why in the future we plan to add an SDK for plugin development and each developer will be able to add functionality to their liking.
Expansion of the range of node types
This set of nodes does not cover all cases required by the user. Nodes to be added:
- Script node - converts and places data using js and the corresponding API. Using this type of node, you can do things like pre-request and post-request scripts in Postman.
- GraphQL node - graphql support
- Custom assertion node - will allow you to expand the set of existing assertions in the project
Naturally, this is not the final list, it will be constantly updated due to, including, your feedback.
FAQ
How are you different from Postman?
- The concept of nodes, which allows you to almost infinitely scale the functionality of the project
- Human-readable project format with saving it in the file system, which simplifies work using version control systems
- Ability to create tests without programming and more advanced js support in the test editor (auto-completion, static analyzer)
- Advanced auto-completion and highlighting the current value of variables
Is it an open source product?
No, at the moment the sources are closed, but in the future we are considering the possibility of opening the sources
What are you living off of?
Along with the free version, we plan to release a paid version of the product. It will primarily include things that require a server side, such as synchronization.
Conclusion
Our project is moving by leaps and bounds towards a stable release. However, the product can already be used, and the positive feedback from our early users confirms this. We actively collect feedback, because without close cooperation with the community it is impossible to build a good tool. You can find us here:
We look forward to your wishes and suggestions!
Source: habr.com
