


Today, using available materials, we will assemble in Telegram bot using (or Yandex functions — for brevity) and (or Object Storage — for clarity). The code will be in Node.js. However, there is one delicate circumstance — an organization called, let's say, Roskomtsenzur (censorship is prohibited by Article 29 of the Constitution of the Russian Federation), does not allow internet providers in Russia to send requests to Telegram API at the address: https://api.telegram.org/. Well, we won't — if it's not possible, it's not possible. After all, in our suitcase we have what's called webhooks — with their help, we don’t make requests to a specific address, but simply send our request as a response to any request made to us. In other words, as they say in Odessa, we answer a question with a question. Therefore, Telegram API it will not appear in our code.
DisclaimerThe names of any government organizations mentioned in this article are fictional, and any potential coincidences with the names of real organizations are coincidental.
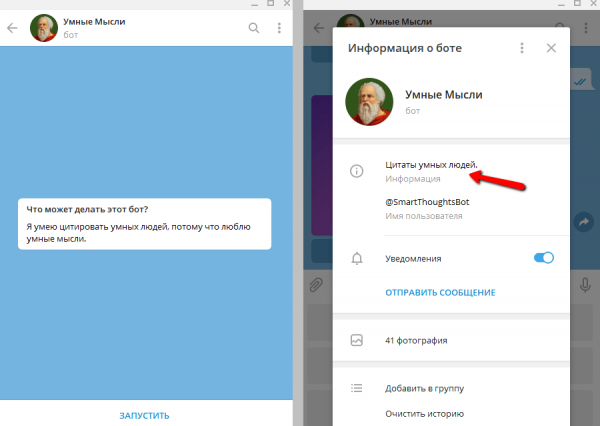
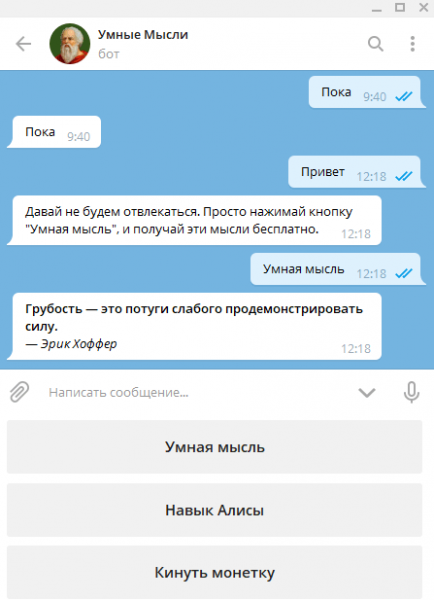
So, we will create a bot that supplies us with smart thoughts. Just like the one in the picture:
You can try it out — here’s the name: @SmartThoughtsBot. Did you notice the button ‘Alice's Skill’? Это потому, что бот является своеобразным «компаньоном» для одноименного of Alice's skill, i.e., it performs the same functions as Alice's skill and, possibly, they will be able to coexist peacefully by promoting each other. How to create Smart Thoughts Skill is described in the article . Now (after making some changes post-publication of the aforementioned article), this skill will look something like this on your smartphone:
Creating a bot
I hope this tutorial will be useful to everyone, including beginner 'bot builders'. Therefore, in this section, I will describe in detail how to create bots in TelegramYandex. For those who do not need this information — feel free to skip to the next sections.
Open the app Telegram, call the father of all bots (just like people) — @BotFather — and first, give him the command /help to refresh our memory on what we can do. Right now, we will be interested in the command /newbot.
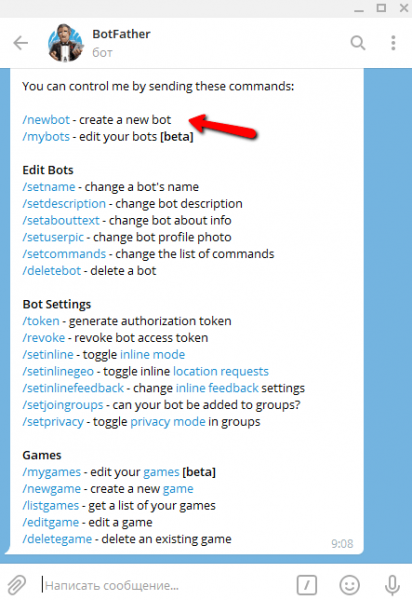
Since the bot described here is already created, for demonstration purposes I will create a different bot for a short time (then I will delete it). I will name it DemoHabrBot. Names (username) of all Telegram bots must end with the word bot, for example: MyCoolBot or my_cool_bot — this is for bots. But first, we give the bot a name (name) — and this is for people. The name can be in any language, contain spaces, and doesn't have to end with a word bot, and it doesn't even have to be unique. In this example, I named this bot Demo Habra.
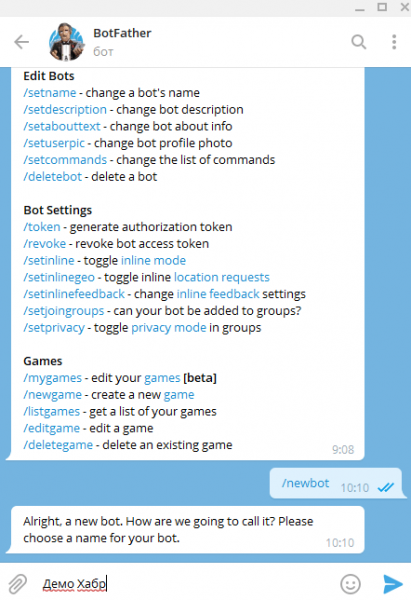
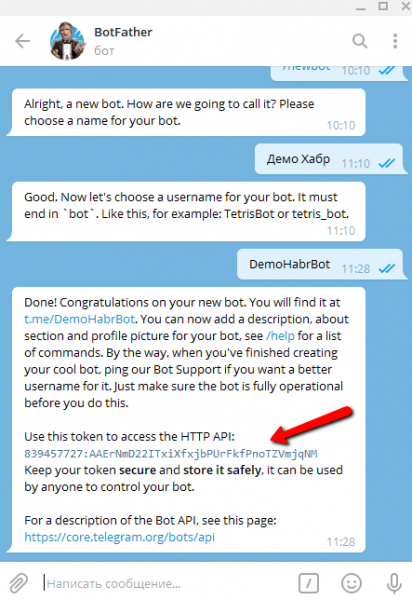
Now we choose a name for the bot (username, the one meant for bots). Let's call it DemoHabrBot. Everything related to the bot's name (name) has nothing to do with its identity — username (or it does, but in the opposite sense). After successfully creating a unique name for the bot, we need to copy and keep (in strict secrecy!) the token shown in the screenshot with the red arrow. We will use it shortly to set the webhook from Telegramthe web to our Yandex function.
And now let's give a command to the father of all bots: /mybots, and it will show us a list of all the bots we've created. For now, let's leave the freshly minted bot Demo Habra (it was created to show how to create bots, but we will still use it today for other demonstration purposes), and let's look at the bot Smart Thoughts (@SmartThoughtsBot). Click the button with its name in the list of bots.
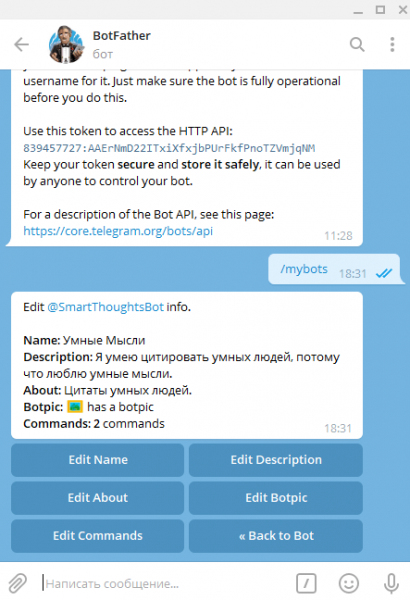
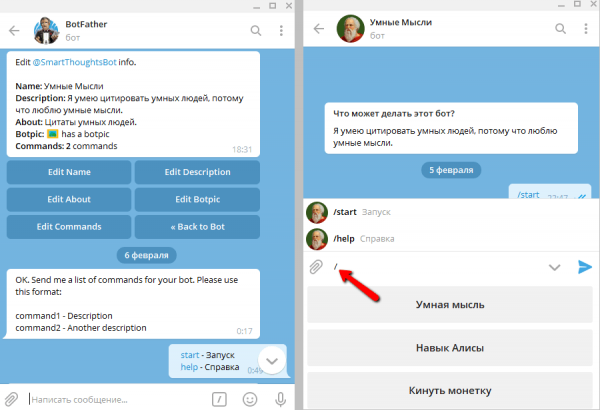
Here we can configure our bot. By clicking the button Edit… we will go to edit one option or another. For example, by clicking the button Edit Name we can change the name of the bot, say instead of Smart Thoughts, write Nonsensical Ideas. Botpic — this is the bot's avatar, and it should be at least 150 x 150 px. Description — this is a brief description that the user sees upon the first start of the bot, in response to the question: What can this bot do? About — an even shorter description that is transmitted with a link to the bot (https://t.me/SmartThoughtsBot) or when viewing information about it.
We just need to set up the commands. To do this, we click the button Edit Commands. To standardize user practice Telegram it's recommended to always use two commands: /start and /help, and if the bot needs settings — an additional command /settings. Our bot is as simple as a rock, so it doesn't need settings for now. We write down the first two commands, which we will then handle in the code. Now, if the user types a slash (the slash sign: /) in the input field, a list of commands will appear for quick selection. Just like in the picture: on the left we set commands through the father-bot; on the right, these commands are already available to users in our bot.
Yandex function
Now that our bot is created, let's proceed to Yandex.Cloud, to create a function that will run our bot's code. If you haven't worked with Yandex.Cloud , read the material , and then — . I am almost certain that these relatively small articles will provide you with a good basic understanding of the subject.
So, in the console Yandex.Cloud , in the left navigation menu, select Cloud Functions, and then click the button Create function. Assign it a name and a brief description for yourself.
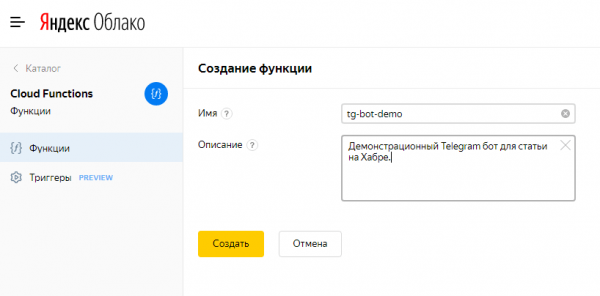
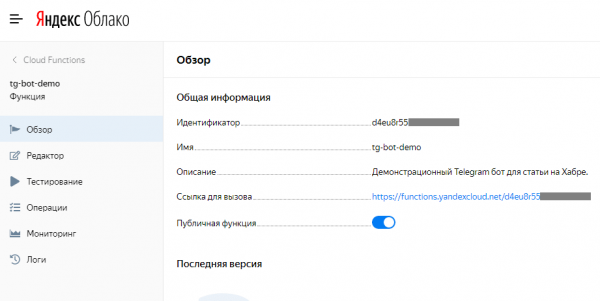
After clicking the button Create After a couple of seconds, the new function will appear in the list of all functions. Click on its name — this will take us to the Overview of our function. Here you need to turn on (On) the switch Public function, so that it becomes accessible from the external (to the Yandex.Cloud) world, and keep the values of the fields Call link and Identifier — keep it deeply secret from anyone except yourself and Telegram, so that your function cannot be called by various fraudsters.
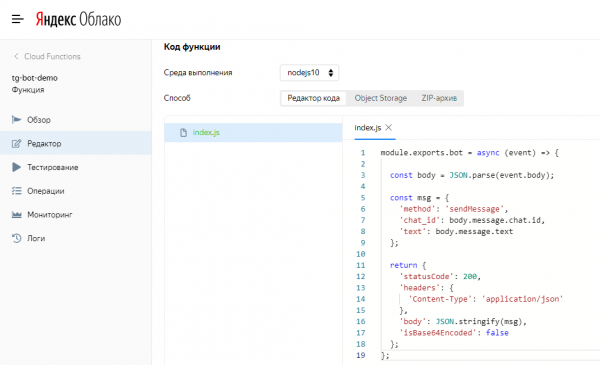
Now, using the left menu, go to Function editor . For now, let's set aside our Smart Thoughts, and create a minimal template function to check if our bot works… In fact, in this context, this function is our bot… In short, right here and now, we will create a simple bot that will 'mirror' (i.e., send back) user requests. This template can always be used when creating new Telegram bots to make sure the connection with Telegramworks properly. Click on Create file, name it index.js, and in the online Code editor , paste the following code into this file:
module.exports.bot = async (event) => {

  const body = JSON.parse(event.body);

  const msg = {
    'method': 'sendMessage',
    'chat_id': body.message.chat.id,
    'text': body.message.text
  };

  return {
    'statusCode': 200,
    'headers': {
      'Content-Type': 'application/json'
    },
    'body': JSON.stringify(msg),
    'isBase64Encoded': false
  };
};
In the Yandex.Cloud console, it should look something like this:
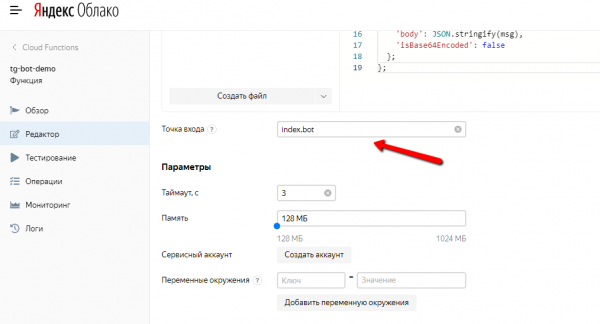
Next, a bit lower, specify Entry point — index.bot, where index this is the name of the file (index.js), and bot — the name of the function (module.exports.bot). Leave all other fields 'as is', and in the upper right corner, click the button Create version. After a few seconds, this version of the function will be created. Soon, after testing the webhook, we will create a new version — Smart Thoughts.
Object Storage
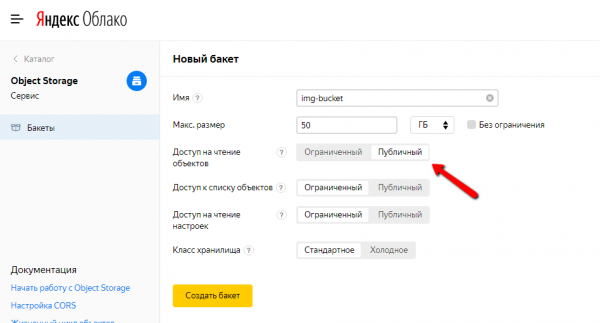
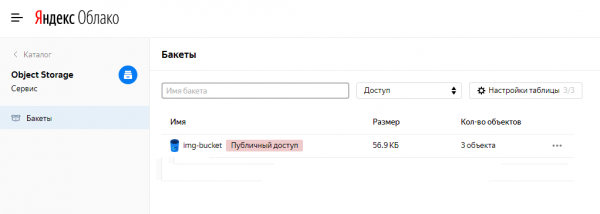
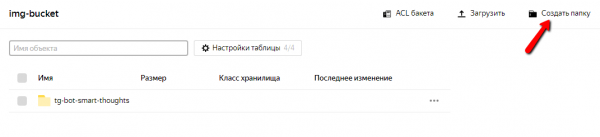
Now that we have created Yandex function, let's create a so-called bucket ( Yandex.Cloud, i.e., a bucket in Russian, definitely not a bouquet) to store image files that will be used in our botbucket. In the left navigation menu, select the item Smart Thoughts, click the button Object StorageCreate Bucket , come up with a name for it, for example,img-bucket , and, most importantly,Set Object Access to public — otherwise Telegram won't see our images. We leave all other fields unchanged. Click the button After this, the list of all buckets may look something like this (if this is your only bucket): , come up with a name for it, for example,.
Now I suggest clicking on the bucket name and creating a folder inside it to organize the storage of images for your different applications. For example, for the Telegram bot
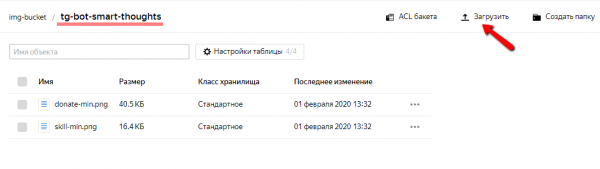
I created a folder named Smart Thoughts tg-bot-smart-thoughts (no worries, I’ll figure out this cipher). You create something too. Now you can click on the folder name, enter it, and upload files:
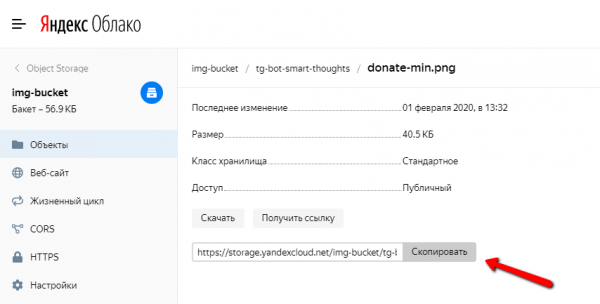
And by clicking on the file name — get it
for use in our bot, and generally — anywhere (but don’t publish this URL unnecessarily, as traffic from URL Object Storage is billed). That’s basically all about
Object Storage . Now you will know what to do when you see a prompt to upload files there.Webhook
Now we will set up the
webhook — i.e., when the bot receives an update (for example, a message from a user), a request ( request Telegram ) with the data will be sent from the server Yandex function to ourwebhook. Here’s a line you can simply paste into your browser's address bar and then refresh the page (you only need to do this once): https://api.telegram.org/bot{bot_token}/setWebHook?url={webhook_url}
Just replace {bot_token} with the token we received from the parent bot when creating our bot, and {webhook_url} — with URL our Yandex functions. Wait a minute! But isn’t it Roskomtsenzur forbidding providers in Russia to service the address https://api.telegram.org. Yes, that’s correct. But you’ll think of something. After all, you can, for example, ask your grandmother in Ukraine, Israel, or Canada — there are no 'Russian censorship' there, and only God knows how people live without it. In the end, the request-response when setting up the webhook should look like this:

Testing. It should 'mirror'.
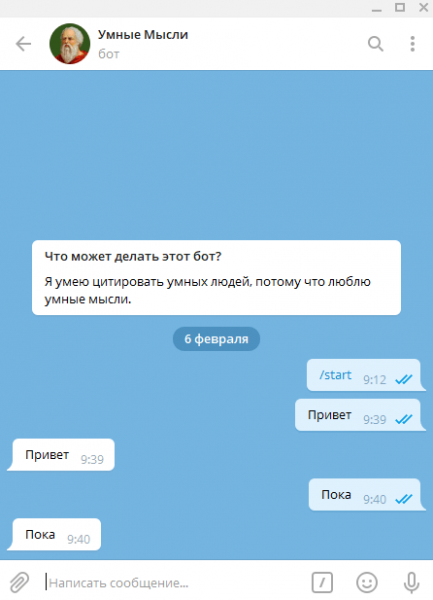
And it does. Congratulations — now Yandex function is called Telegramit's a bot!
Smart Thoughts
And now let's create Smart Thoughts. The code is open and located at . It's well-commented, and it’s just about a hundred lines. Read it as if you were an opera diva reading a libretto!
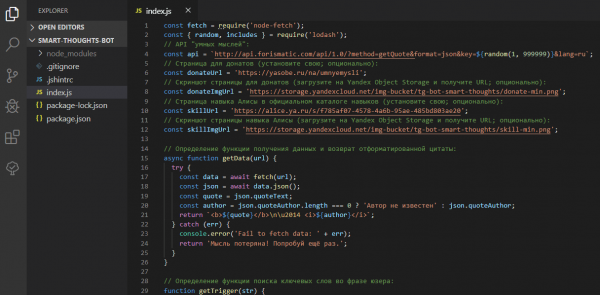
Clone the project and install the dependencies:
git clone https://github.com/stmike/tg-bot-smart-thoughts.git
cd tg-bot-smart-thoughts
npm i
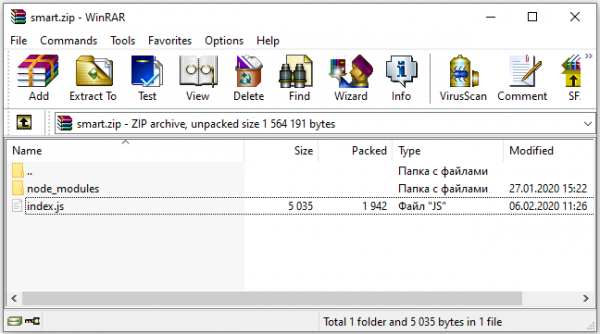
Make the necessary changes to the file index.js (optional; you can leave it unchanged). Create zip-archive, containing the file index.js and the folder node_modules inside, for example, named smart.zip.
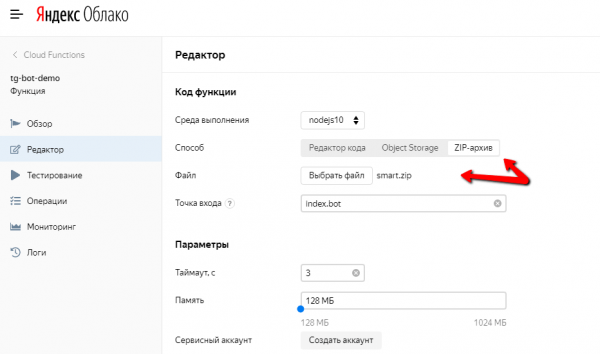
Now navigate to our Yandex functions, select the tab ZIP archive, click the button Choose file, and upload our archive smart.zip. Finally, in the upper right corner, click the button Create version.
After a few seconds, when the function updates, let's test our bot again. Now it no longer "mirrors" but delivers smart thoughts!
That's all for today. More articles are coming. If you're interested in similar topics, subscribe for notifications about new articles. You can subscribe here, or on Telegram-channel , or Twitter .
Links
Donations
Source: habr.com
