

Buongiorno a tutti! Oggi vorrei condividere un piccolo esempio di automazione del processo di creazione di richieste di uscita per i nuovi dipendenti utilizzando i prodotti Microsoft SharePoint, PowerApps, Power Automate e Teams. Nella realizzazione di questo processo non è necessario acquistare piani utente separati per PowerApps e Power Automate, basta un abbonamento Office365 E1/E3/E5. Sul sito SharePoint creeremo elenchi e colonne, PowerApps aiuterà a realizzare un modulo, mentre Power Automate fornirà le possibilità per configurare la logica dei processi aziendali. Il processo finale sarà collegato al team di MS Teams. Non perdiamo tempo e vediamo che cosa ne verrà fuori.

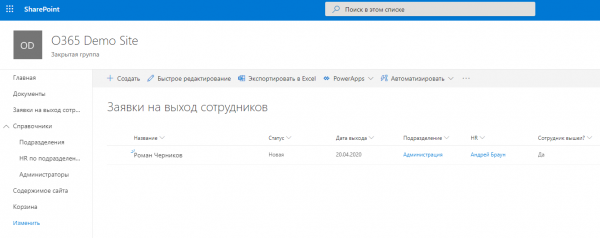
Nella prima fase creiamo elenchi e requisiti. Avremo bisogno degli elenchi:
- Richieste di uscita dei dipendenti
- Dipartimenti
- HR per dipartimenti
- Amministratori
Ogni elenco avrà un ruolo specifico in seguito e vedremo quale sarà. Creiamo i requisiti e configuriamo il menu di navigazione:
PowerApps
Ora, creiamo un modulo per l'elenco "Richieste di uscita del dipendente" utilizzando PowerApps. Alla fine sarà simile a questo:
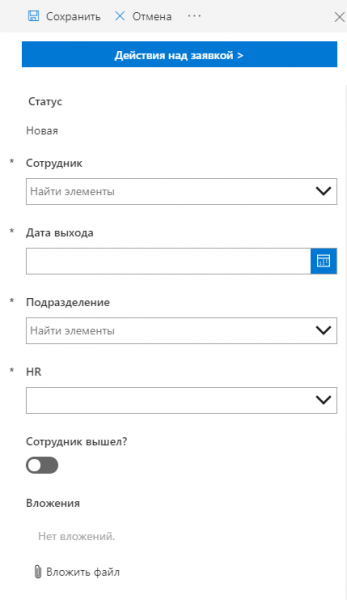
Nel campo "Dipendente" si sceglie da un elenco di utenti Office 365, la "Data di uscita" viene selezionata da un calendario, il "Dipartimento" è indicato dall'elenco dei dipartimenti, e "HR" è scelto dall'elenco "HR per dipartimenti":
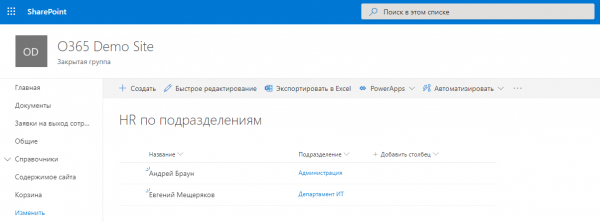
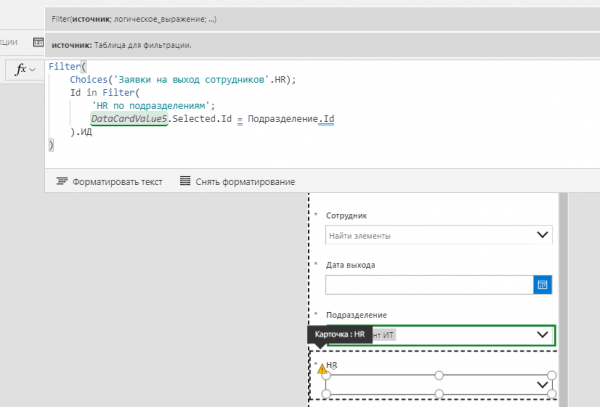
È necessario fare in modo che l'elenco degli HR disponibili per la selezione sia filtrato in base al dipartimento indicato nel modulo. Utilizzeremo una formula per filtrare i dati in PowerApps. Per la proprietà "Items" del campo "HR" scriviamo:
Inoltre, nel modulo è possibile apportare piccole impostazioni al valore predefinito per il campo Stato. Per la proprietà "Default" del campo "Stato" scriviamo:
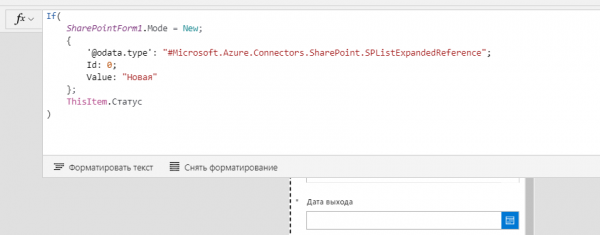
Se si apre il modulo di creazione di un elemento, il campo "Stato" verrà valorizzato con il valore "Nuovo"; altrimenti, nel campo stato del modulo verrà inserito il valore della colonna SharePoint per l'elemento corrente.
Uno dei problemi di PowerApps è la difficoltà di ottenere facilmente dati dai gruppi SharePoint. Di conseguenza, non è facile configurare la visibilità/accessibilità dei campi o degli oggetti nel modulo se si vuole basare l'accesso sull'inclusione di un utente nel gruppo SharePoint. Ma si può effettuare una manovra alternativa. Appositamente per questo, abbiamo creato in anticipo l'elenco Amministratori:
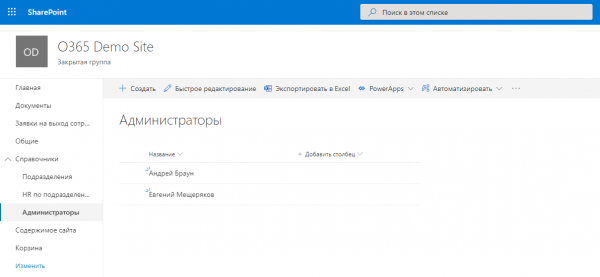
In this list, there is a field 'Employee' with the type 'User or group', displayed only on the form, and a field 'Name', where the name of the selected employee is written, displayed only in the list view. Now, let's do a little trick in PowerApps. For example, we can set the availability of any field based on the condition of the current user being in the Administrators list. We find the 'Display Mode' property of the 'Exit Date' field and write:
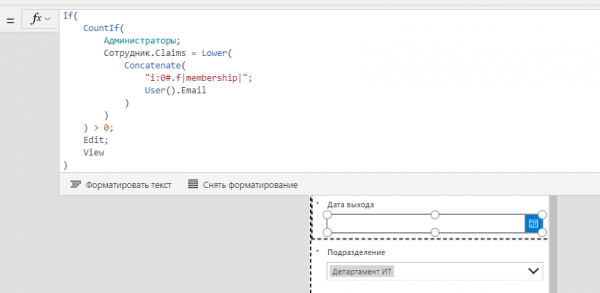
According to this formula, if there is at least one employee in the Administrators list whose login matches the current user's login, then the field will be editable; otherwise, it will be view-only. For more reliability, we convert the login to lowercase, as there can be various cases.
You may have noticed that there is a button 'Actions on the application' in the form header:
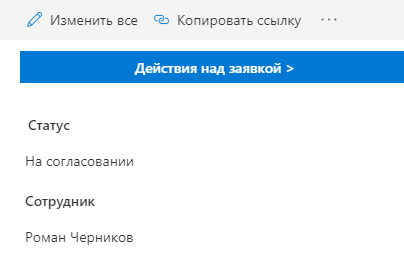
This button will navigate to another screen where, for convenience, all possible actions on the application are gathered:
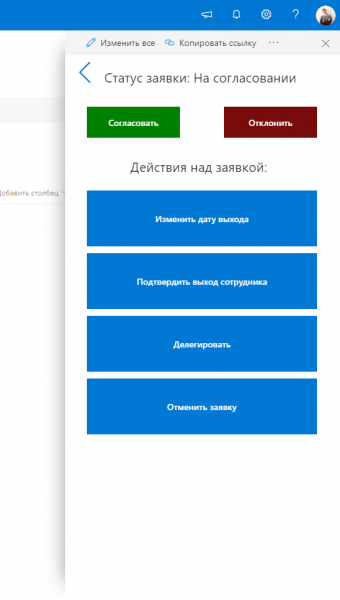
After clicking on each button, an additional action window opens; for example, if 'Cancel application' is selected, an additional window opens with the option to enter comments:
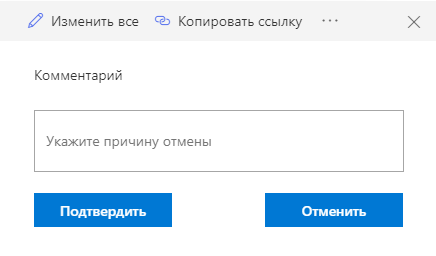
After clicking the 'Confirm' button, the application status changes, and this can be done even without starting the Power Automate flow. We'll use the 'Patch' function for the 'OnSelect' property of the button:
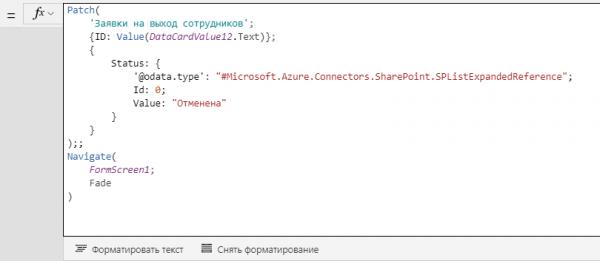
Using the Patch function, we update the application list item, filtering it by the identifier of the current item. We change the value of the 'Status' field and navigate to the main screen. The logic for the other action buttons is similar.
Now we just need to set up the approval flow. Let's create it in its simplest form.
Power Automate
Our approval flow will be triggered automatically when an application is created. During its execution, the application status will change, the head of the department will be retrieved, and an email notification will be sent about the new application to the head. To determine the head, we have the 'Departments' directory:
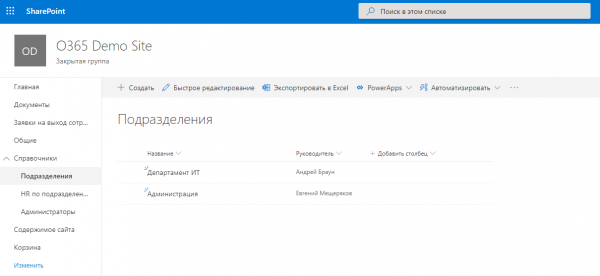
Create a Power Automate flow:
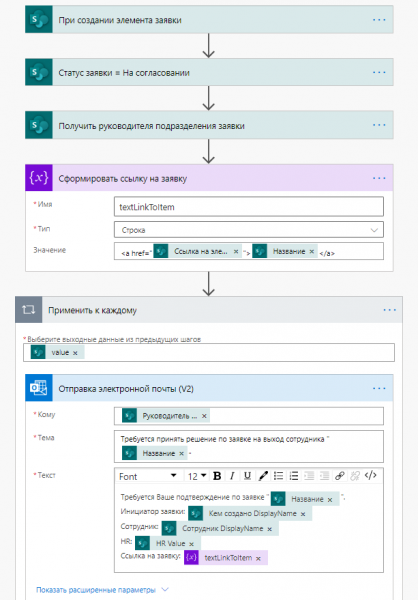
During the execution of this flow, the head of the department receives an email notification about the creation of a new application and can follow the link to make a decision by clicking the button:
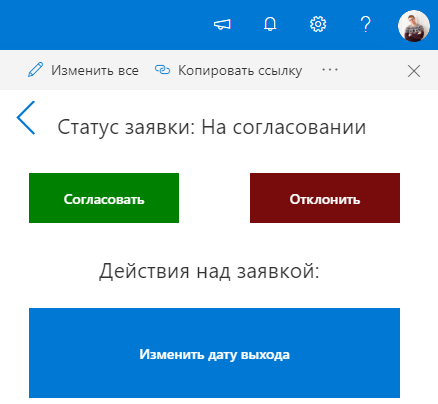
Premere il pulsante «Approvare» o «Rifiutare» avvia anche un flusso di Power Automate, che cambia lo stato della richiesta e invia una notifica via email al personale HR:
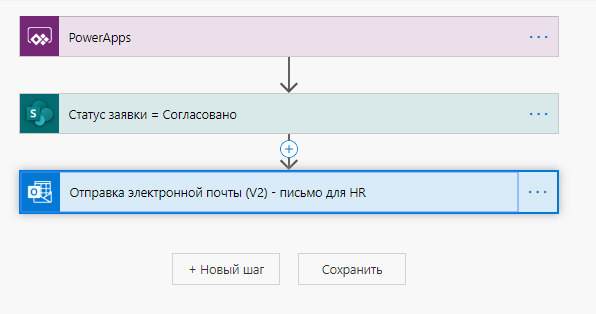
Il processo è pronto.
Teams
E l'ultima fase – organizzare la collaborazione con questo processo. A questo scopo, colleghiamo il processo al team di MS Teams:
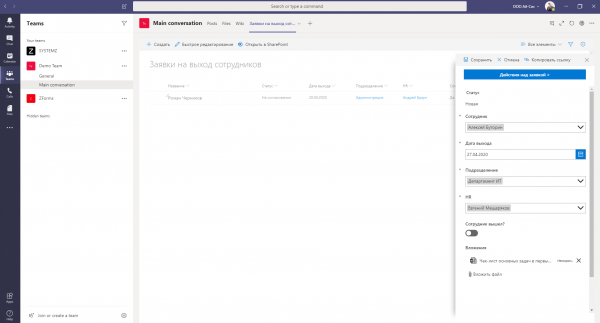
Ora, tutti i membri del team MS Teams hanno accesso al processo di integrazione dei nuovi dipendenti in una scheda separata.
Certo, nella logica del flusso è possibile prevedere un approvazione a più fasi, inoltre c'è la possibilità di utilizzare il componente Approvals per l'assegnazione di attività a Power Automate. È anche possibile configurare report e generare notifiche che verranno inviate al chatbot di Microsoft Teams. Ma parleremo di questo nei prossimi articoli. Grazie per l'attenzione e buona giornata a tutti!
Fonte: habr.com
