

Why GCP?
When I started writing Telegram bots, I faced the question of how to make the bot run constantly, quickly and for free. Options like Heroku and Pythonanywhere have too small limits if you have more than one bot. Thus, I decided to utilize GCP. The platform offers $300 for a year for free + huge discounts when using these funds (up to 94%).

How to host your bot?
Step 1. Register on GCP
Go to the website and click Get started for free.

Enter your details and card information. Money will not be charged from the card unless you manually activate a paid subscription.

Step 2. Create a virtual machine
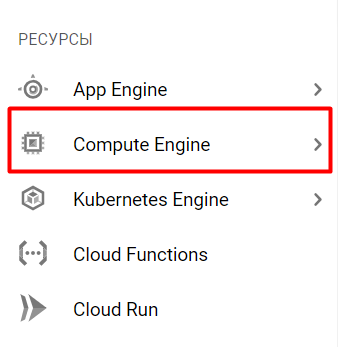
After registration, you will land on the main page of the service. You need to select the Compute Engine tab in the Resources section.
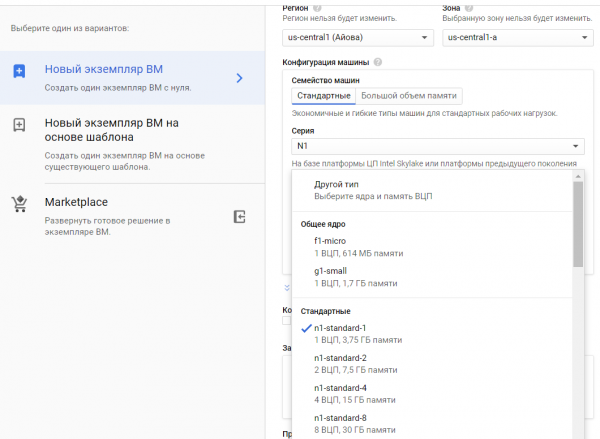
You must create a new instance.

If you are not deploying a database on makinën virtuale, you can take g1-small; otherwise, I recommend n1-standard.
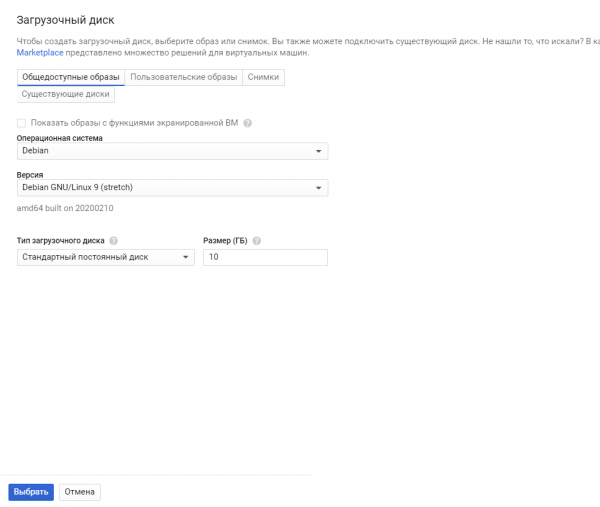
You will also need to select an OS. I chose Debian GNU/Linux 9 (stretch).
That's it, the VM is created. Its deployment usually takes from 1 to 5 minutes.
Step 3. Configure the virtual machine
You can connect via SSH from your PC or interact through the platform.
To do this, click on SSH.

A Linux terminal will open in a new window.
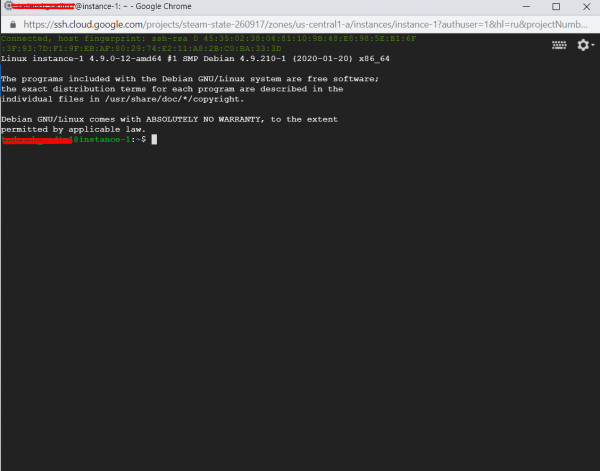
Now let's get to the configuration. First, enter the command:
sudo apt-get updateto update the information about the latest versions of packages.
Then enter:
sudo apt-get install python3-setuptools
sudo apt-get install python3-pip
You don't need to install Python itself; it's already available.
Now you need to install all the necessary libraries. There's a small nuance; all libraries need to be installed twice:
pip3 install ‘name_of_package’for usage via the python3 command, and
sudo pip3 install ‘name_of_package’ for systemd. This utility will help you run the bot and restart it if it crashes.
The simplest way to run the bot is via python3, but it will turn off if you disconnect. You can use screen, but the bot won't restart by itself. You can also use crontab with port checking, but I think this option is more complex than systemd.
Step 4. Upload the bot to the server
There are two ways to upload your bot. If you’re not familiar with Git, you can simply zip the bot into a .tar file and upload it to the server:
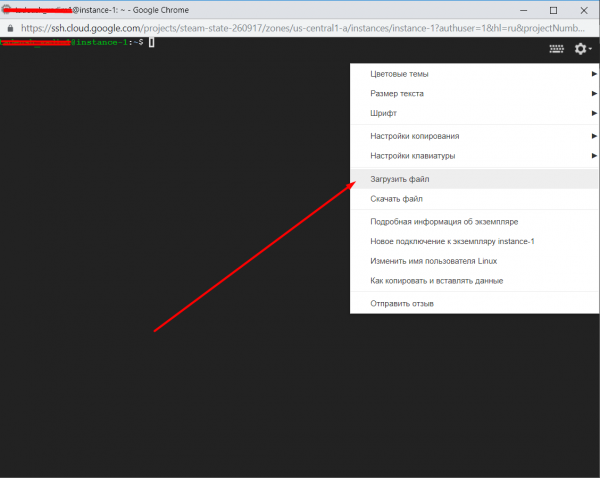
After that, we will unzip it using the command:
tar -xvf yourfile.tarTani tani bot juaj ruhet në një dosje me emrin e arkivit.
Mënyra e dytë përmes Git. Nuk mendoj se duhet të shpjegoj se si ta bëni këtë për ata që e dinë si ta përdorin.
Pas instalimit me komandën:
sudo apt install gitJu mund ta kloni atë në VM-në tuaj.
Pas kësaj kalojmë në konfigurimin e systemd. Për këtë kalojmë në direktorinë e tij:
cd /etc/systemd/systemDhe krijojmë skedarin bot.service:
sudo nano bot.serviceShkruani në dritaren që u hap ky tekst:
[Unit]
Description=Telegram bot 'Emri i botit'
After=syslog.target
After=network.target

[Service]
Type=simple
User=root
WorkingDirectory=/home/emri juaj/faqja ku ndodhet boti
ExecStart=/usr/bin/python3 /home/emri juaj/faqja ku ndodhet boti/bot.py

RestartSec=10
Restart=always

[Install]
WantedBy=multi-user.target
Mbyllni dhe ruani skedarin. Mbyllen me komandën Ctrl+X.
Pas kësaj, shkruani komandat njëra pas tjetrës:
sudo systemctl daemon-reload
sudo systemctl enable bot
sudo systemctl start bot
sudo systemctl status bot
Nëse gjithçka shkon mirë, do të shihni diçka të ngjashme:
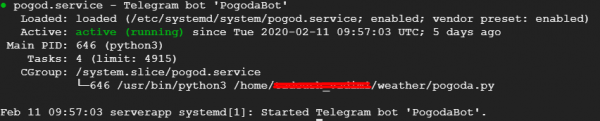
Çdo gjë, tani boti juaj punon vetë. Shpresoj që artikulli im do t'ju ndihmojë të hostoni botin tuaj.
P.S.
1. Kontroloni boti tuaj për gabime
Nisni botin tuaj dhe kontrolloni funksionimin e tij para se ta nisni përmes systemd. Për këtë, kaloni në dosjen e botit dhe niseni përmes python.
cd
python3 bot.py
2. Shtoni në skedarët me skriptat py kodimin
#!/usr/bin/env python
# -*- coding: utf-8 -*-
Shtoni në fillim të skedarit.
3. Gabimet në systemd
Nëse keni kontrolluar botin për gabime dhe ai punonte normalisht, por nuk dëshiron të nisë në systemd, mund të kontrolloni log-et dhe të kuptoni ku është gabimi duke parë skedarin:
sudo nano /var/log/syslogMund ta shkarkoni këtë skedar dhe ta shihni në kompjuterin tuaj përmes Notepad++.
4. Përditësimi i botit
Nëse dëshironi të shkruani ose të ngarkoni një version të ri të botit, jepni komandën:
sudo systemctl stop botKryeni të gjitha manovrat e nevojshme. Dhe pastaj jepni komandat e mëposhtme që ai të fillojë sërish:
sudo systemctl daemon-reload
sudo systemctl start bot
sudo systemctl status bot
Burimi: habr.com
